Automated Device Enrollment (ADE) is a feature that lets you automate the initial setup and MDM enrollment of devices that have been assigned to your Apple Business or Apple School Manager account.
The Automated Device Enrollment is not available for devices that are not assigned to your Apple Business or Apple School Manager account.
But, you can add factory reset or newly acquired modern Apple iPhone, iPad, and Mac to your Apple Business or Apple School Manager account using Apple Configurator.
30-day grace period
The configurator enrollment has a grace period of 30 days. During this time, the device user will see an option to Leave remote management meaning that the user can release the device from Apple Business or Apple School Manager, supervision, and device management. Once the period has passed, the option disappears from the device's end.
What is needed to add an iOS device to Apple Business or Apple School Manager using Apple Configurator?
- You need a Mac with Apple Configurator 2.5 or newer and a USB connection to the device.
- Make sure your device runs iOS 16 or later or iPadOS 16.1 or later.
- You should have a Device Manager user role in Apple Business or Apple School Manager.
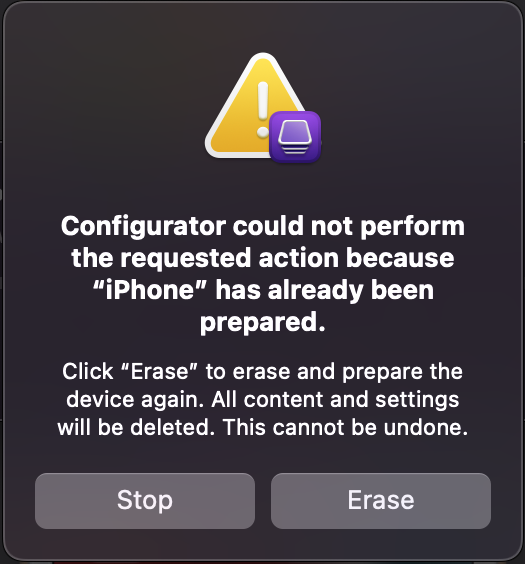
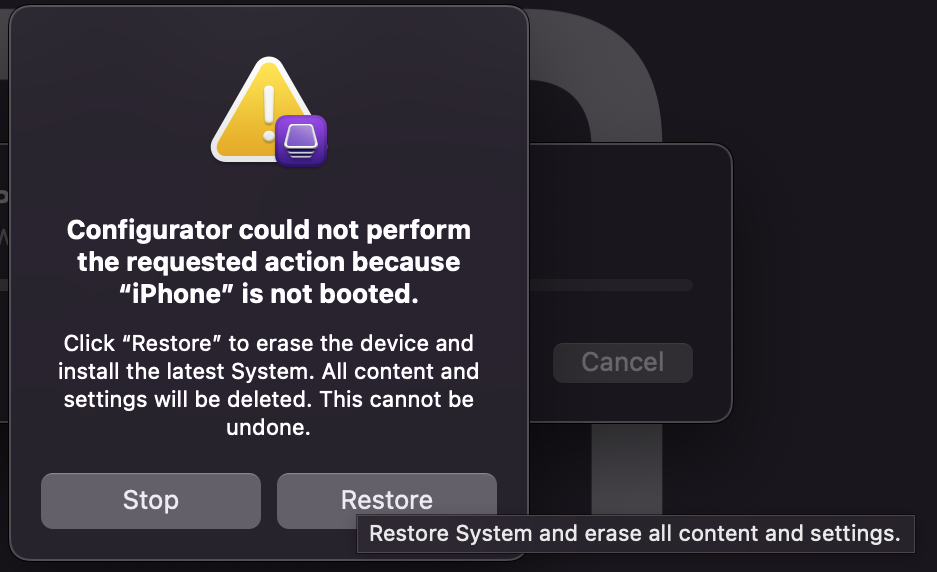
- Device reset is mandatory.
Adding Mac to Apple Business or Apple School Manager using Apple Configurator for iPhone
You can add modern Mac to Apple Business or Apple School Manager using Apple Configurator for iPhone even if the devices weren't purchased from Apple or an Apple-authorized reseller. To do this, you will need to download and install the Apple Configurator app on an iPhone running iOS 15 or later. For further instructions, please refer to Apple's documentation.
How to add iOS devices to Apple Business or Apple School Manager with Apple Configurator?
It is recommended to reset the device before starting the process. In this way, the probability of errors is smaller. You can reset the device through the device's Settings > General > Reset > Erase all content and settings.
The device gets reset during the process, if not reset earlier.
These instructions apply especially when adding a device to the Apple Business or Apple School Manager for the first time. The configurations you make will be saved for the next devices.
Create a Wi-Fi profile
Go to the Apple Configurator and prepare a Wi-Fi profile, which will be pushed to the device later. Start by choosing File > New Profile, then select Wi-Fi and configure the settings.
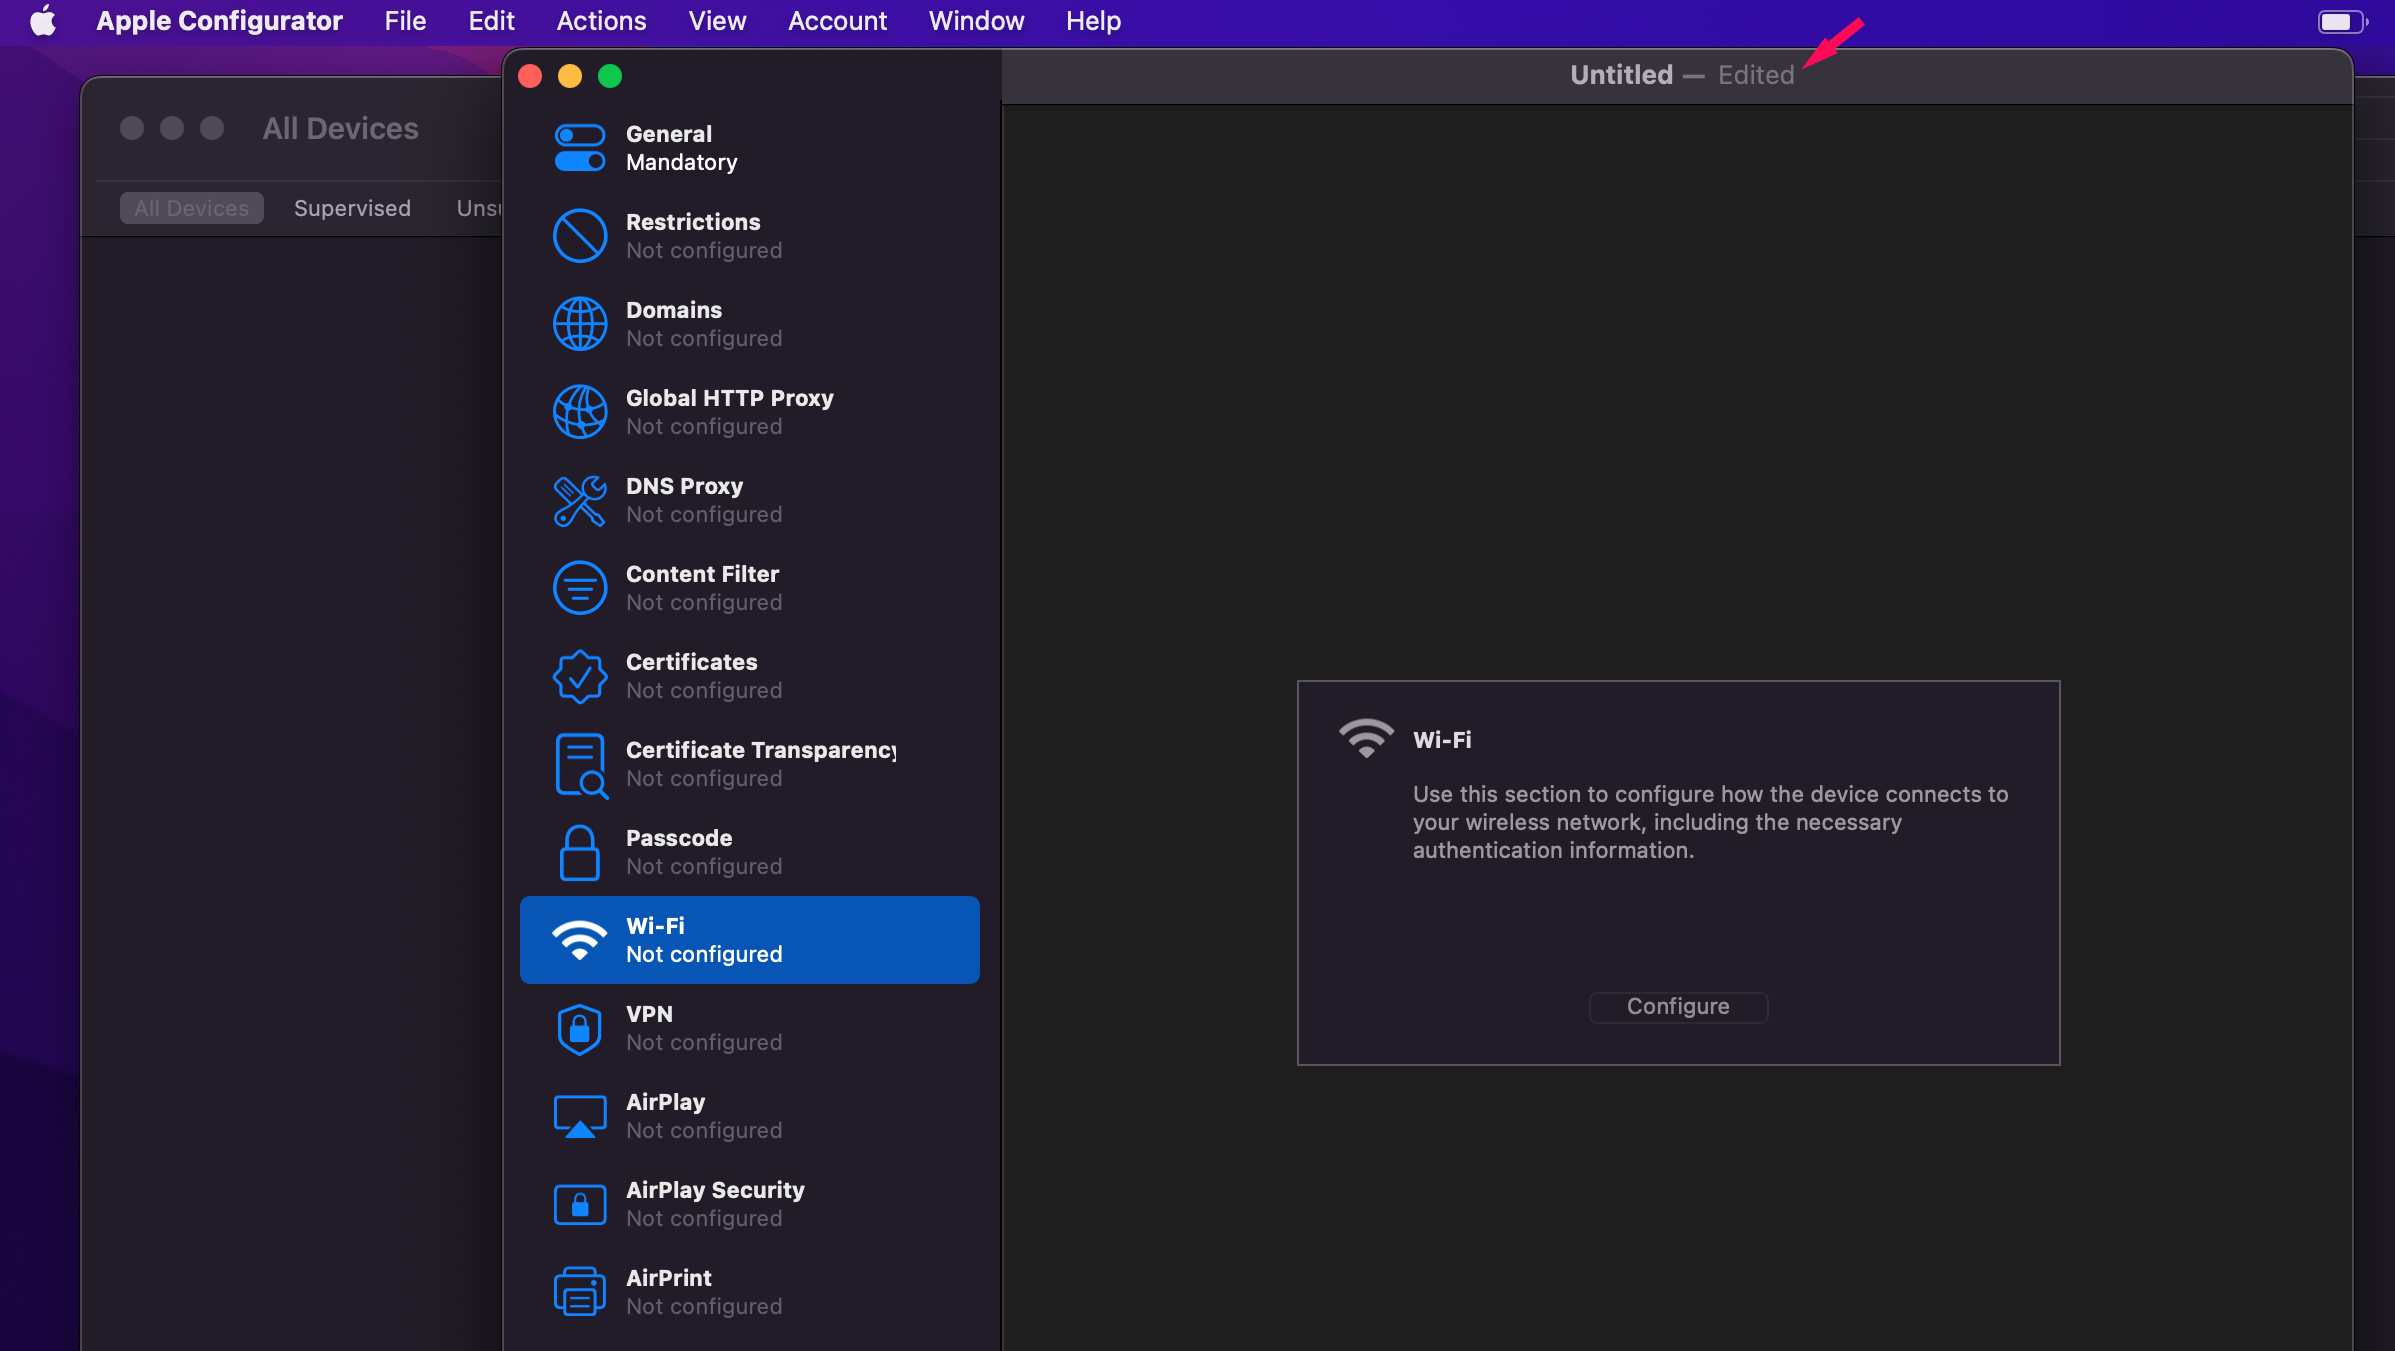
Before saving, remember also to name the profile from the heading (arrow on the previous picture).
Prepare the device
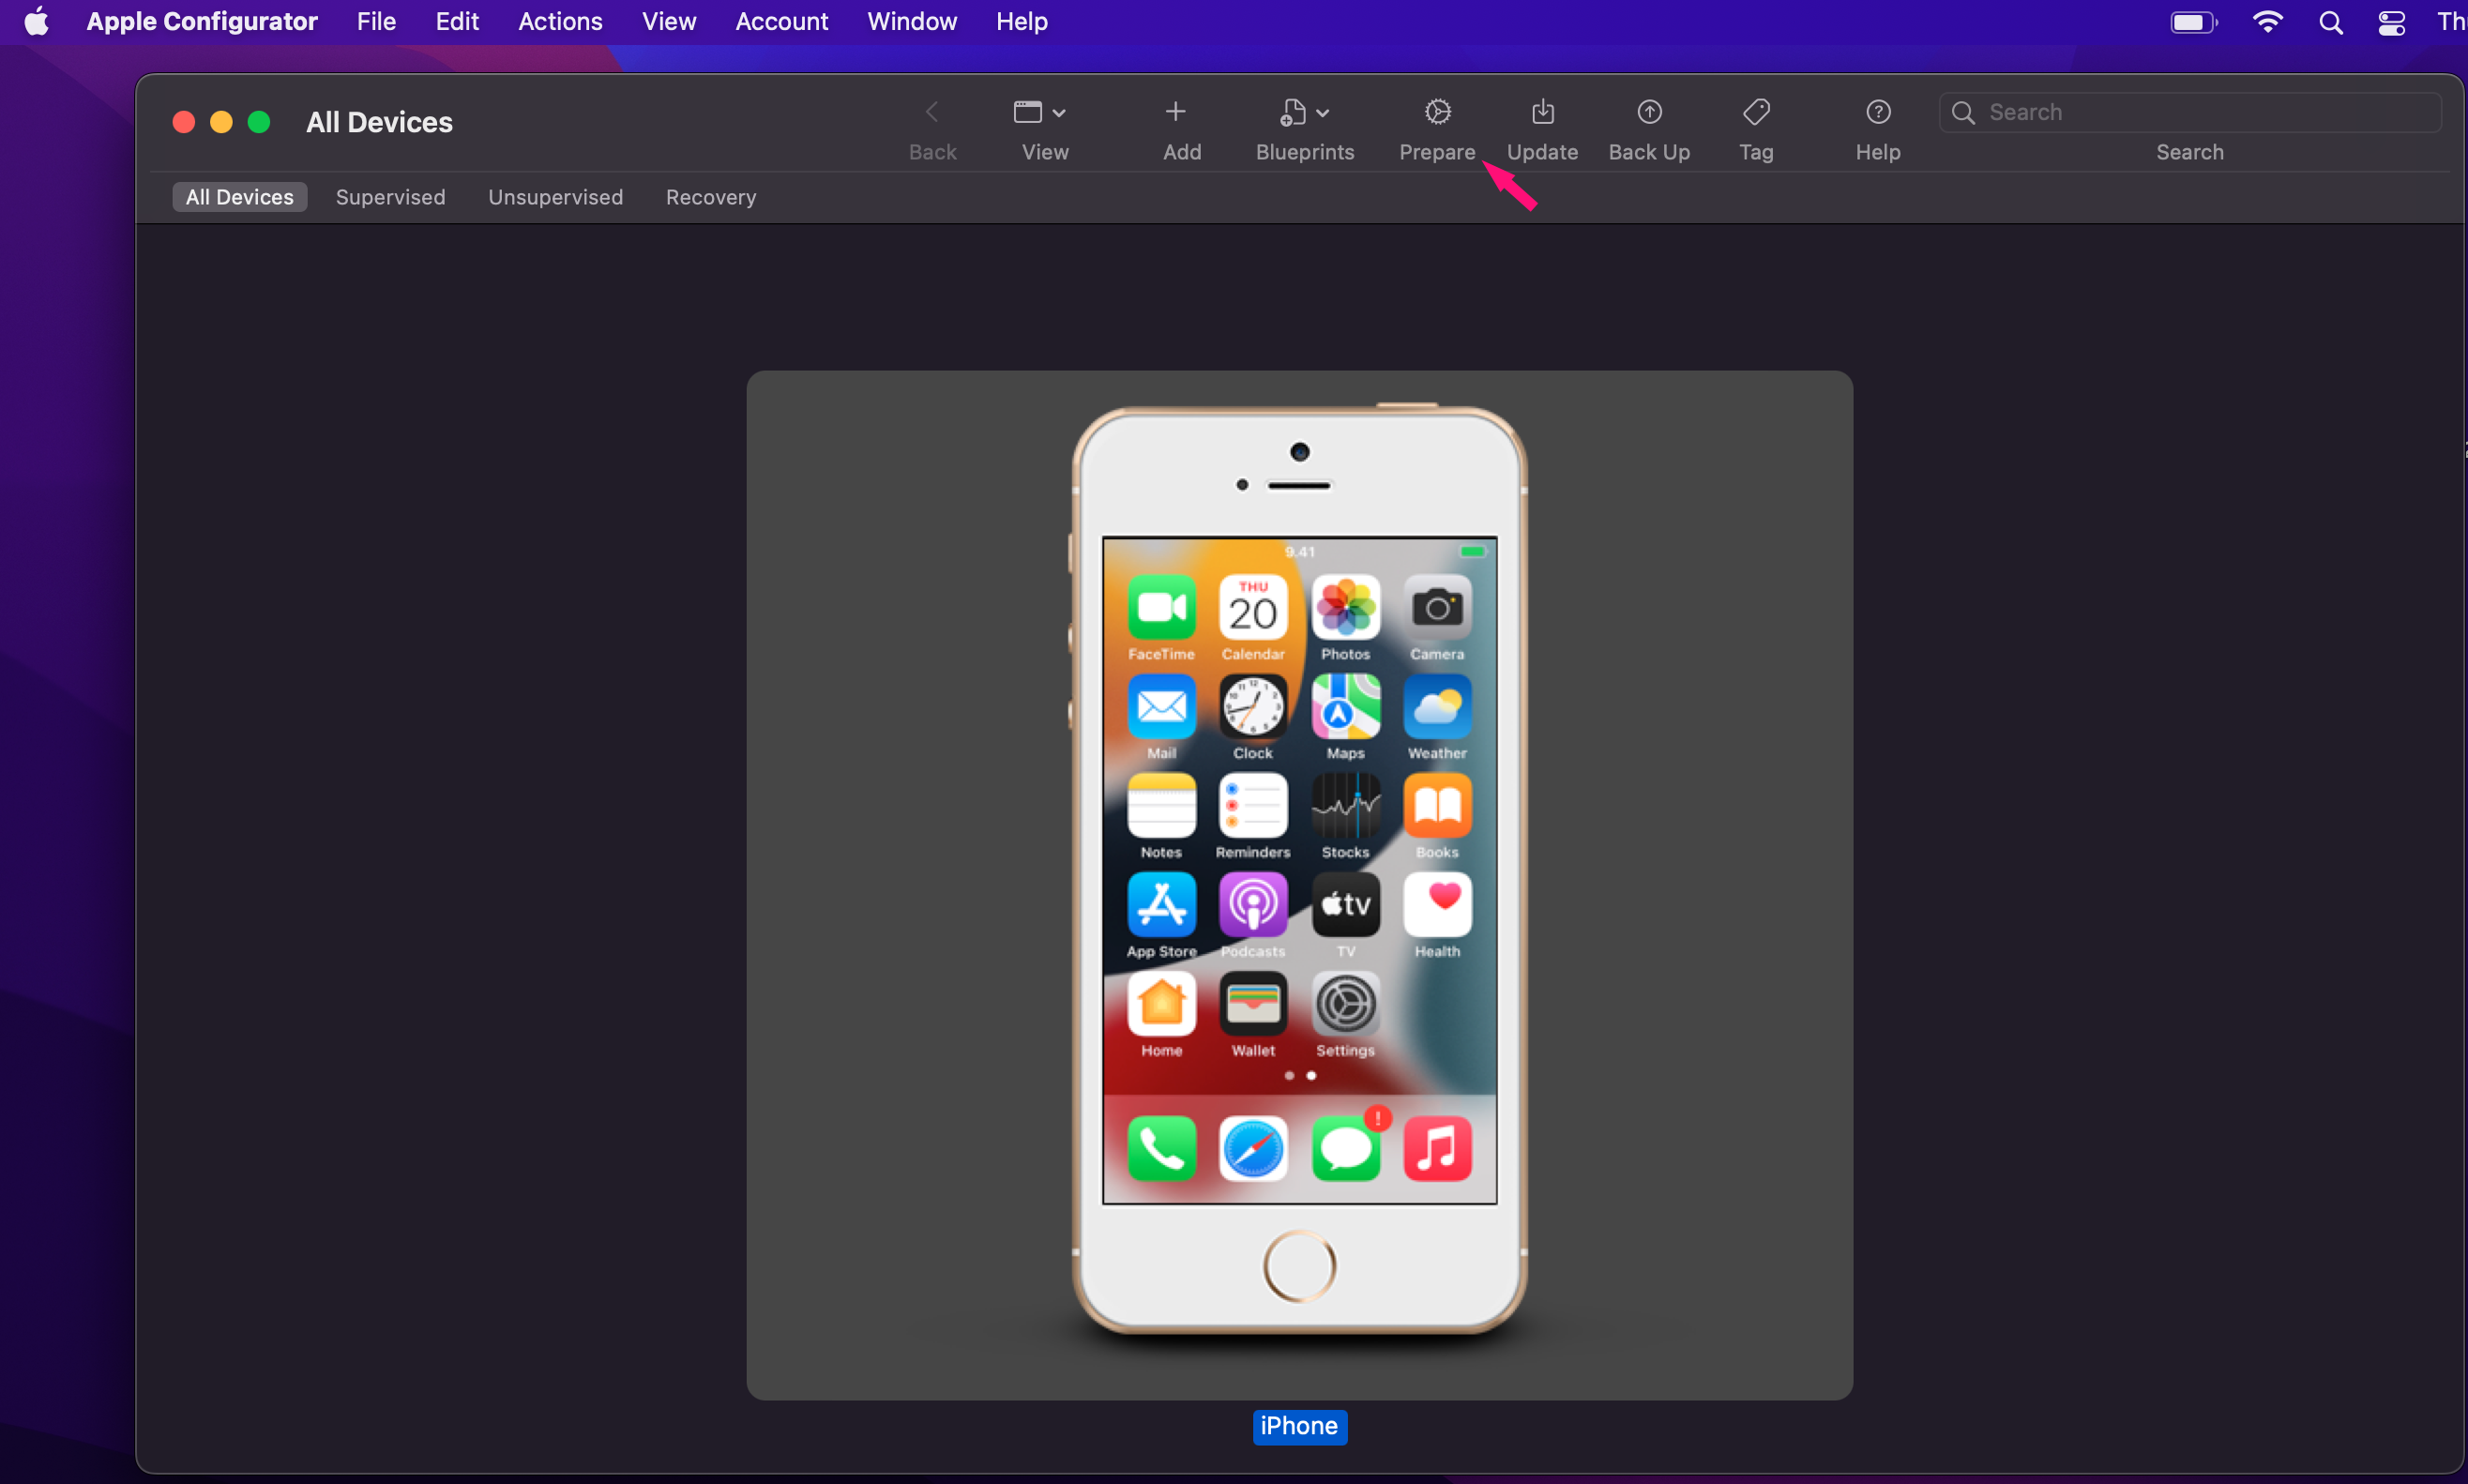
1. Connect the device to the Mac with a USB cable.
2. Start by selecting the device from All Devices and press Prepare.
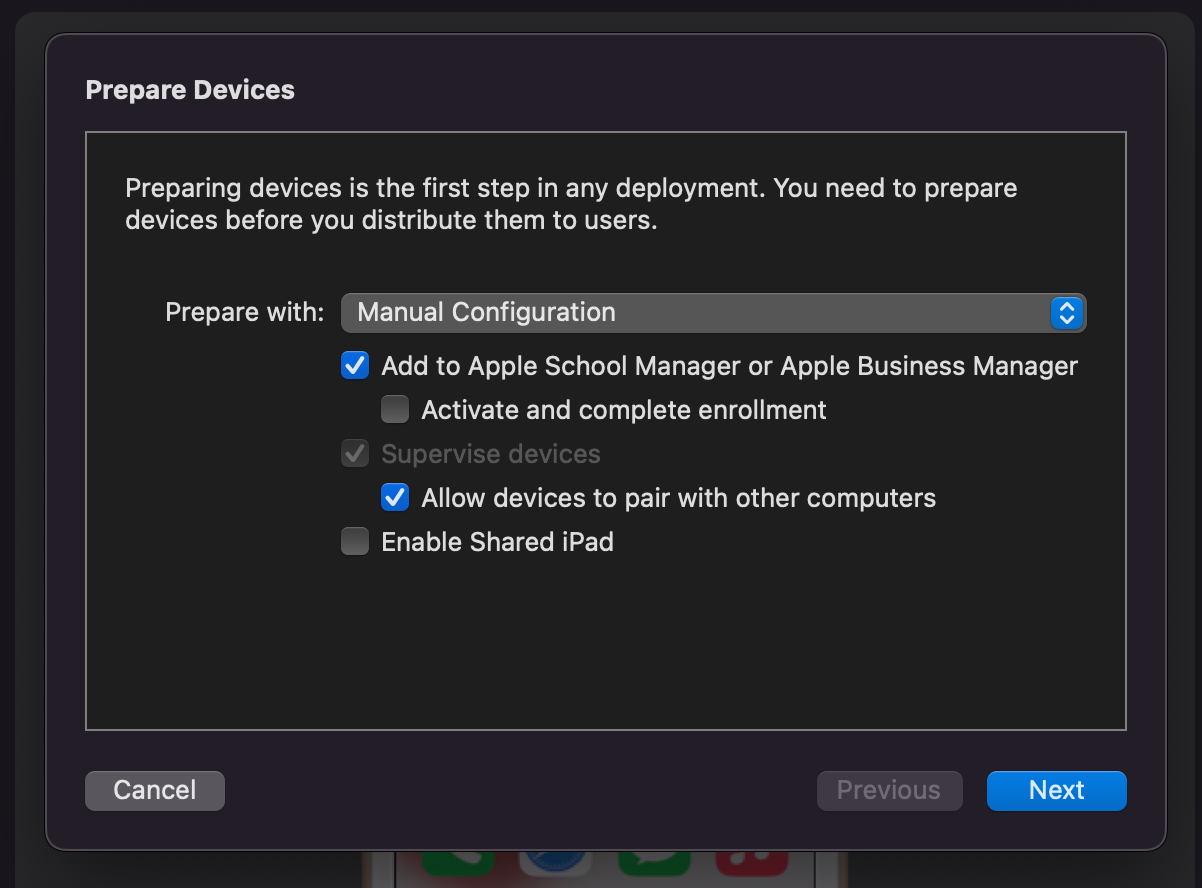
3. In the wizard, select Manual configuration and Add to Apple School Manager or Apple Business Manager. Also, uncheck Activate and complete enrollment.
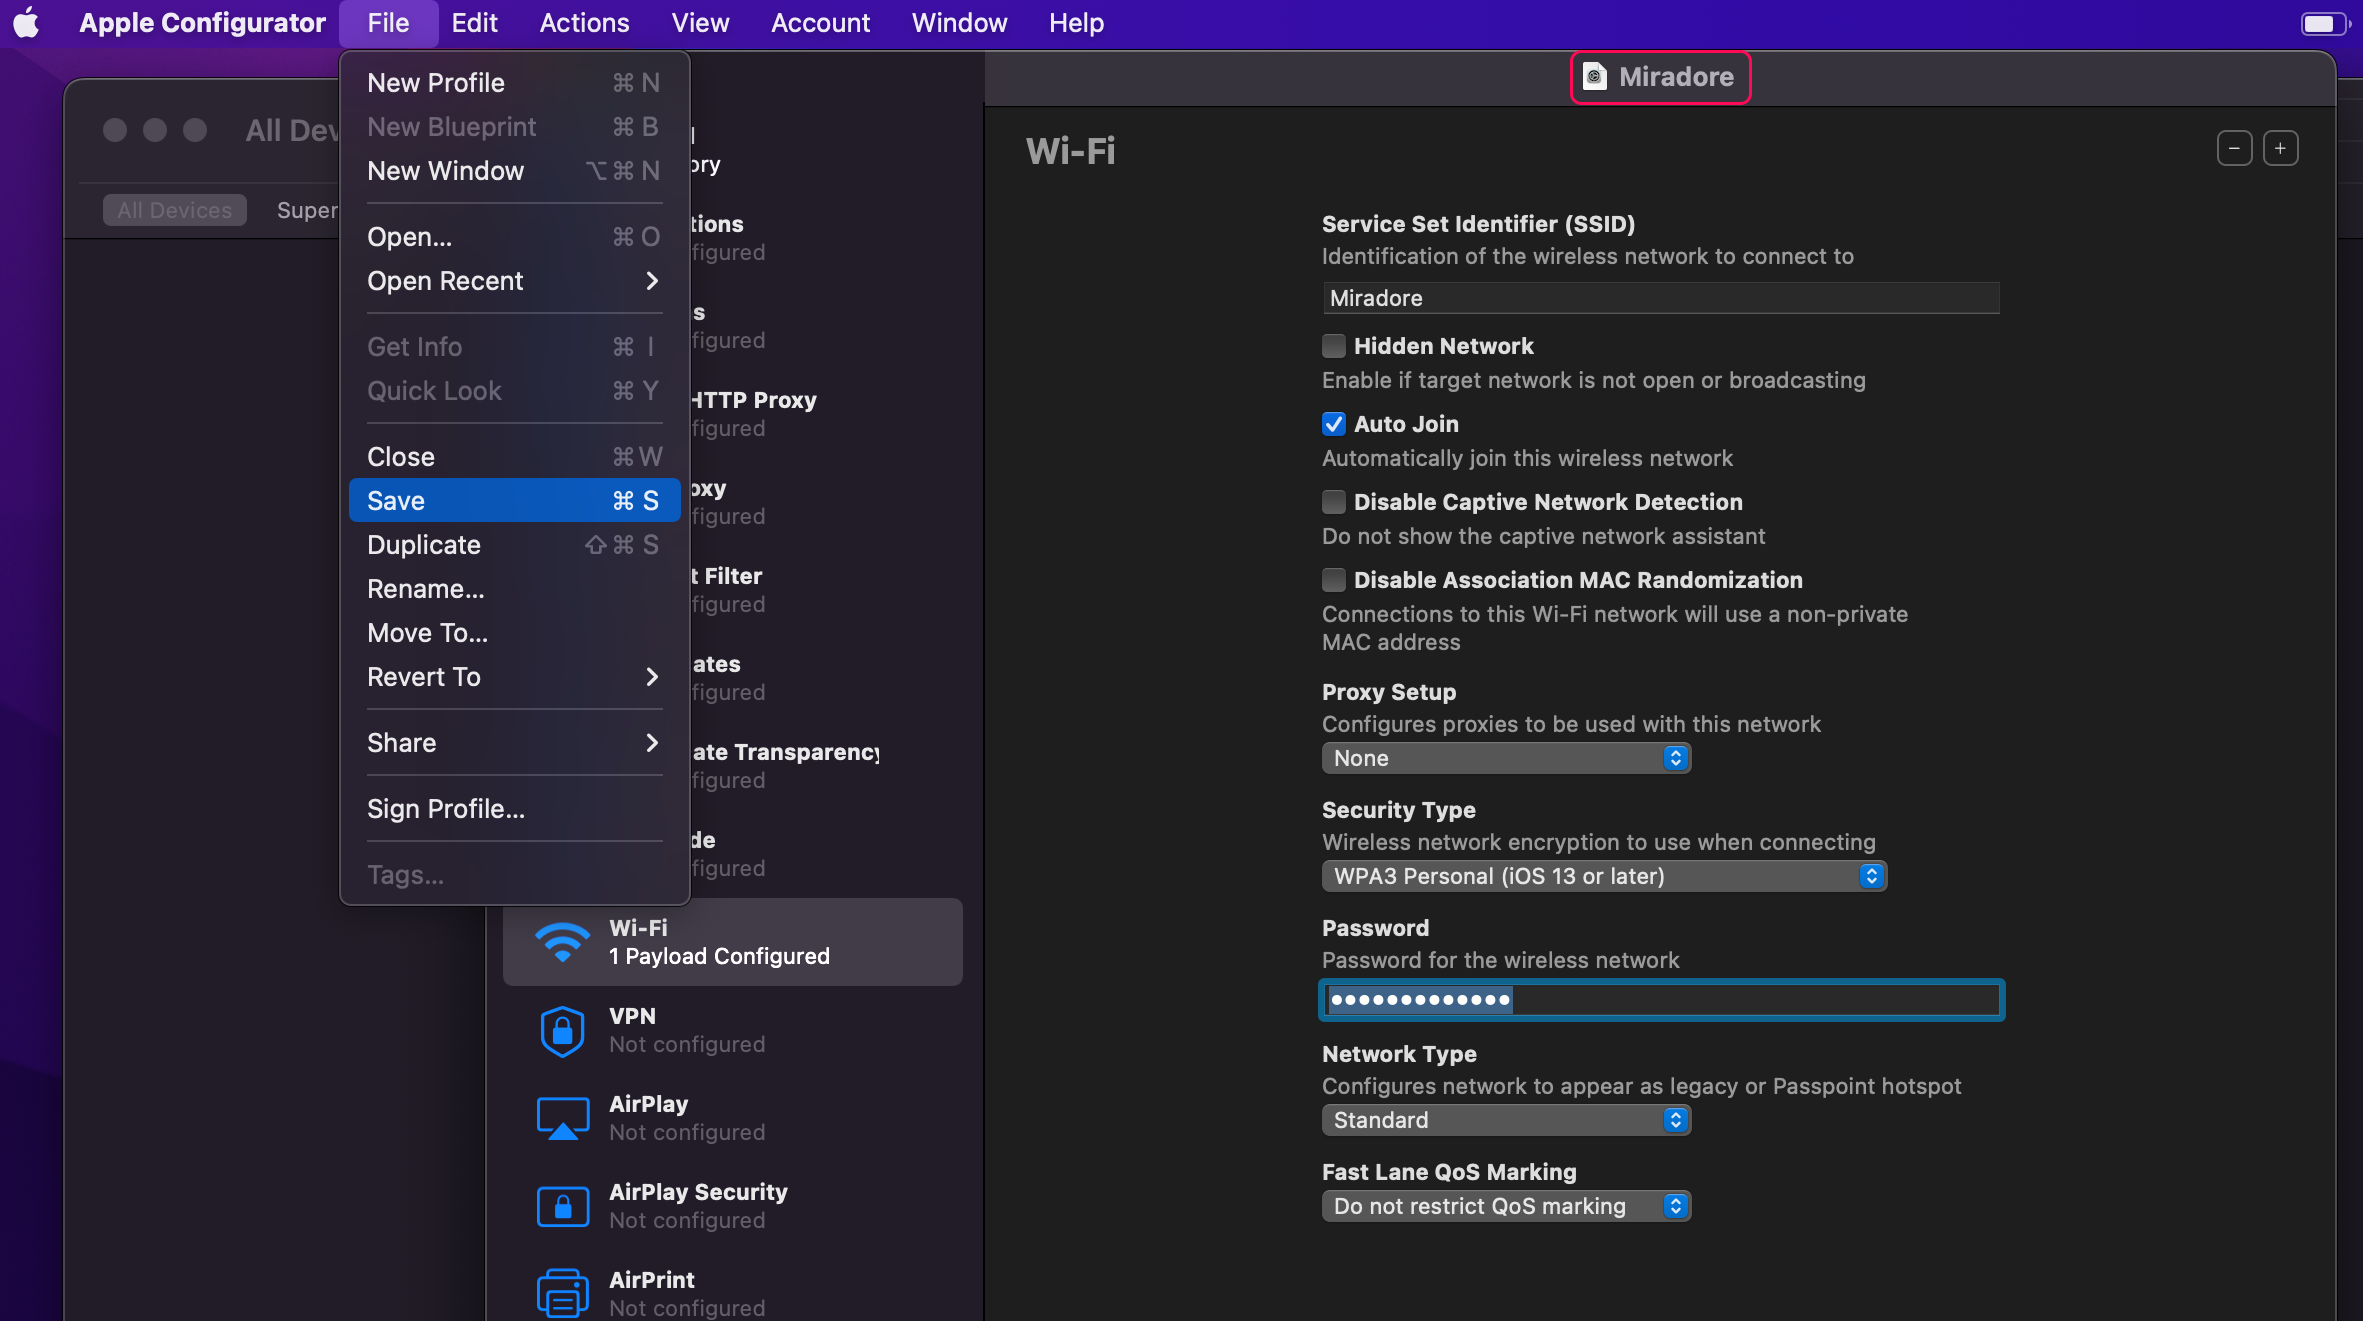
4. Next you need to define the MDM Server the device is enrolled in.
When asked to choose an MDM server, select the option New Server and press Next. Define the server by giving the name Miradore and using the URL https://gateway.miradore.com.
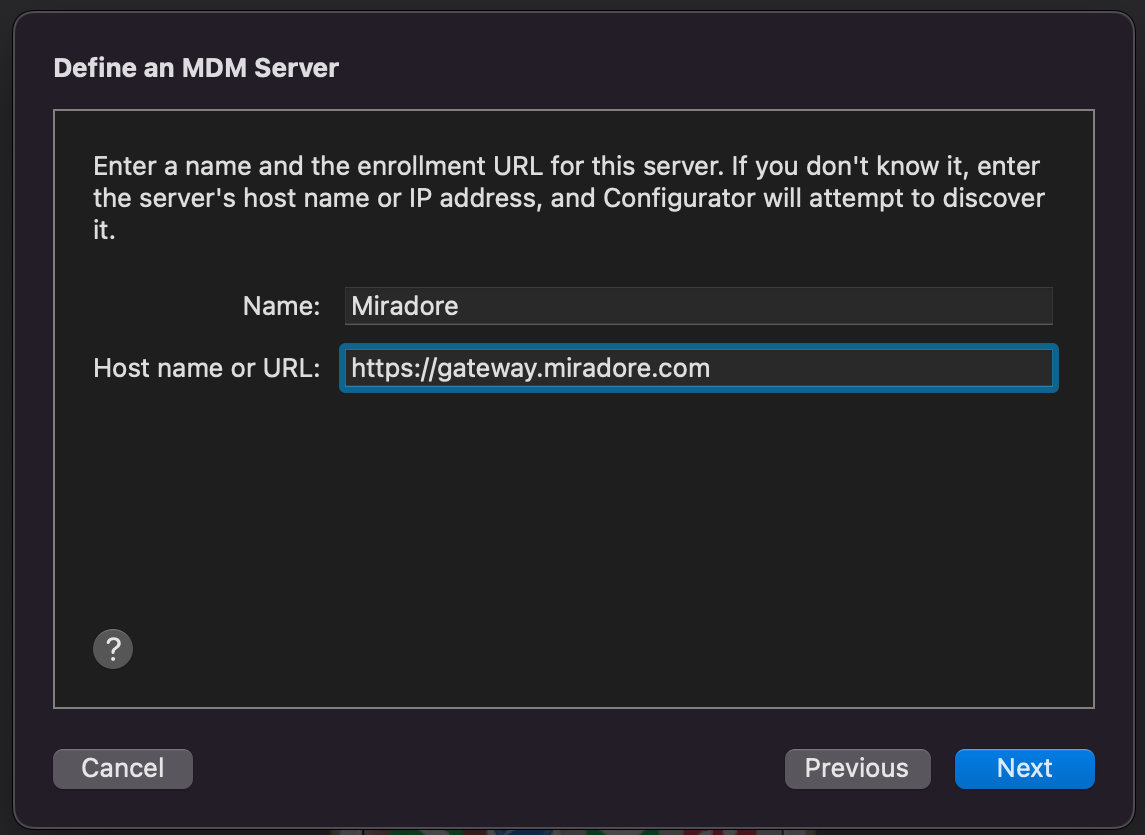
After pressing next, you'll see the certificates fetched from that site. Continue by pressing Next again.

5. Next, you're asked to sign in to Apple School Manager or Apple Business with the Managed Apple ID that has access to the Apple portal.
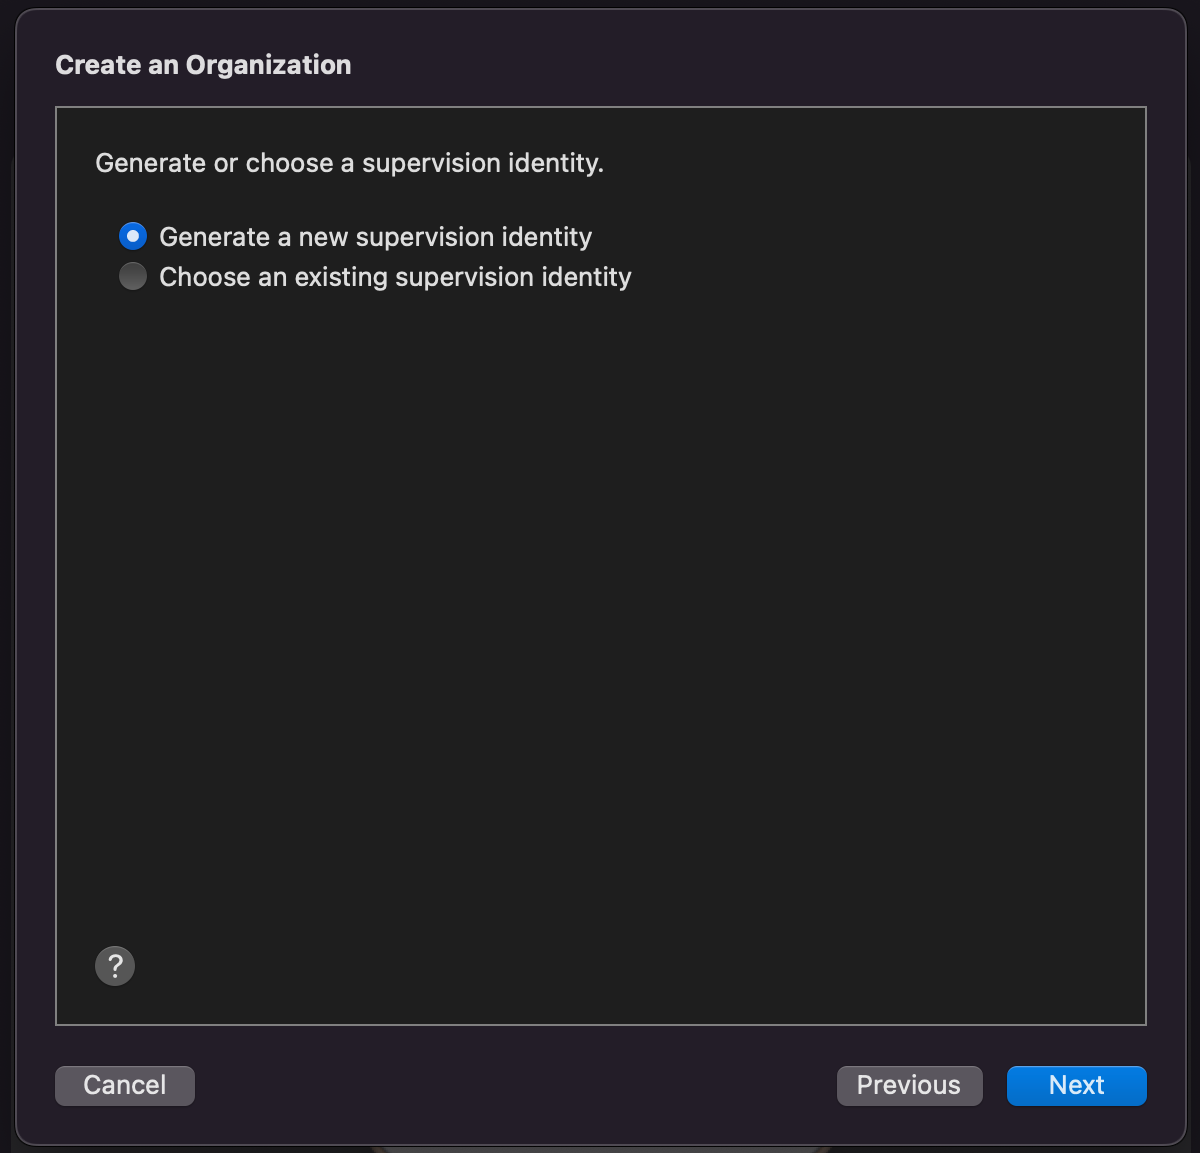
6. Then you need to assign the device to an organization that is used to supervise the devices. When creating a new one, choose to generate a new supervision identity.
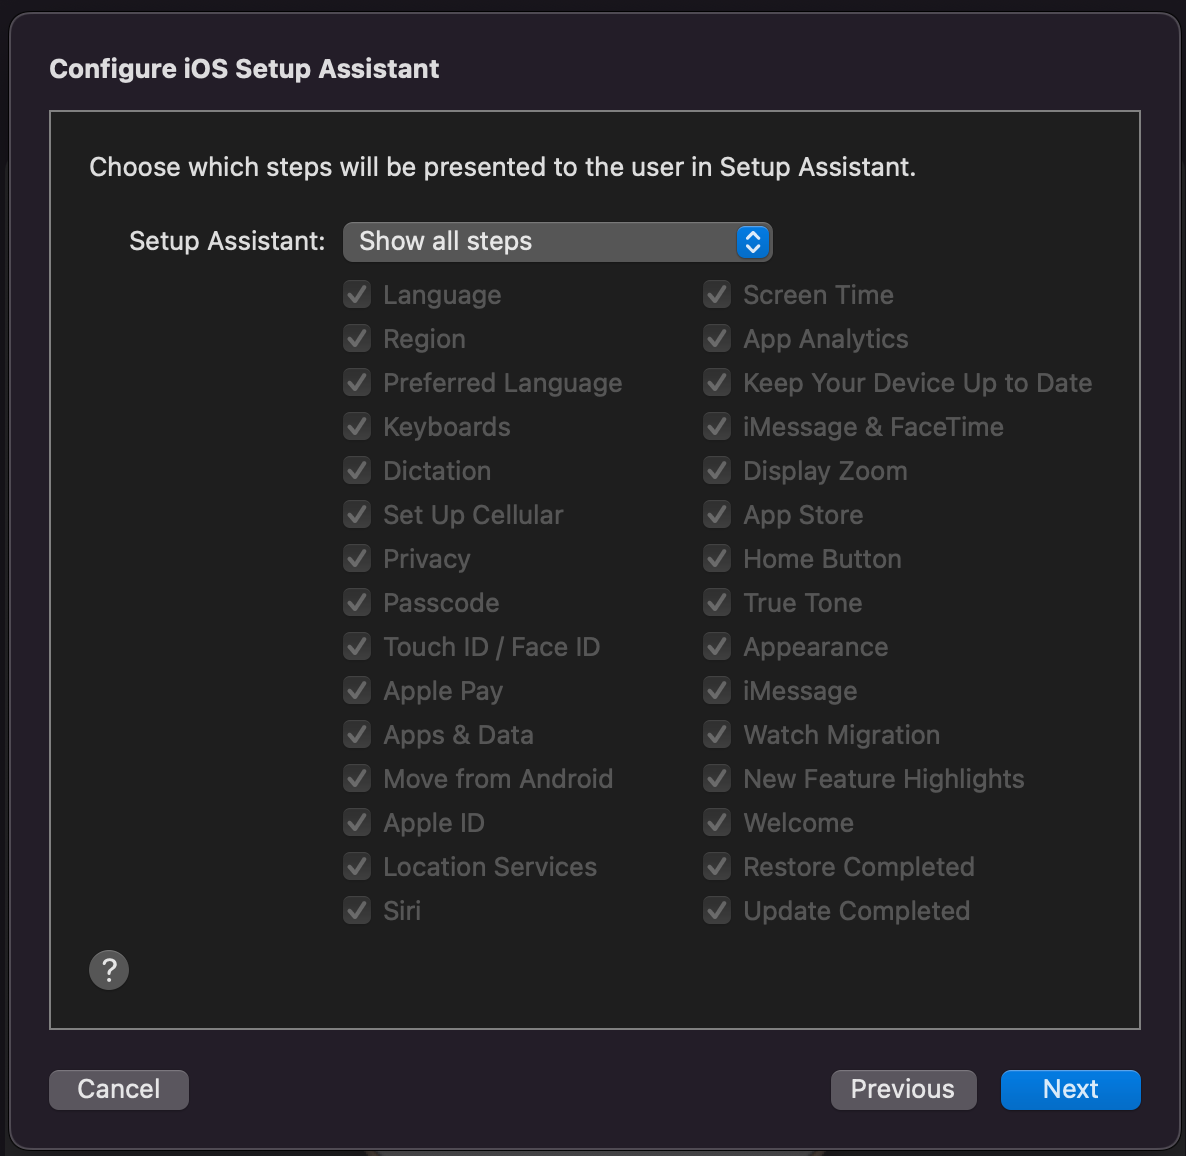
7. Make sure to select Show all steps in the Configure iOS Setup Assistant screen.
The device enrollment may fail due to an invalid profile if you configure the setup assistant to not show some of the steps.
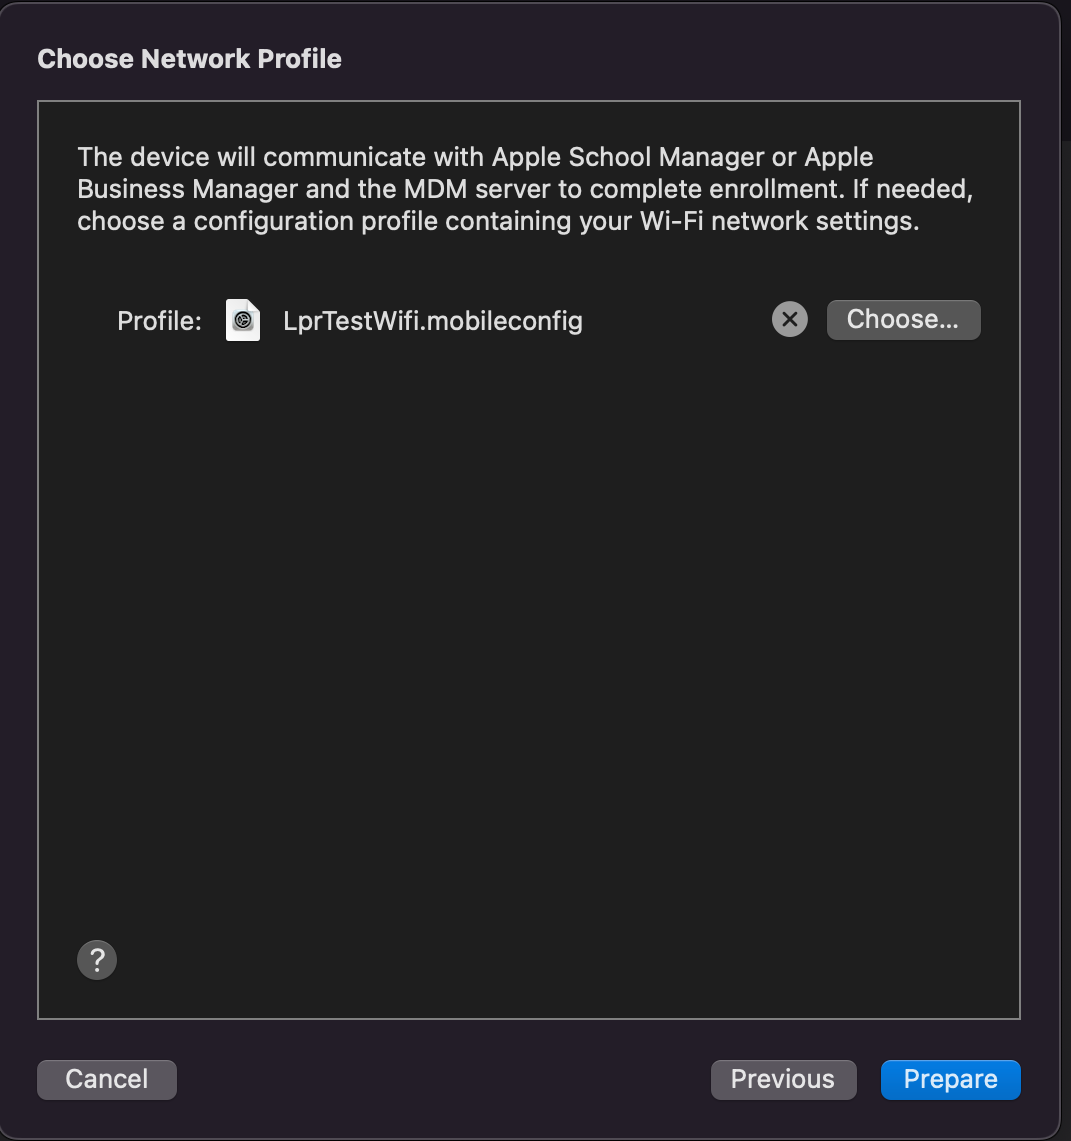
8. Make sure that you don't have any Apple ID defined on the device, otherwise, the preparation will fail, and the device gets locked down. Then, choose the Wi-Fi profile that you created earlier and click Prepare.
The iPad preparation takes a few minutes after which the device should appear in Apple Business or Apple School Manager, so wait until the iPad preparation is complete. After this step, you can put the device aside for a moment. In case you haven't reset the device earlier the reset is required at this point.
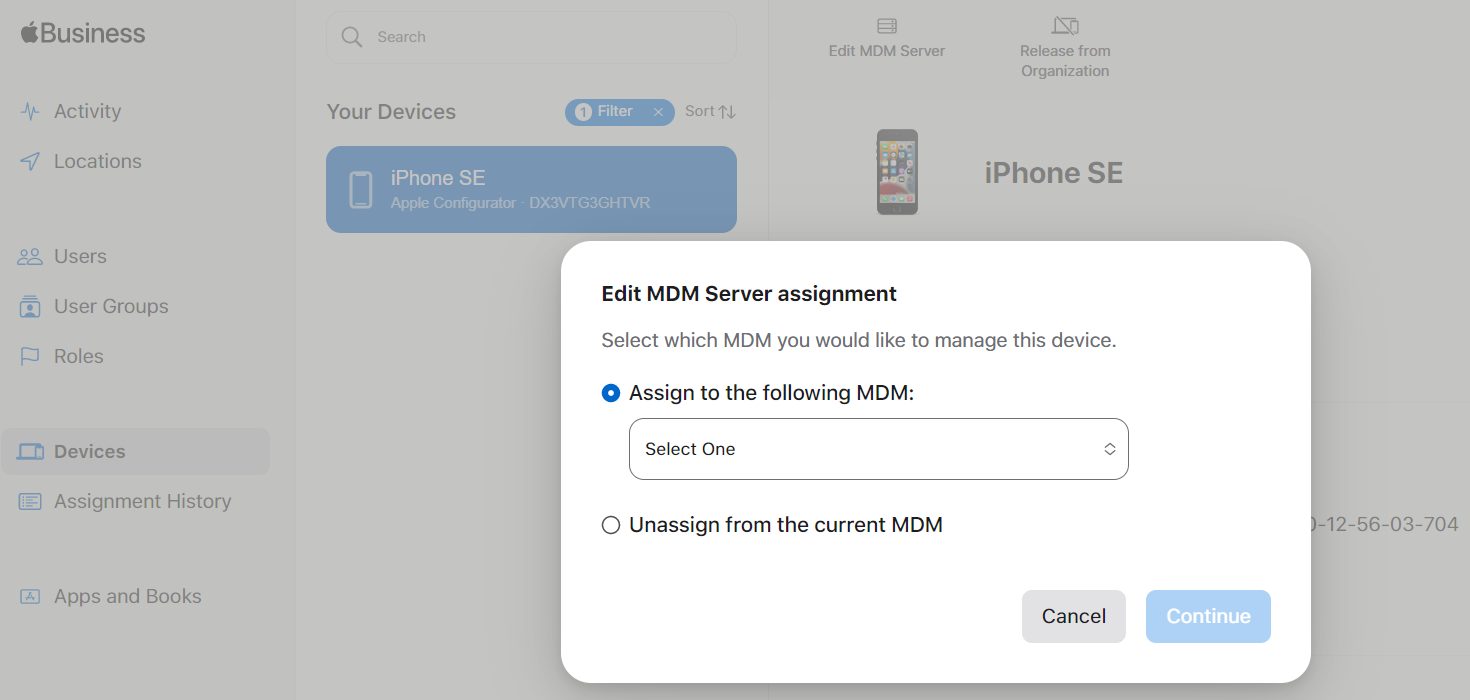
Assign a device to the MDM server in Apple Business or Apple School Manager
- Once ready, navigate to https://business.apple.com/ and sign in.
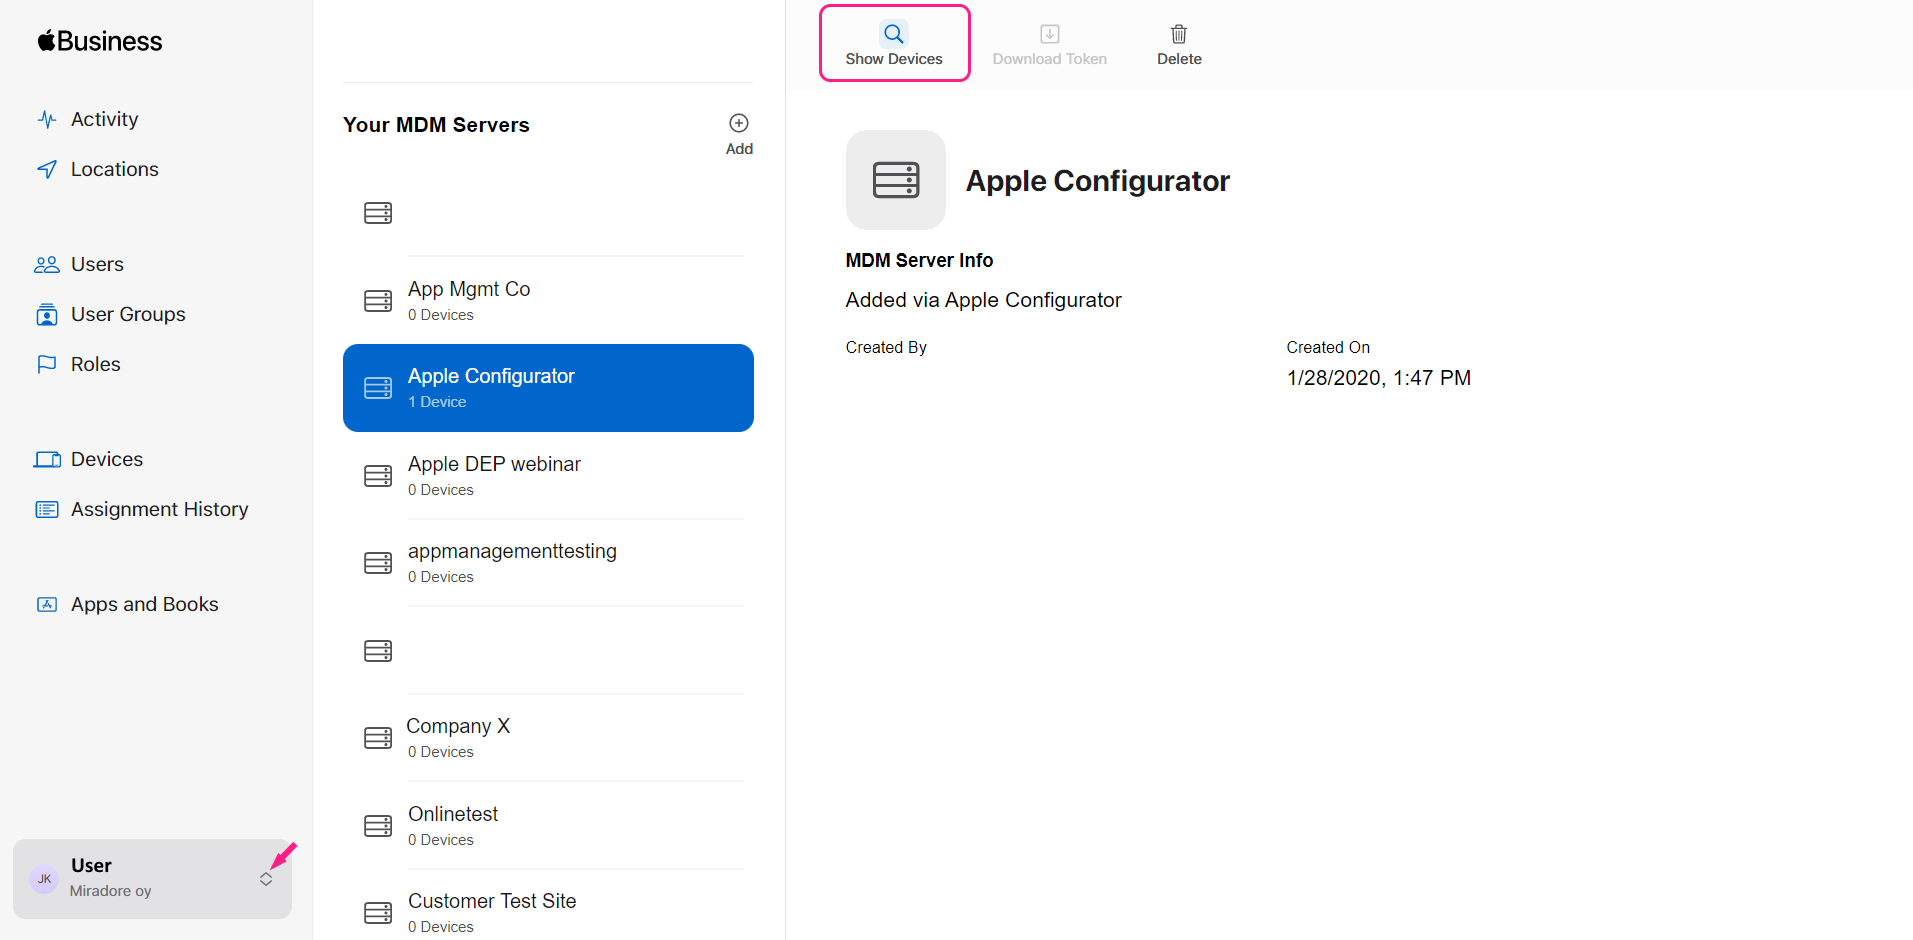
- In the portal, click the arrows next to the User and select Preferences. Now, you should see your MDM servers. All devices added manually with Apple Configurator will automatically appear under the MDM server Apple Configurator. Click the Show devices button.

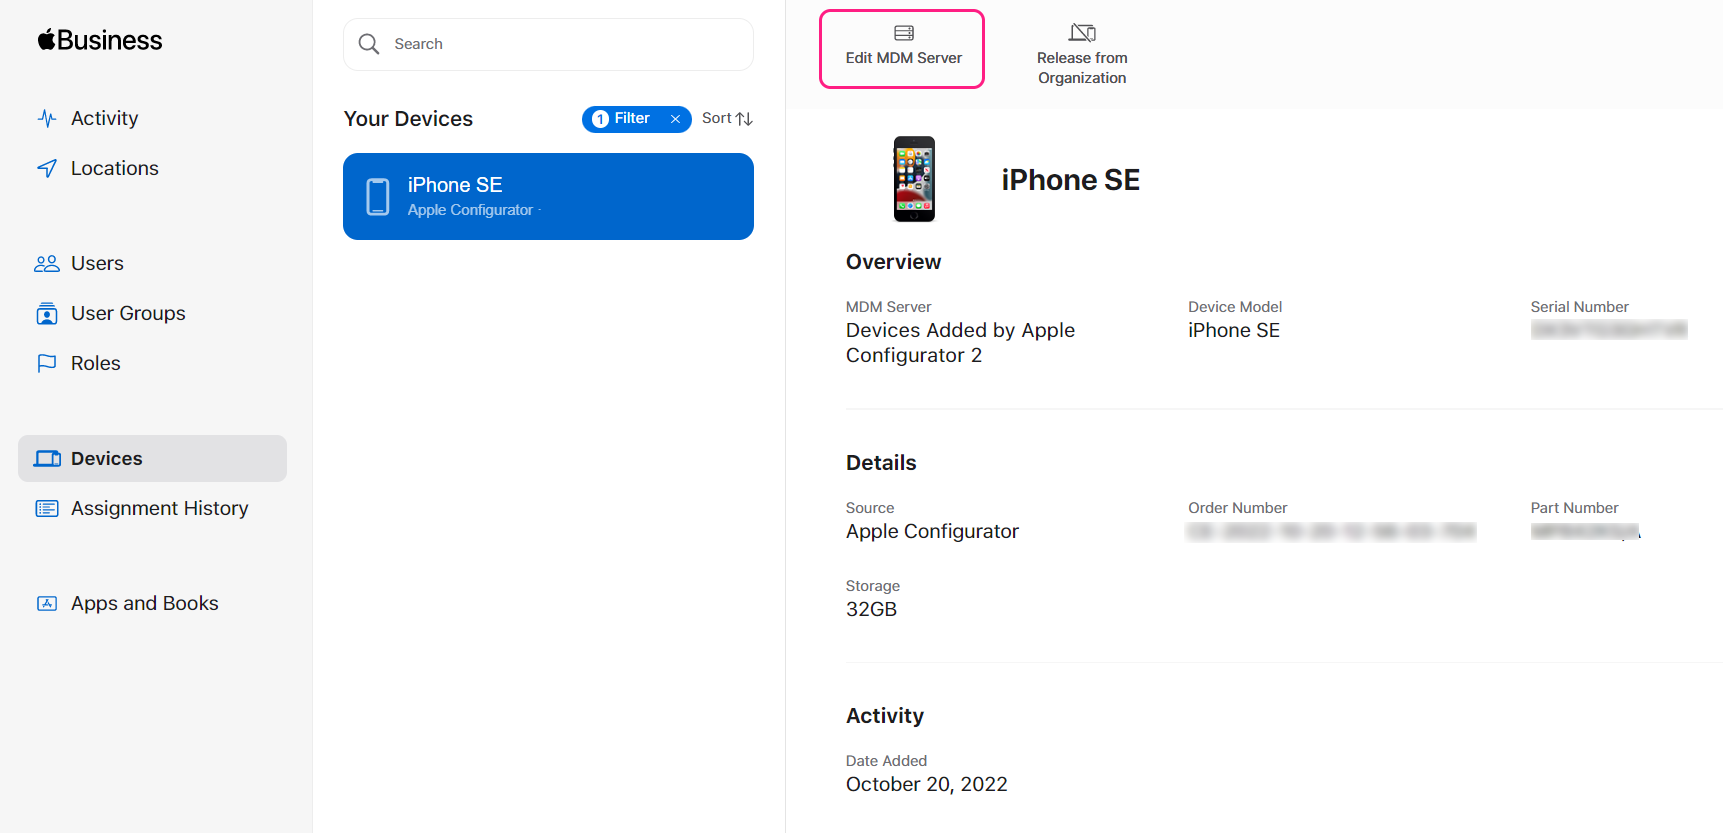
- Select device(s) from the list (keep the Ctrl-key pressed if you want to select many) and use the Edit MDM Server button to assign the selected devices to the desired MDM server.

- Select the option Assign to the following MDM and choose your Miradore site as a server.
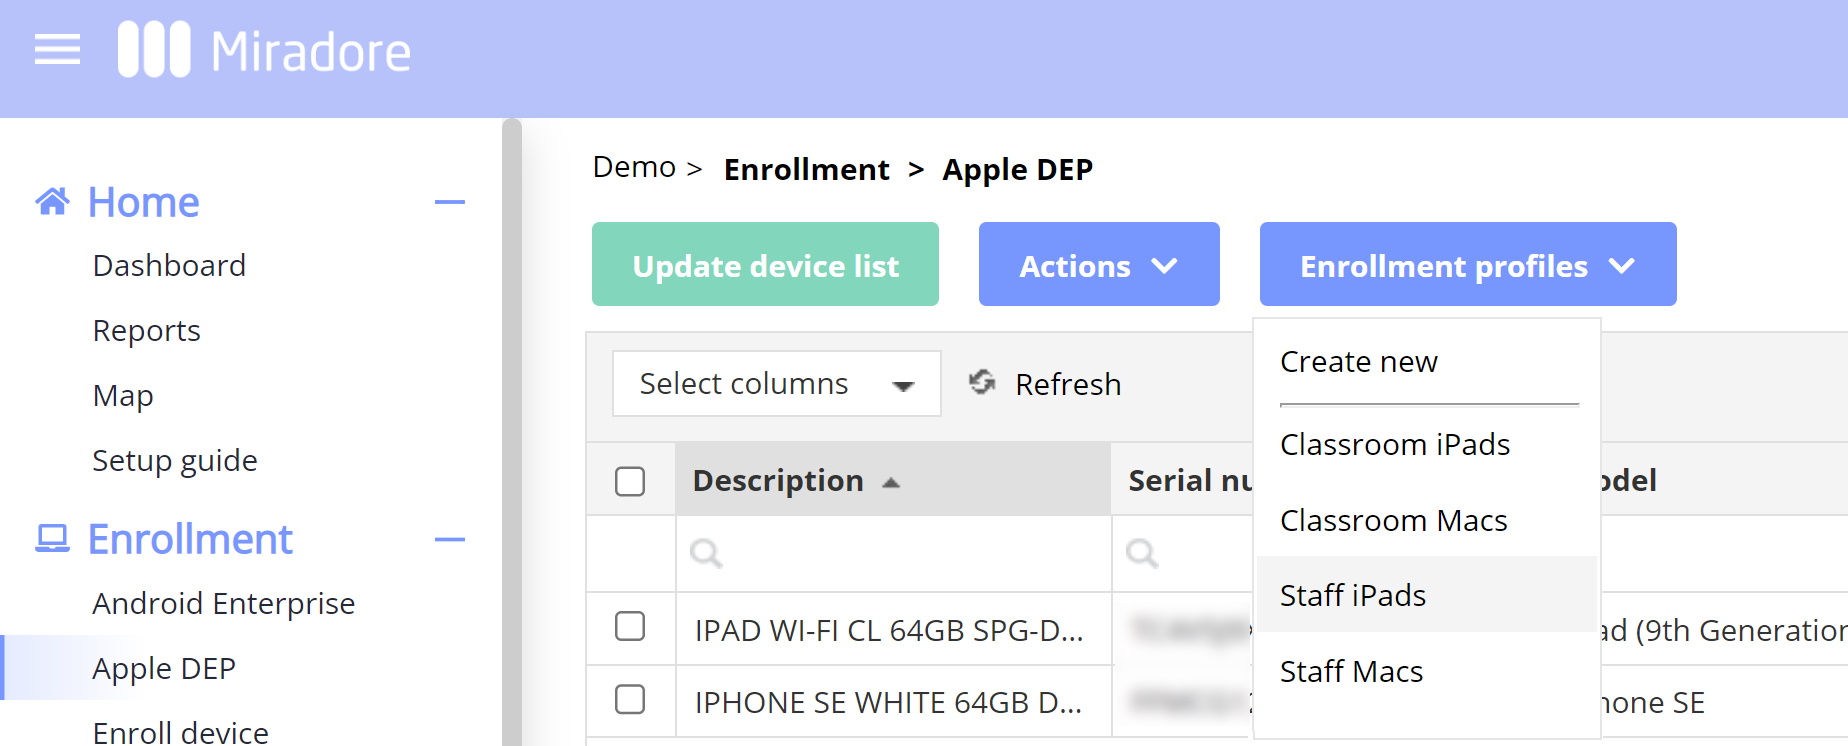
Enroll the device to Miradore
Next, you can log in to your Miradore site at: https://online.miradore.com/login/login and go to the Enrollment > Apple ADE view. Click the Update device list button and choose whether you want to update all devices or just the new and changes ones. After that, you should be able to see the devices on the page.
- Select new devices from the view and assign an enrollment profile to the devices by choosing Actions > Assign enrollment profile. When doing this, you can add tags for the device if you want to. Miradore adds the "Dep" tag automatically for the devices that go through the Automated Device Enrollment.
- You can check and modify the configurations of an enrollment profile by clicking the Enrollment profiles button and opening up any of the existing profiles.

In case needed, follow the instructions on the Enrollment profiles -article to finalize the device enrollment.