This article shows how to configure a managed Google Play Enterprise account for Miradore. It will enable you to provide additional device enrollment and management features and a secure company container for your Android devices.
Benefits
Configuring managed Google Play Enterprise account for the Miradore site enables multiple device management features, such as:
- add managed Google Play applications,
- create a work profile and secure container for the work data,
- deploy applications silently to the devices,
- manage application configurations and runtime permissions,
- deploy additional restrictions.
For more detailed information on the different management features, read the article about Android device management.
Requirements
- Miradore Premium Plan subscription or active trial.
- It is strongly recommended that only work email addresses be used for the sign-up. Also, Microsoft identity accounts are supported. We would suggest using two-factor authentication to protect your Miradore account.
- You can have a single Miradore site configuration for each account.
- If you want to publish private apps for your Managed Google Play Enterprise, the Google account must be a developer account and the apps must be added under that account.
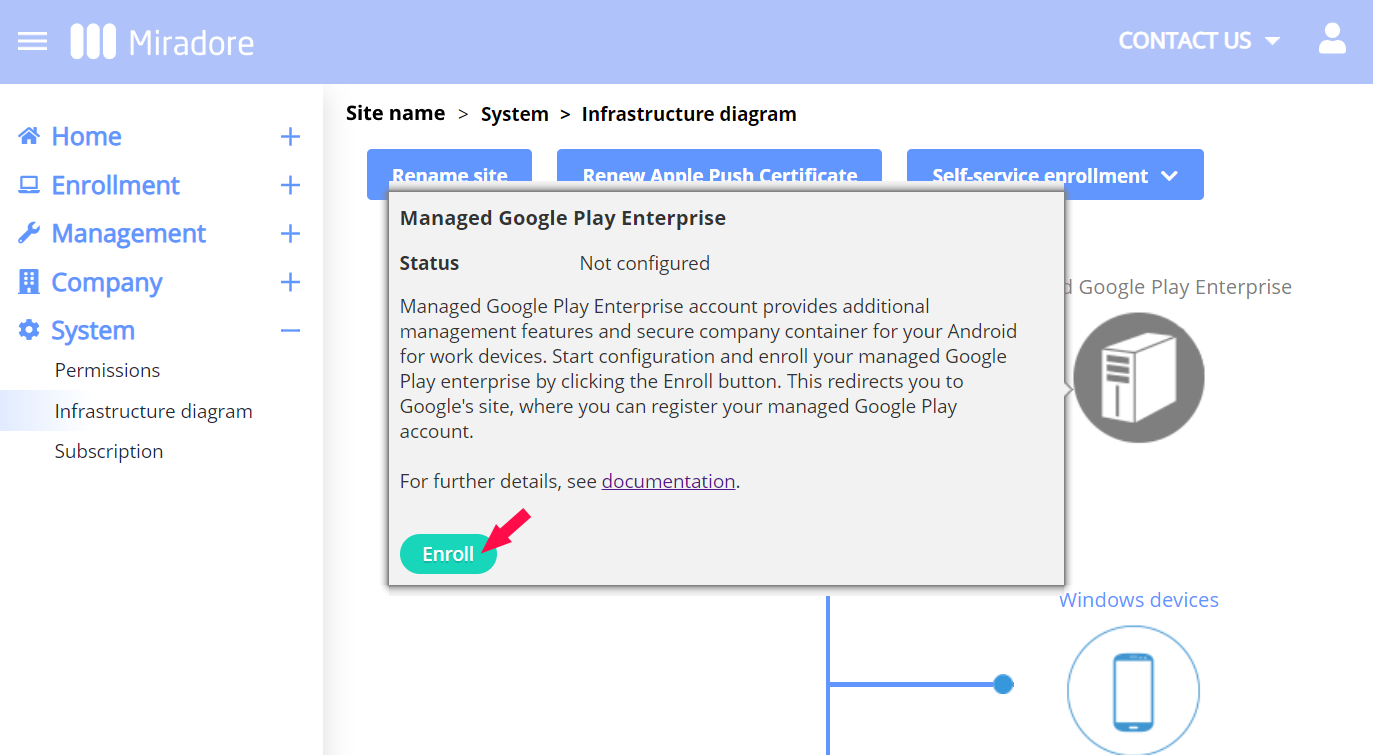
How to configure the managed Google Play Enterprise for a site?
Navigate to System > Infrastructure diagram and select Managed Google Play Enterprise from the diagram.
1. Click the Enroll button from the Managed Google Play Enterprise item to proceed. This redirects you to Google's console where you can register your managed Google Play Enterprise account.
2. Enter the work email address to create the Admin account.
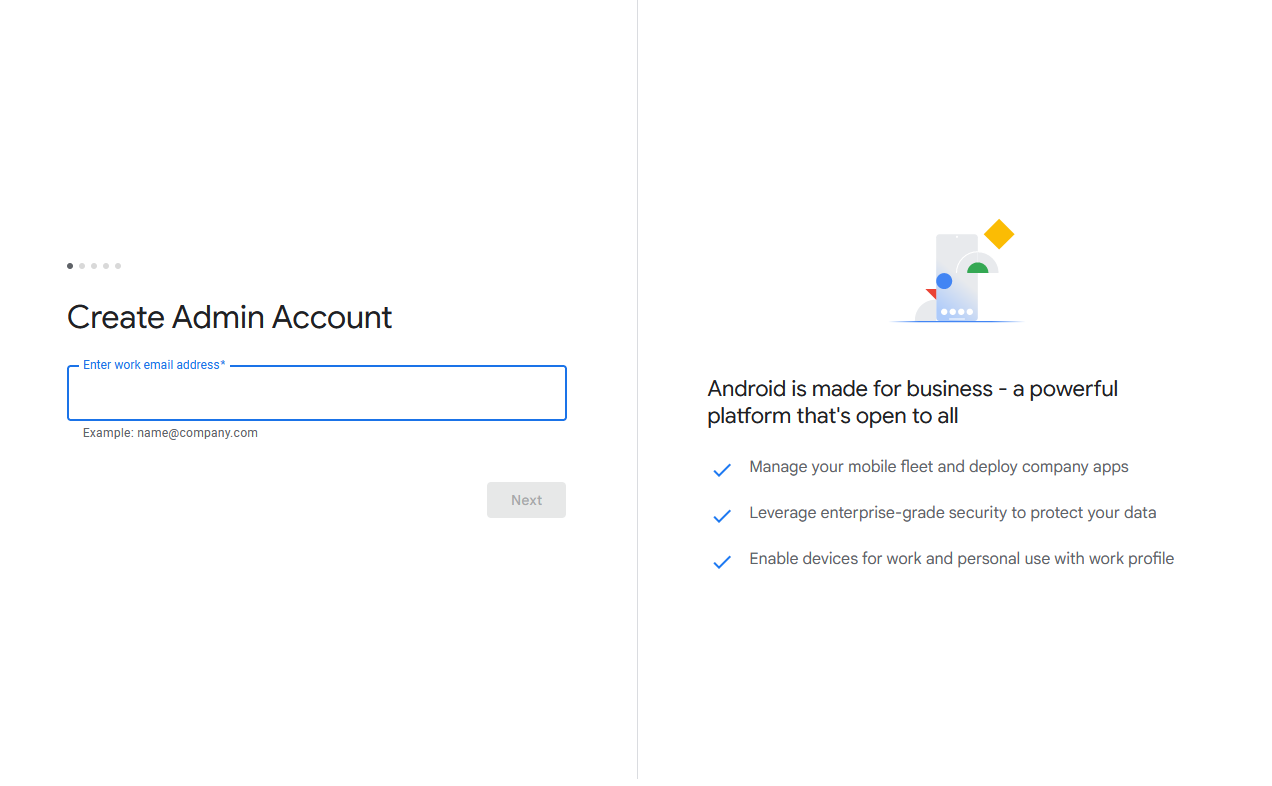
3. You will receive the verification email. When clicking the "Verify email address" you will be redirected to the sign-up flow to continue the registration.
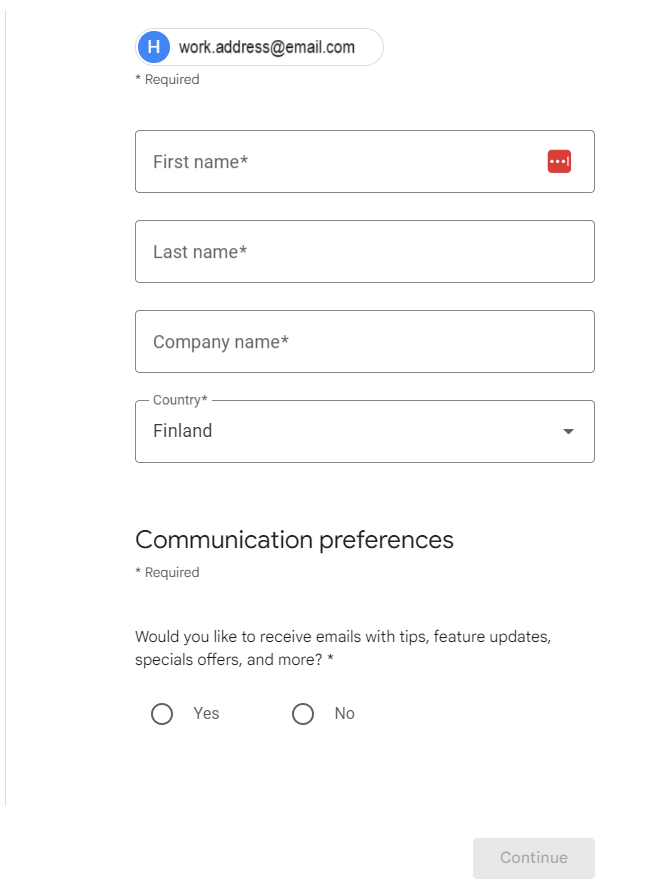
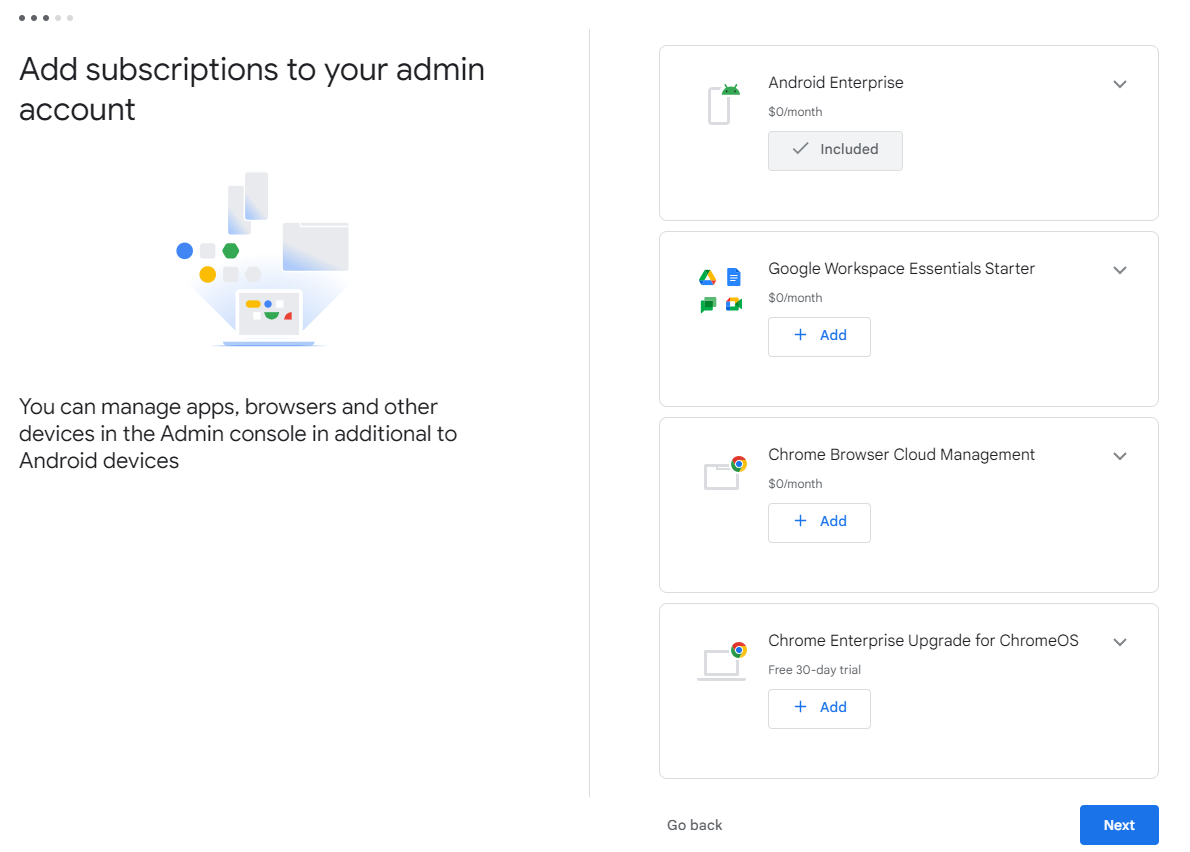
4. Next you can add other Google products to the Admin Console. Android Enterprise is selected by default which is adequate to proceed with the configuration. Continue by pressing Next.
5. Create a password for your account. Ensure you have read and agreed to the Google agreement.
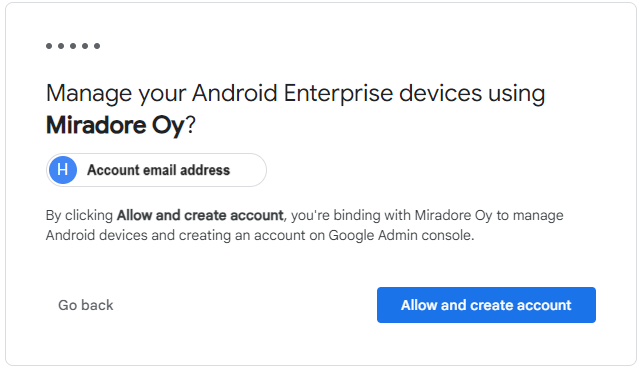
6. Confirm that you want to manage your Android devices with Miradore.
7. Next you need to verify your account by login in with the credentials you created for the Admin Console.
8. You will be directed back to Miradore and you'll receive a confirmation that your managed Google Play Enterprise has been configured successfully.

Using personal email addresses
If the sign up email address is detected as personal email, you can choose from either of the three options in the picture.
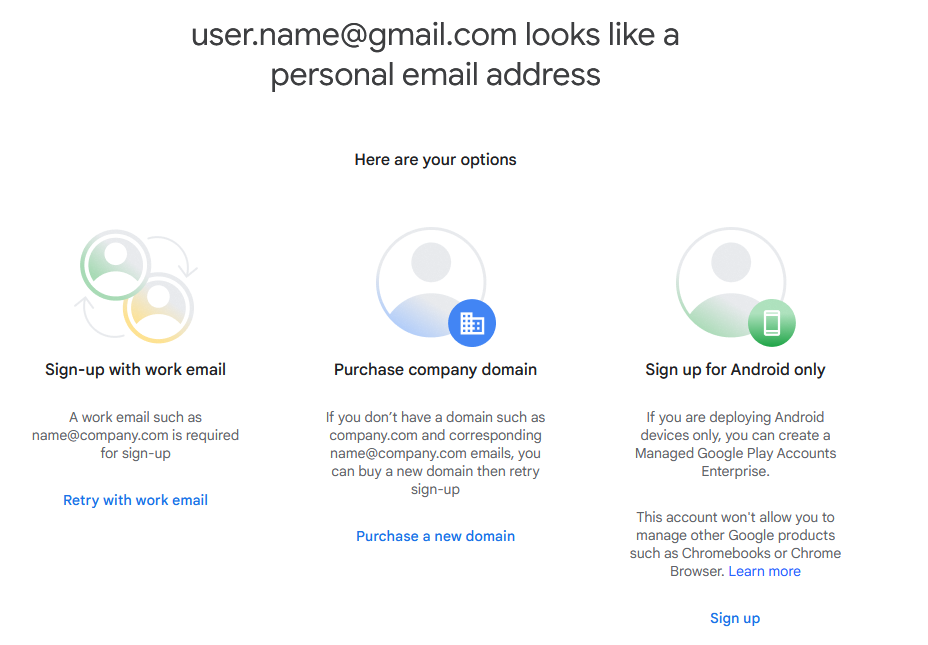
Choose "Sign up for Android only" to continue configuring the managed Google Play Enterprise.
Previous Article:
« Managed Google Play applications in Miradore
Next Article:
Configuring managed Google Play Enterprise »