This page describes the steps required in order to start the use of the Miradore API. In short, the main steps are: the activation of the API and the generation of the required API authentication key.
A step-by-step guide to getting started with the API
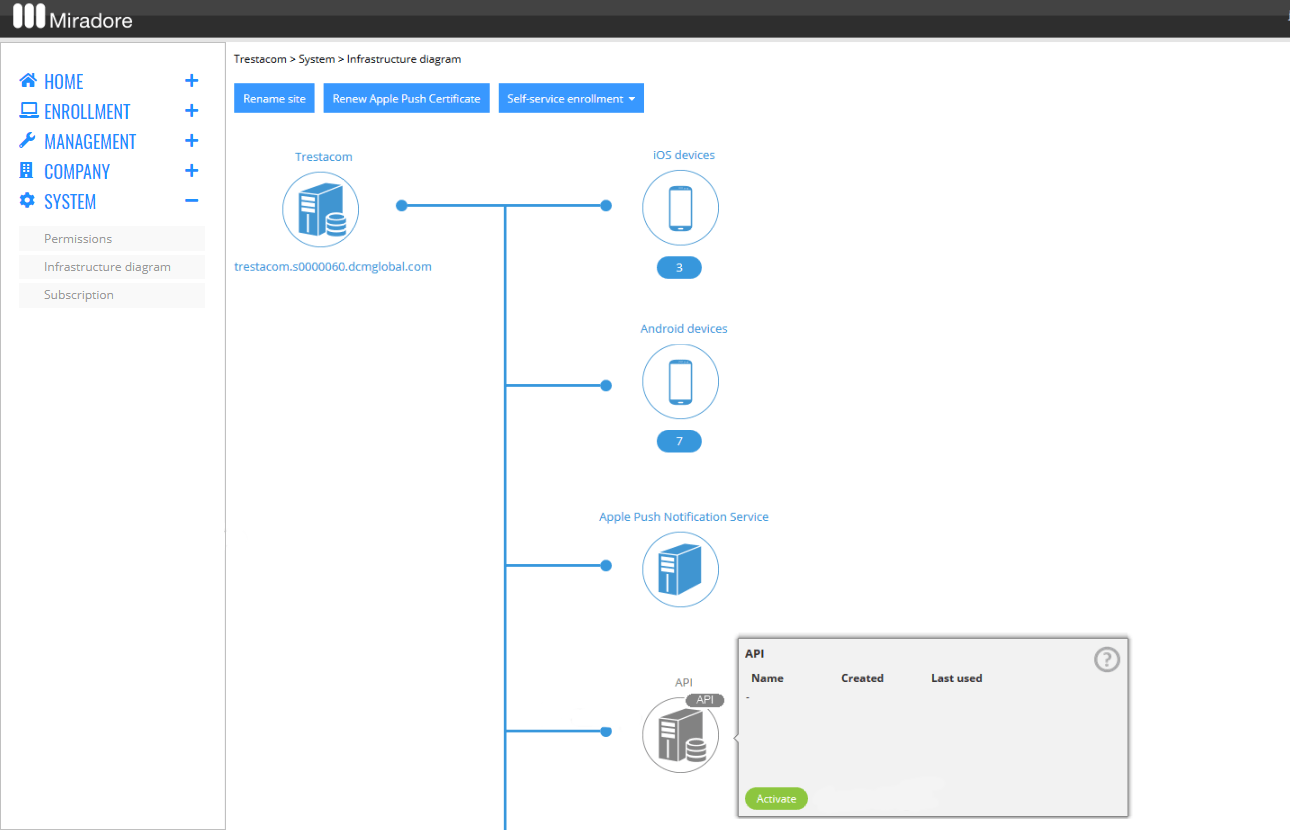
1. Start by navigating into System > Infrastructure diagram in Miradore's Navigation menu. In the infrastructure diagram, you should see a grey API icon indicating that the API has not yet been activated. Hover on the icon, and click the Activate button.
2. Wizard for activating the API should appear on top of the page. In the first step of the wizard, read the acknowledgment and tick the checkbox. Once you're done you can proceed by clicking Activate now.
3. The second screen of the wizard then informs you whether the activation was successful. You may then exit the wizard by clicking Close.
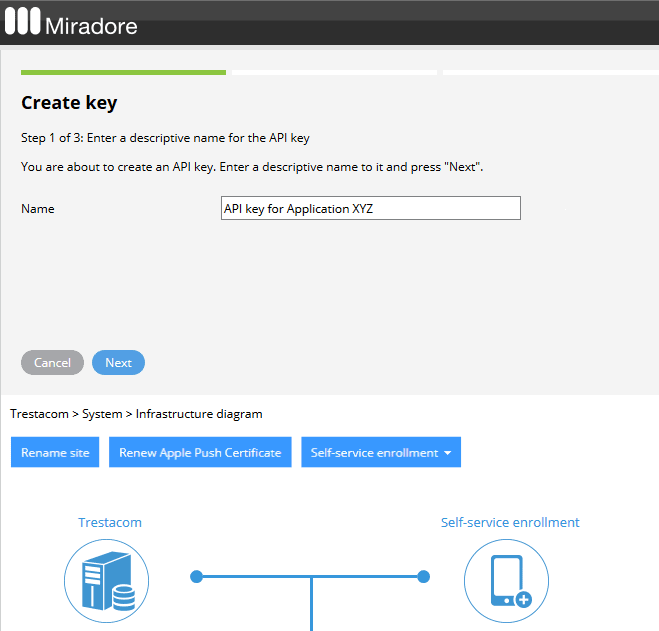
4. After successful activation, the icon of the API should turn blue. Hover on the blue icon, and click Create key in order to generate an authentication key for the API. Miradore uses the authentication keys to authenticate the queries.

5. In the next step, you are asked to enter a name for the API authentication key. This is important especially if you are going to create multiple authentication keys to be used with different information systems, for example. Try to use descriptive names, which help you later to remind what the different keys are used for.
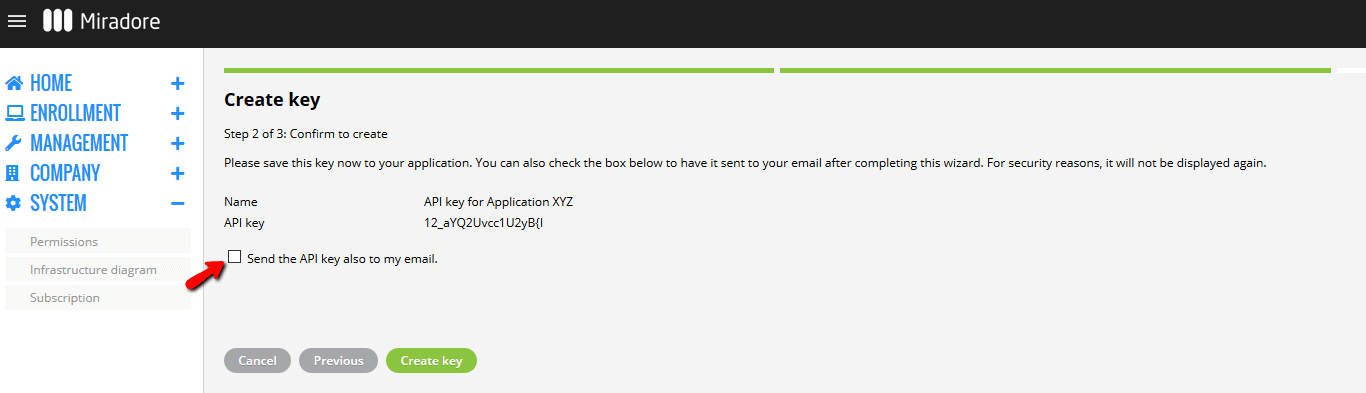
6. In the next step you are asked to confirm the creation of the API key. Before you do that, it is important to write down or otherwise save the authentication key (API key), because, for security reasons, it cannot be seen from the Miradore user interface afterward. You can also choose to receive the API key by email in the API key generation wizard. Once you click Create key, the authentication key will be activated.
7. Finally, you should see a notification telling whether the key was created successfully. The key will be delivered to you shortly if you chose to receive it by email in the key creation wizard. In addition to the key, the email contains a few examples of queries that you may find helpful when starting to use the API.
If you want to create multiple API authentication keys, repeat steps 4-6 from this article.
More information:
Have feedback on this article? Please share it with us!
Previous Article:
« Miradore API
Next Article:
Getting started with API »