Windows 10 upgrade on domain joined PCs
Upgrading to Windows 10 has been a hot topic for IT professionals since its release on July 29, 2015. The upgrade is a very straightforward process for home users who have Windows Update enabled. They just need to accept an upgrade offer and the upgrade will soon be available for them to install. If a computer is joined to an Active Directory domain and/or the current Windows installation is volume licensed, things are not that easy. But don’t worry, I will explain in this blog post how to upgrade to Windows 10 also in those cases. Furthermore, I will give you some aftercare tips that you should consider doing after the upgrade has completed.
When a computer is joined to an AD domain, it will not get the upgrade offer from the Windows Update. This has been done to give the IT department more control over their environments. In practice, this means that the upgrade must be done using a Windows 10 installation media. It’s important to notice that a free Windows 10 upgrade is only available to OEM and retail licensed Windows 7, 8, and 8.1 versions. If you are using volume licenses, you must provide a new volume license key while upgrading and also use a volume license installation media of Windows 10 to upgrade.
The Windows 10 installation media for OEM and retail licensed old Windows versions can be acquired using Media Creation Tool available on the Microsoft website. With the tool, it is possible to upgrade a single device or download the installation media as an ISO image, which can be used to automate the upgrade. Volume license users can get the installation media ISO image and the product key from the Volume Licensing Service Center.
Once you have the correct installation media, you can extract the contents of the ISO image to a file share and automate the upgrade by using a script or a software deployment tool like Miradore. Automation can be achieved by first copying the installation media from the file share to the computer’s local drive and then starting the upgrade from setup.exe using command-line options.
The command could be, for example:
setup.exe /auto:upgrade /quiet /showoobe full /pkey XXXXX-XXXXX-XXXXX-XXXXX-XXXXX
The “/auto:upgrade” parameter defines that the Windows 10 installation is done as an automatic upgrade saving both user data and applications. Another option would be to use “/auto:data” which would only save the user data and not the apps. With the “/showoobe” switch, you can decide whether the user gets the normal out-of-box experience wizard after the upgrade. The product key “/pkey” switch is only needed when upgrading from volume licensed old Windows. If you’re using OEM or retail licenses, just leave this switch out.
Here is an example screenshot of a Miradore package that does a Windows 10 upgrade for volume licensed Windows 7-8.1. You can also download the package template here. The Miradore package can be published to Miradore self-service portal, which enables the end users to start the upgrade even themselves.
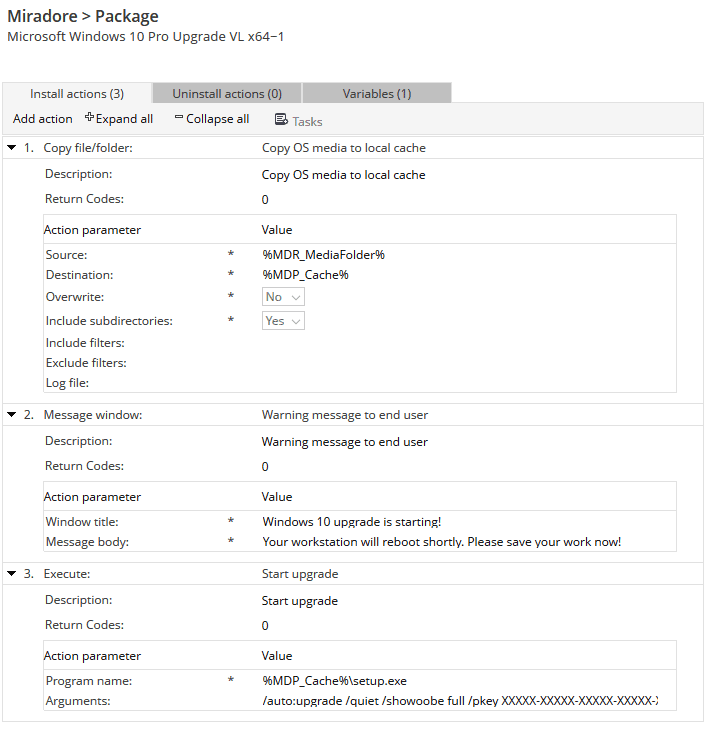
%MDR_MediaFolder% stands for the installation point file share directory where the Windows 10 installation media is located. %MDP_Cache% can be for example %SystemDrive%TEMPWin10 on the local drive. Shortly after the setup.exe is started with the command-line options, the workstation will reboot and start to upgrade to Windows 10. The actual upgrade is similar to non-business devices.
After the upgrade is ready, it’s good to look around and check that everything is working. It’s quite common that some device drivers might be missing. Then just navigate to the computer vendor’s website to download and install the correct driver.
Once you have checked that everything is working and you are happy with the Windows 10 experience, it’s time for hard disk cleanup. Especially if you have a small solid-state drive (SSD) as the system drive, you may easily be running out of disk space after the upgrade.
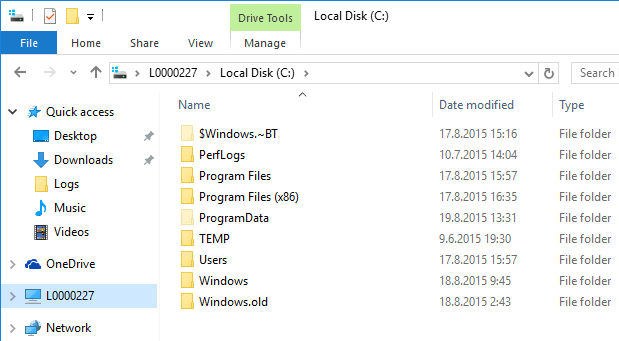
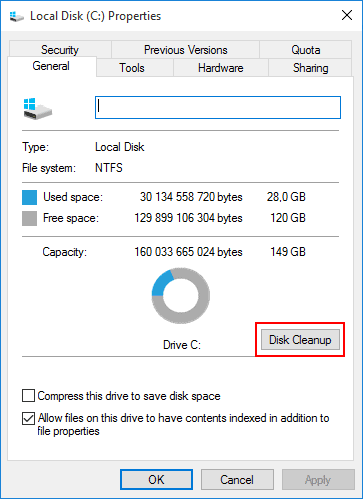
The first thing to remove is the Windows 10 installation media that was copied to the local disk before the upgrade. The next step is to remove the temporary Windows installation files created during the upgrade ($Windows.~BT folder). Finally, if you are sure you don’t want to go back to the old Windows version, you can remove the old Windows installation files (Windows.old folder). The easiest way to remove the $Windows.~BT and Windows.old folders from a single machine is to use the disk cleanup tool, which can be found from system drive properties.

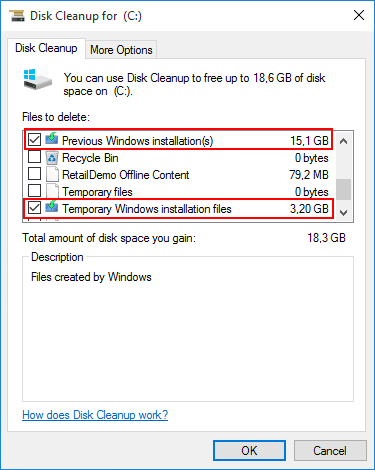
The previous Windows installation and temporary Windows installation files are automatically removed 30 days after the upgrade, but if you are happy with Windows 10, there is no reason why not to remove them already earlier.
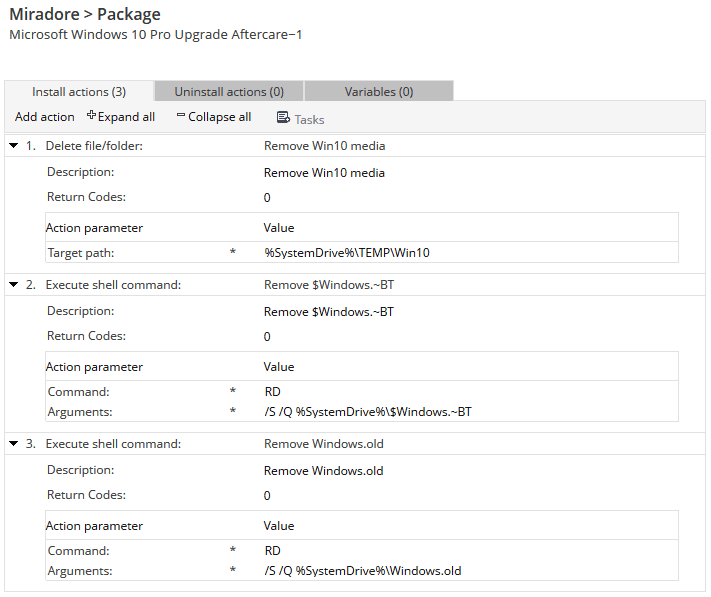
The best way to clean up multiple devices is to automate it with scripting or use a software deployment tool. Below you can see a screenshot of a Miradore package that removes the unnecessary files left after the upgrade. You can also download the package template here.
All in all, upgrading multiple Windows devices in a business environment is quite a straightforward job when you have the proper tools. Remember to check before upgrading that your hardware meets the Windows 10 requirements. If the upgrade fails and you don’t know why find more specific error information from a log file at C:$Windows.~BTSourcesPanthersetupact.log. In case you have questions about Windows 10, check out the Microsoft Community. There is an article called Frequently Asked Questions: Windows 10, which answers many of the common questions.
I hope this blog post has helped you in the upgrade process. Feel free to contact our support team for more assistance.