Windows bulk enrollment is a very easy way to enroll Windows 10/11 devices to Miradore.
The bulk enrollment can be started simply by running a provisioning package on a Windows 10/11 device. After that, the rest of the enrollment process is automatic. The device user does not have to type in the enrollment credentials during the enrollment.
As a result of the enrollment, the device becomes fully managed in Miradore.
Requirements
For building the provisioning package you will need to have:
- An Administrator role on your Miradore site
- A Windows 10/11 device with Windows Configuration Designer software (free software)
Additionally, the device user must have administrator privileges to run the provisioning package
What is a Windows provisioning package?
You can create Windows provisioning packages (with extension .ppkg) using Windows Configuration Designer. The provisioning packages are generally used to automate the deployment of Windows 10/11 devices and to apply desired configurations and customizations to the devices. This is very convenient especially if you want to apply the same configurations to a large number of devices.
Miradore's customers can utilize the provisioning packages to automate device enrollments. The idea is to include the Miradore site-specific mass enrollment credentials in a provisioning package so that the enrollment experience would be as smooth for the device users as possible.
How to build a provisioning package for Windows 10/11 bulk enrollments?
- Go to Microsoft Store and install Windows Configuration Designer on your Windows 10/11 computer.
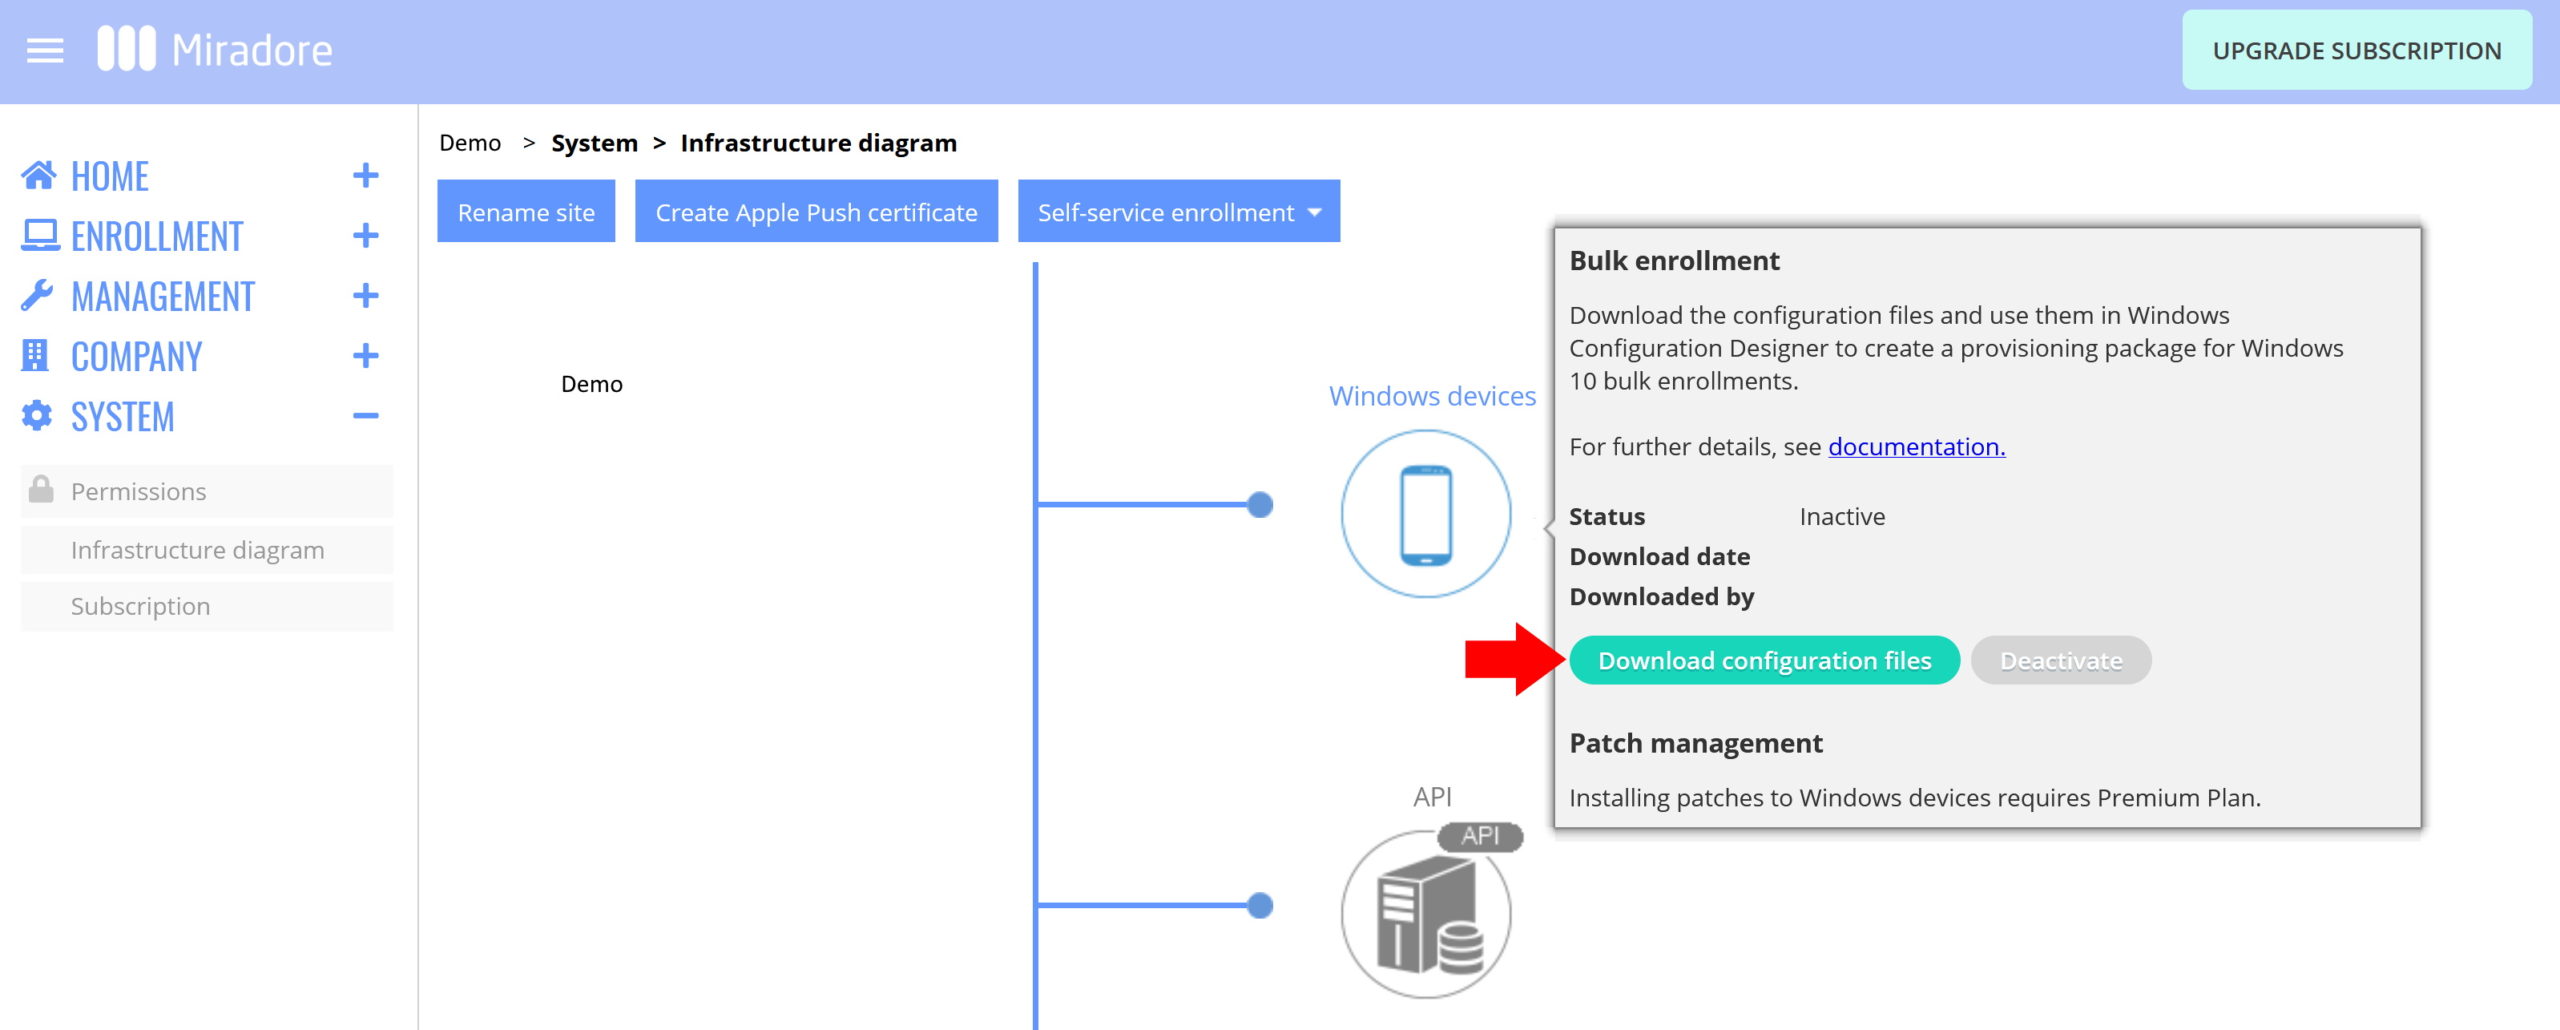
- On your Miradore site, go to System > Infrastructure diagram, hover your mouse over the Windows devices icon, and Download configuration files for creating the bulk enrollment package.
- Unzip the downloaded file.
- Launch the Windows Configuration Designer software and choose File > Open and then select the file Miradore.icdproj.xml.
- Then choose Export > Provisioning package and follow the instructions to finalize the creation of a PPKG file. You can find the provisioning package from the same folder where you saved the unzipped files.
How to enroll devices using the provisioning package?
- Distribute the PPKG file to the devices that you wish to enroll in Miradore. You can move the file for example using a USB stick or a network drive. You can use the same package for all Windows 10 or Windows 11 devices.
- On the devices, double-click the PPKG file to run it. This step requires administrator rights.
- Alternatively, you can run the file in administrator PowerShell with the following command (Replace <sitename> with the name of your Miradore site):
Install-ProvisioningPackage -PackagePath <sitename>.ppkg -QuietInstall
- Alternatively, you can run the file in administrator PowerShell with the following command (Replace <sitename> with the name of your Miradore site):
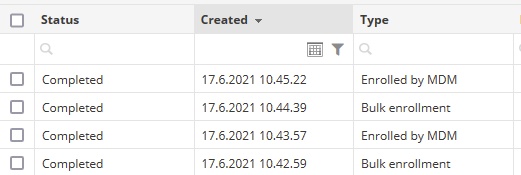
- The enrollment can take up to a few minutes, but you should soon see the enrollment status on the Enrollment > Enrollment log page in Miradore.

- When the device appears to Miradore, remember to assign a user for the device.
Important information
- Windows bulk enrollment supports devices with a 64-bit version of Windows 10/11 Pro or above
- During the bulk enrollment, Miradore first adds an MDM Work account to the device, and after that, the Miradore Client app gets installed on the device automatically
- Miradore does not assign devices to any user during the bulk enrollment by default
How to deactivate a bulk enrollment provisioning package?
Administrators can deactivate the provisioning package at any time using the Deactivate button, which is located in the Infrastructure diagram, under the Windows devices icon. After deactivation, the package cannot be used for enrolling new devices, but previously enrolled devices will remain managed.
If you want to do more bulk enrollments later, you need to create a new provisioning package as described above.
Please note that creating a new provisioning package will also automatically deactivate the previously created packages.
Have feedback on this article? Please share it with us!
Previous Article:
« Enrolling Windows 10/11 devices (full enrollment)
Next Article:
Enrollment instructions for Windows 10 and Windows 11 users »