This article helps you to get started with managing your devices in Miradore. If you are not yet familiar with Miradore, please read what is Miradore and what device management capabilities Miradore offers.

1. Register to Miradore and create your company site
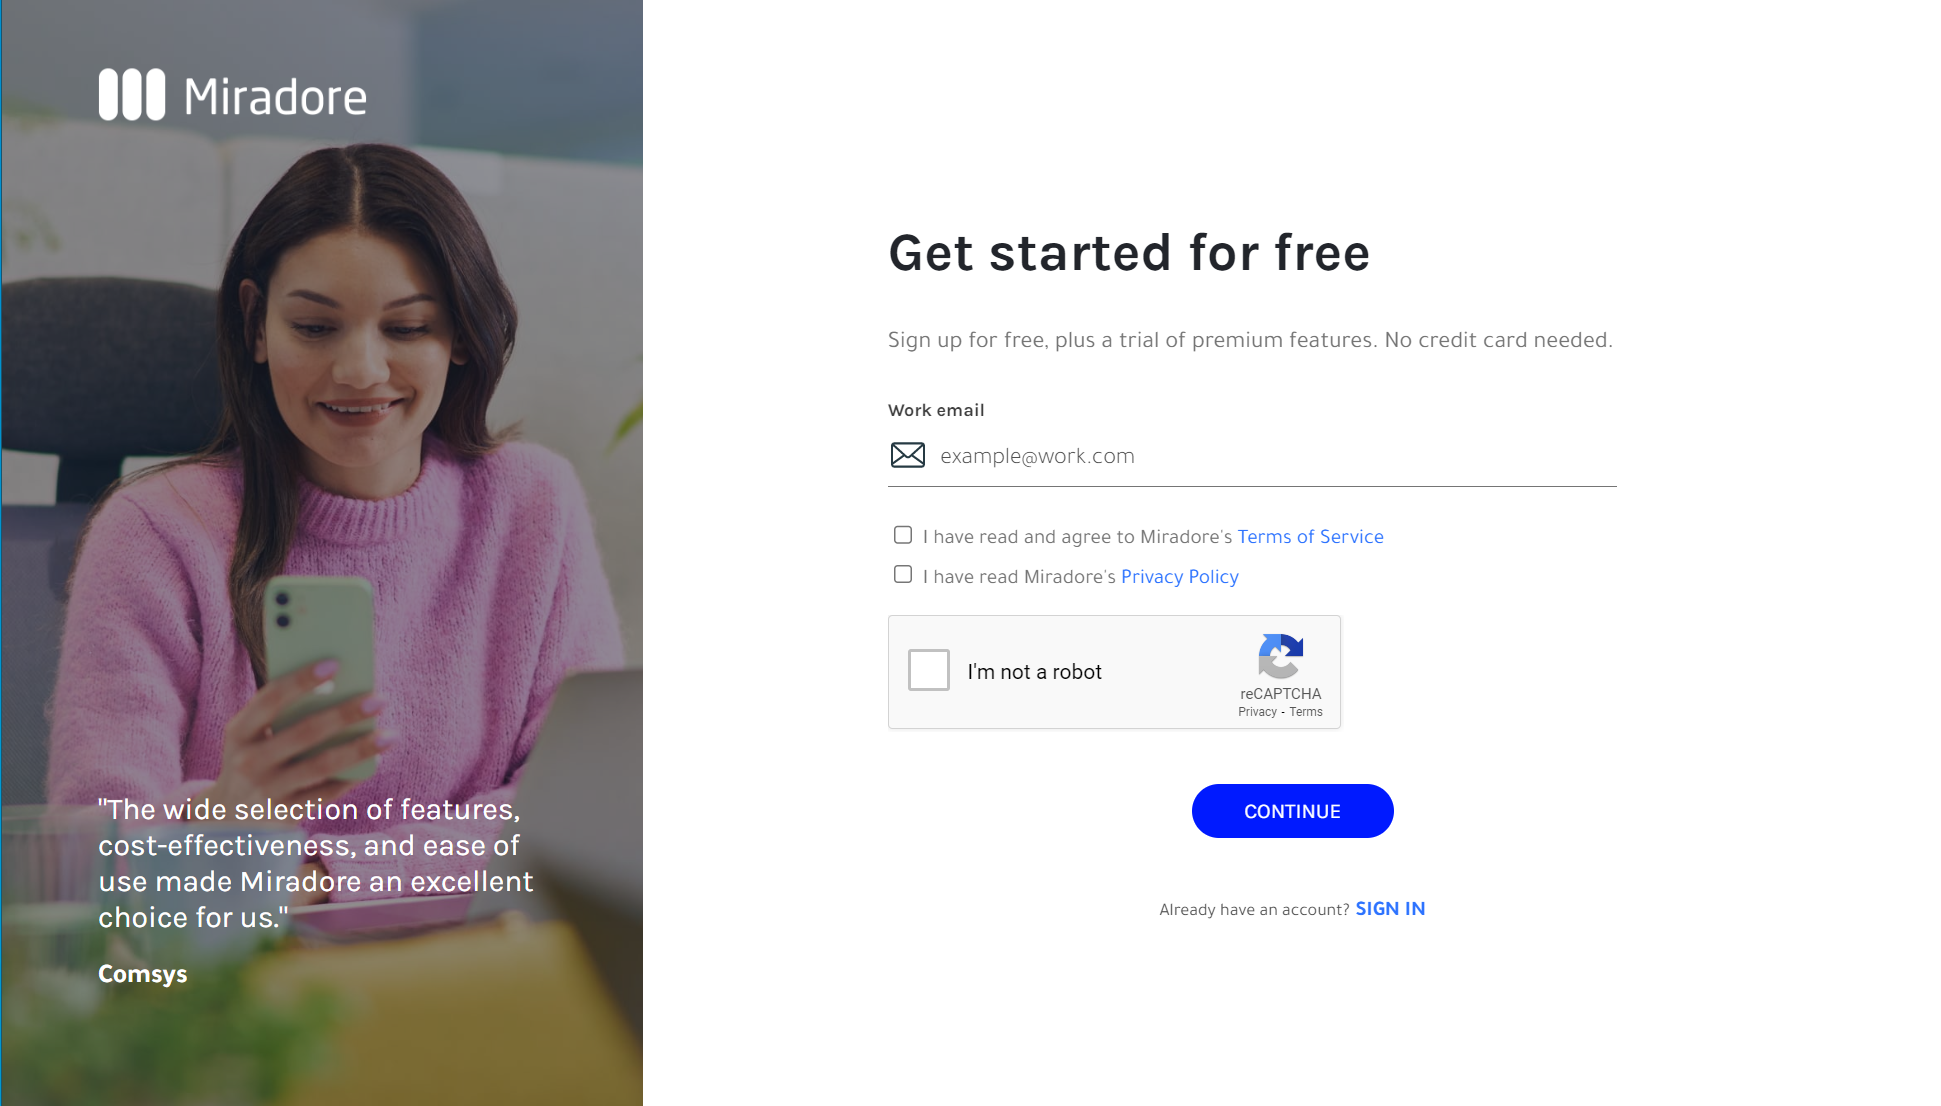
Start by navigating to: https://online.miradore.com/login/register. You can access to the registration page also from miradore.com by clicking Get Miradore free.
You will be first asked to enter your work email. Make sure to read and agree to the Miradore Terms of Service and Privacy Policy before proceeding.
Next, you will create your Miradore account. Fill in the required organization data and create a password for the account. See descriptions below the picture.
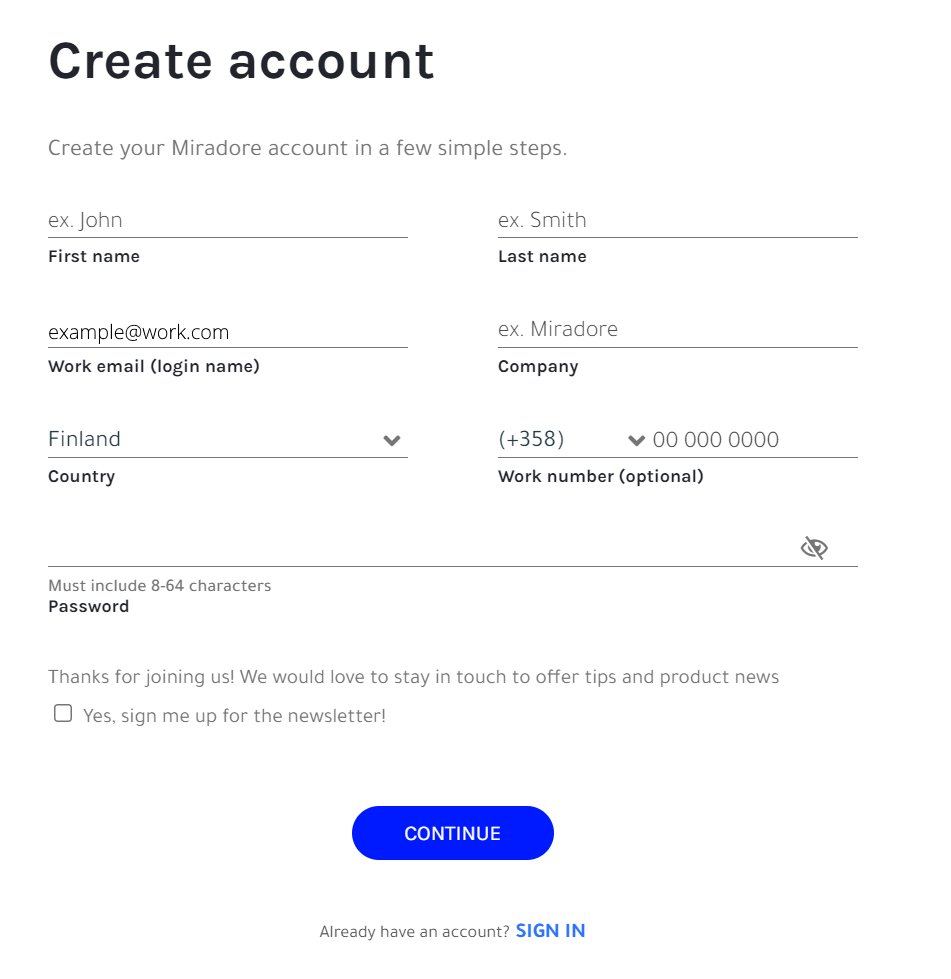
- Your name. You will act as an administrator of the Miradore device environment you create.
- Work email (login name), which is used as a username for your company site in Miradore.
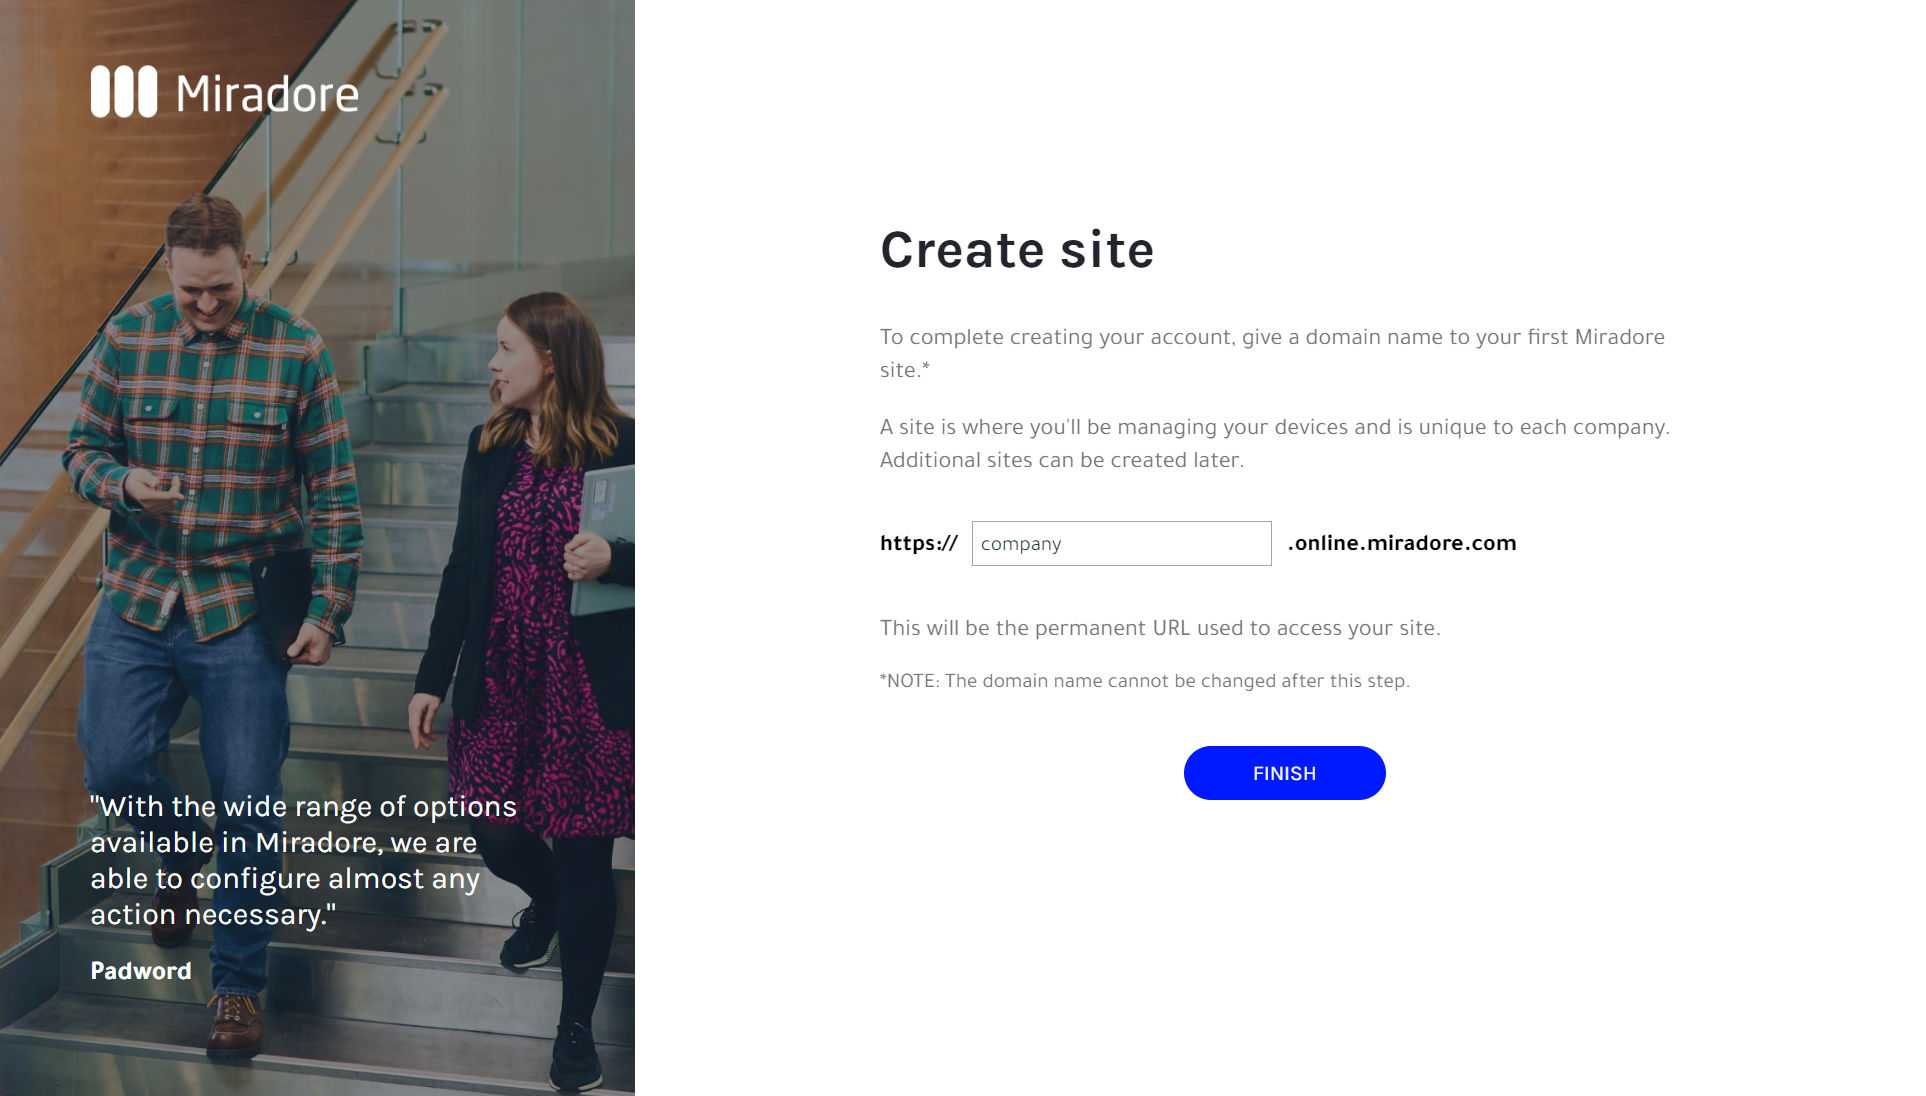
- Company, which is used for naming your Miradore site. For example, the company "Trestacom" will get the site address: https://online.miradore.com/trestacom.
- Country, which will be used for your site settings.
- Desired password for accessing your company site.
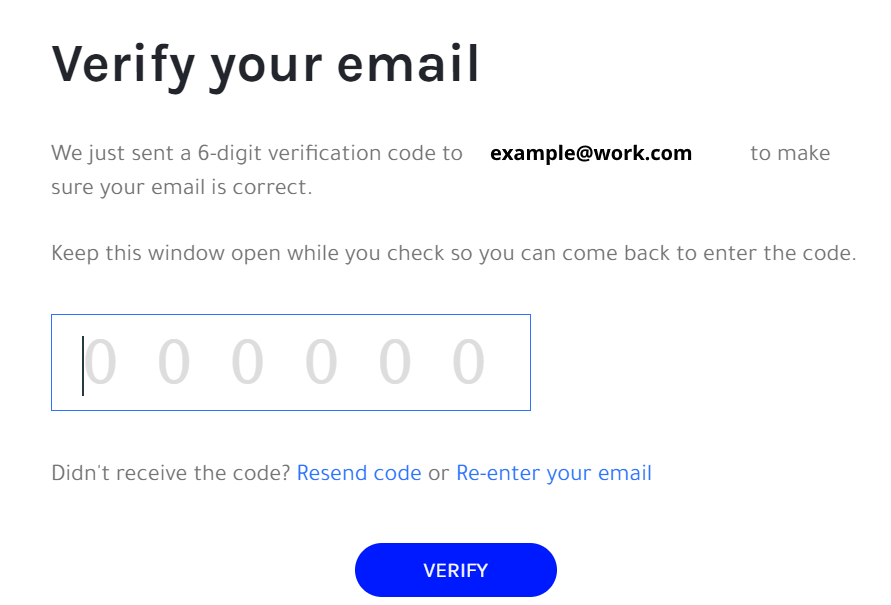
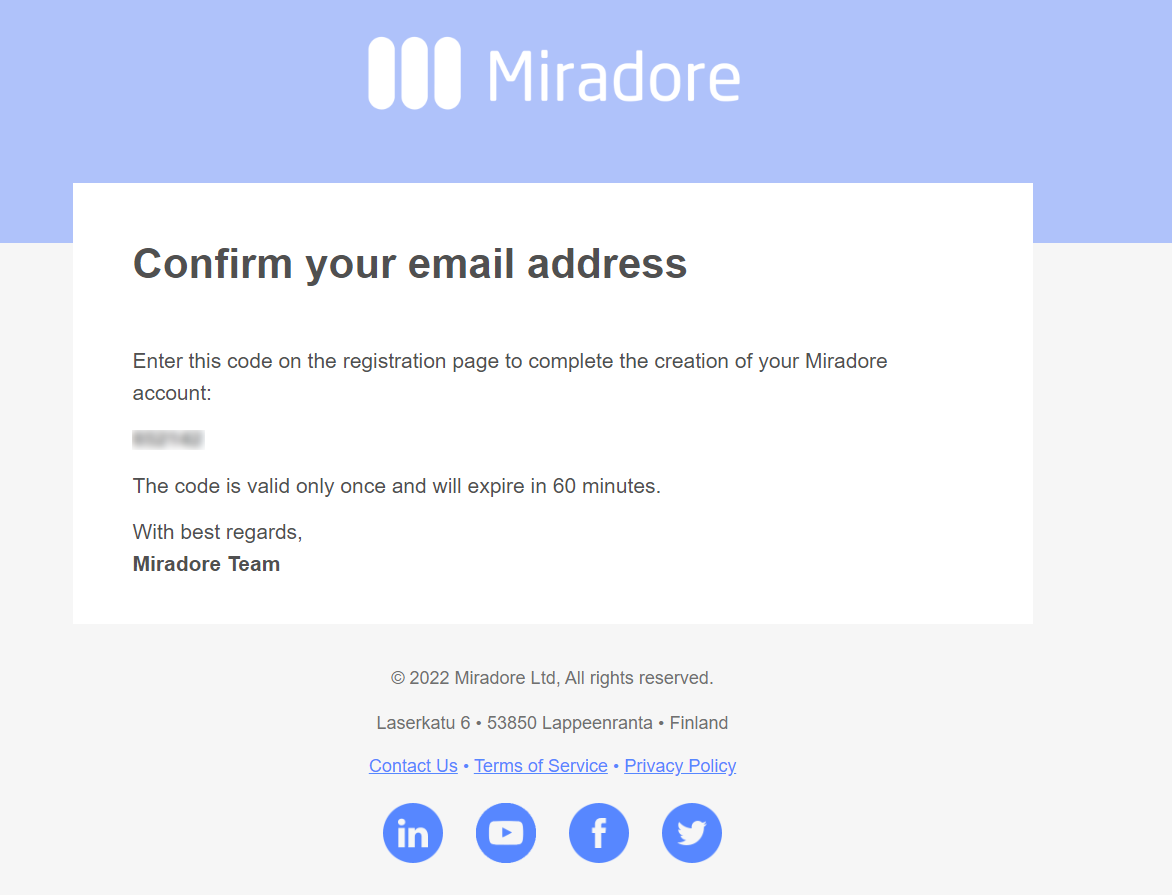
After you have added the details, you need to confirm you email address with the verification code sent to the given email.
The final step is to confirm the domain name for the Miradore site. By default, the domain will be the company name you gave at the step 2 but at this step, you may still change it, if needed.
2. Welcome to Miradore
After the registration, you are will be taken to the Welcome page on your new Miradore site. This page is designed for our users to smoothly get started with Miradore.
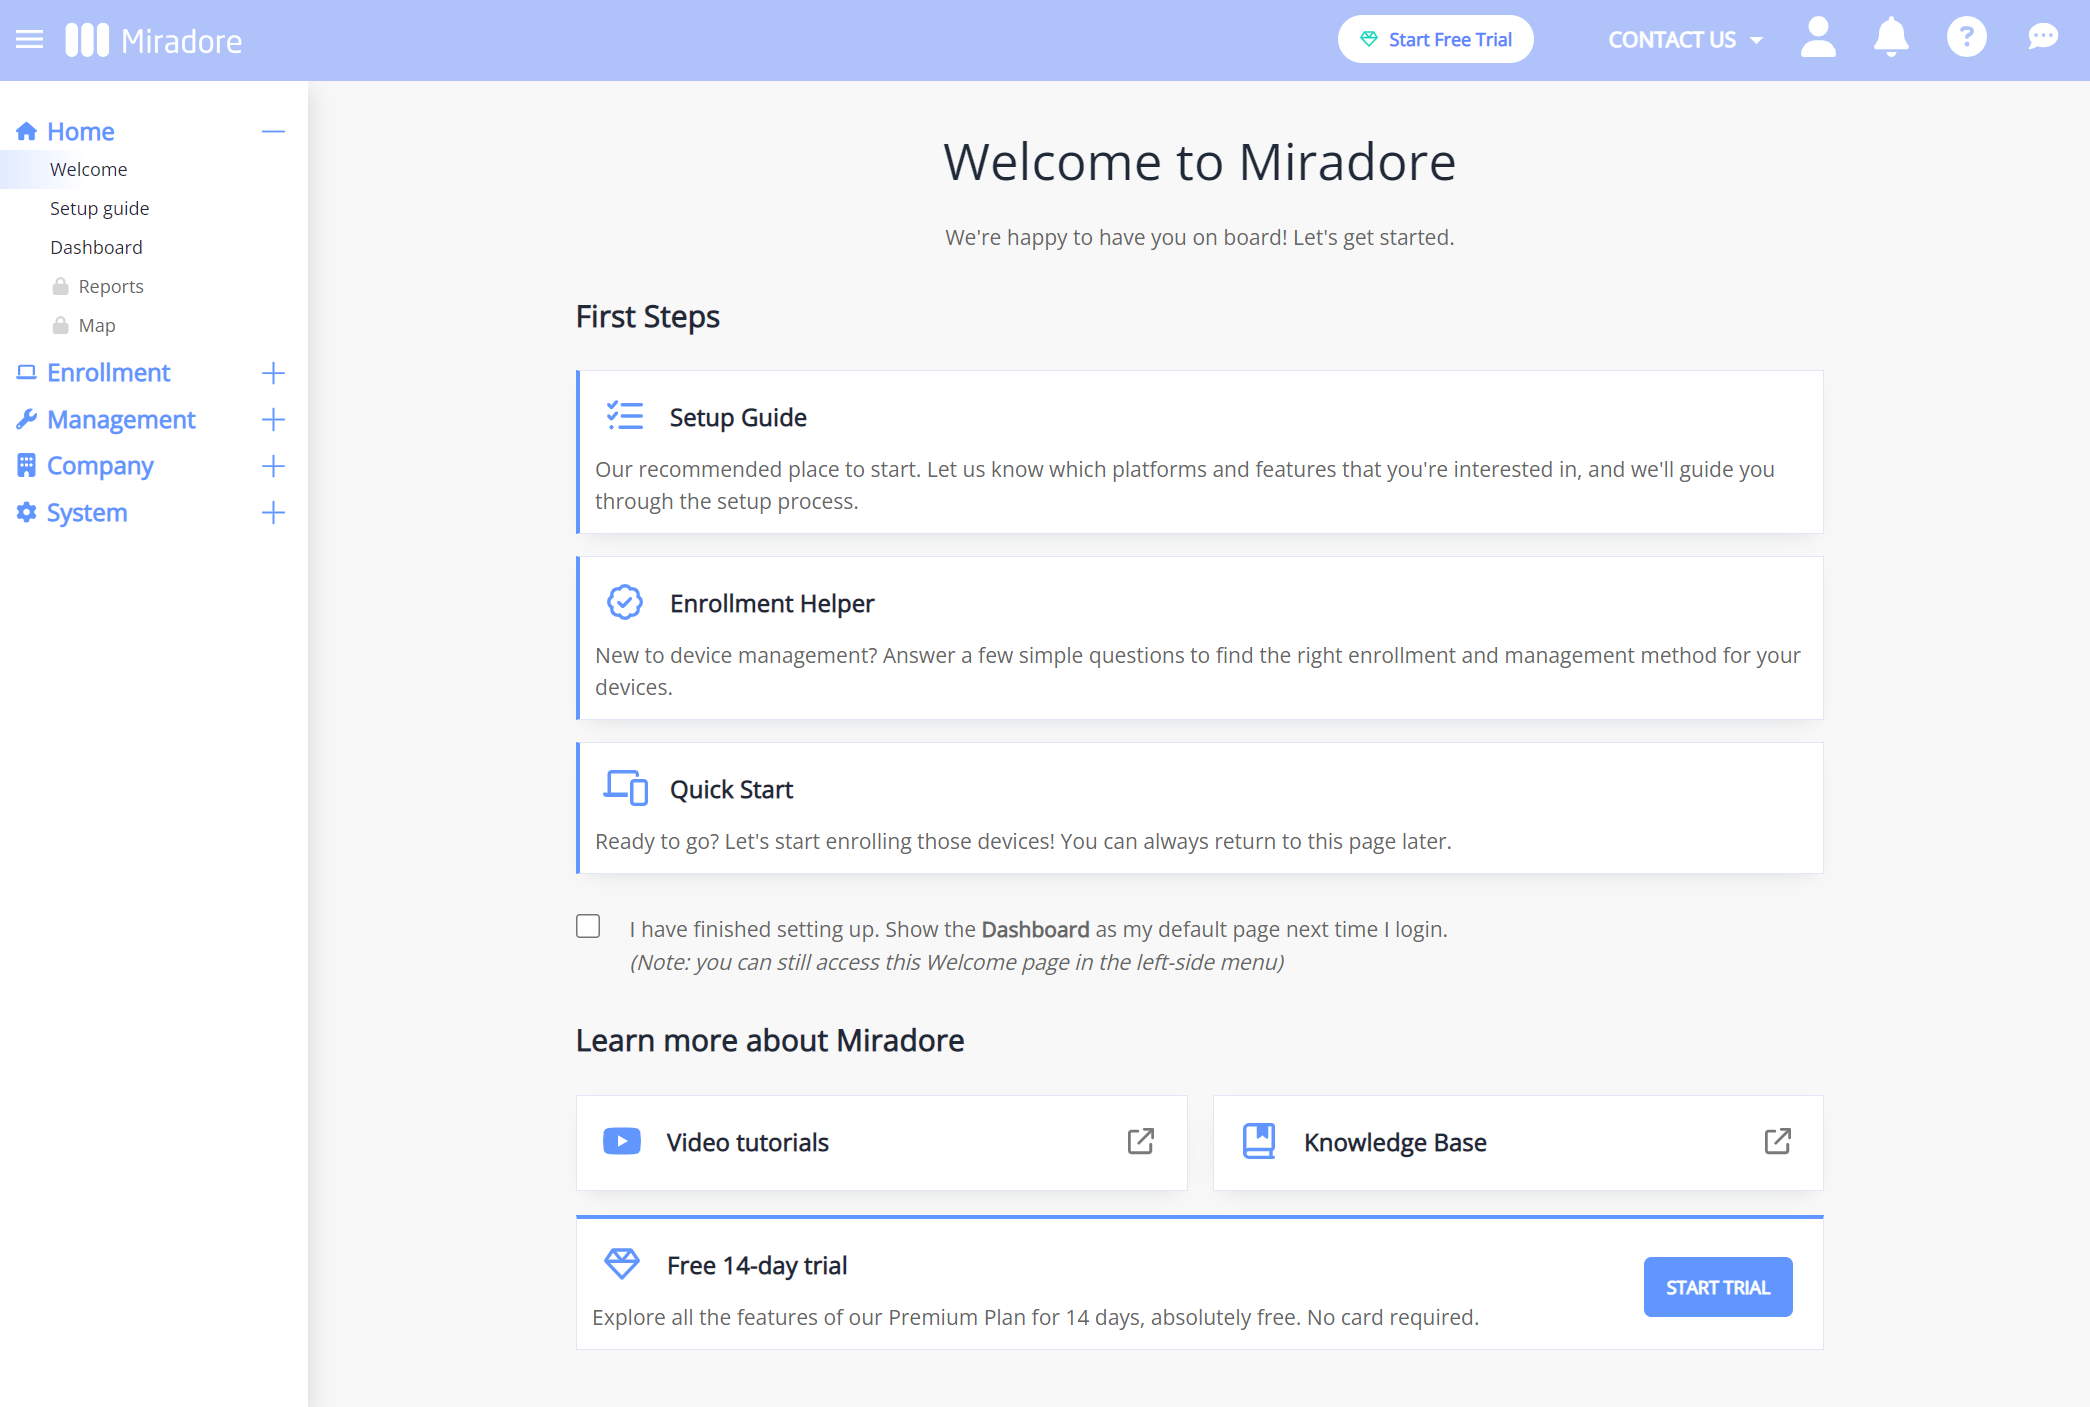
From the Welcome page, you can easily start setting up your device environment and as well as find guidelines when choosing the right management method for your organization's device.
3. Activate your free Premium plan trial
Many basic device management features of Miradore are available free of charge, for an unlimited number of devices. There is also another option for those users who want to take full advantage of Miradore. With the free Premium plan trial, you get to try all the features of Miradore for 14 days, without any commitments.
Some features included in the Premium plan:
- Advanced management features of Android Enterprise, such as setting restrictions with configuration profiles
- Automation with business policies
- Application management
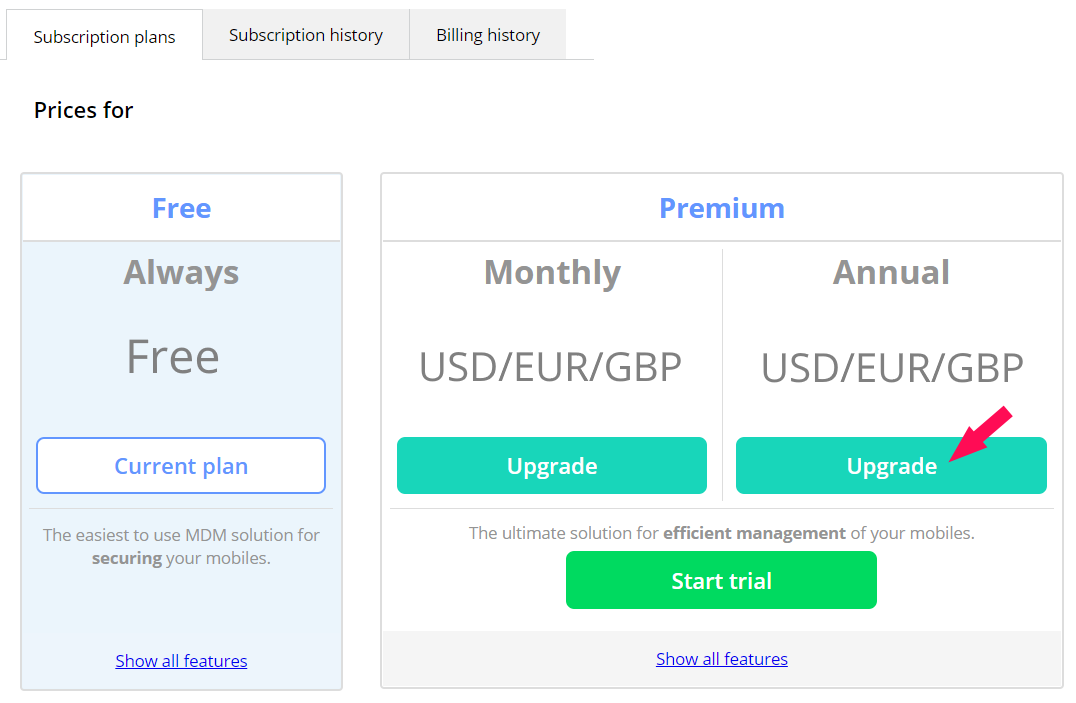
To benefit from all the features, activate the Premium plan trial from your Miradore site System > Subscription (you can also access the page from the Upgrade subscription button at the top). The activation does not require any credit card information and the trial period will automatically end after 14 days. After the trial period, you can either extend the trial by seven days, upgrade your site or continue using the free plan.
4. Add device users
In order to have a reliable device registry, it’s important to assign devices to their users. Devices can be linked to their users when enrolling in Miradore, and therefore, it is recommended to add users to your site before the device enrollment.
If you are using the Android Enterprise solution, device users have to be in the system, in order to create the managed Google Play account. This account is essential for application deployment to work properly on Android devices.
The first user is created with the credentials given when the site is registered. To add a new device user, go to Company > Users in Miradore.
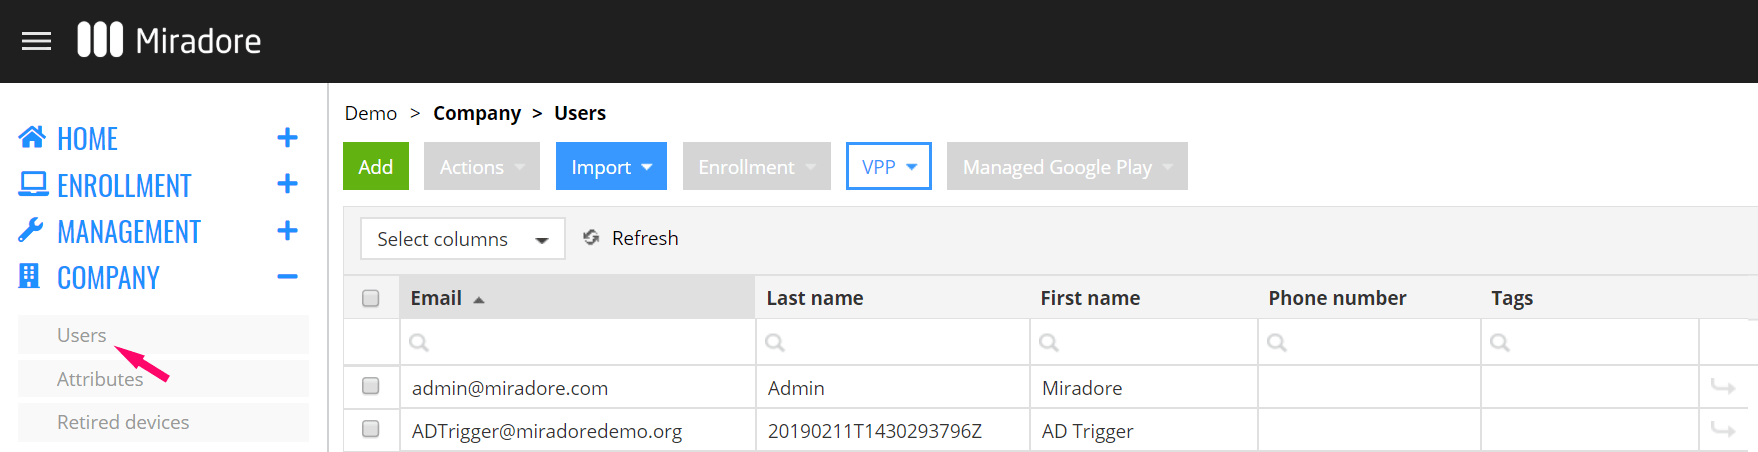
- Press the Add button.
- Type in the user details. Please make sure you have entered your email address and phone number correctly since these can be used for enrolling devices to your site.
You may later add more users manually to Miradore, or use some other available method, like CSV file import, to add users.
5. Device enrollment
Enrolling your devices to Miradore is the first step in beginning to manage them. The enrollment process connects devices to the system by installing an agent or MDM profile on them. Miradore supports several enrollment methods and the enrollment steps may vary between the different device platforms. If you are unsure about the right enrollment and management method for your organization's devices, you can utilize our Enrollment Helper when making the decision.
The most common way to enroll devices in Miradore is to use the enrollment wizard in Enrollment > Enroll device.
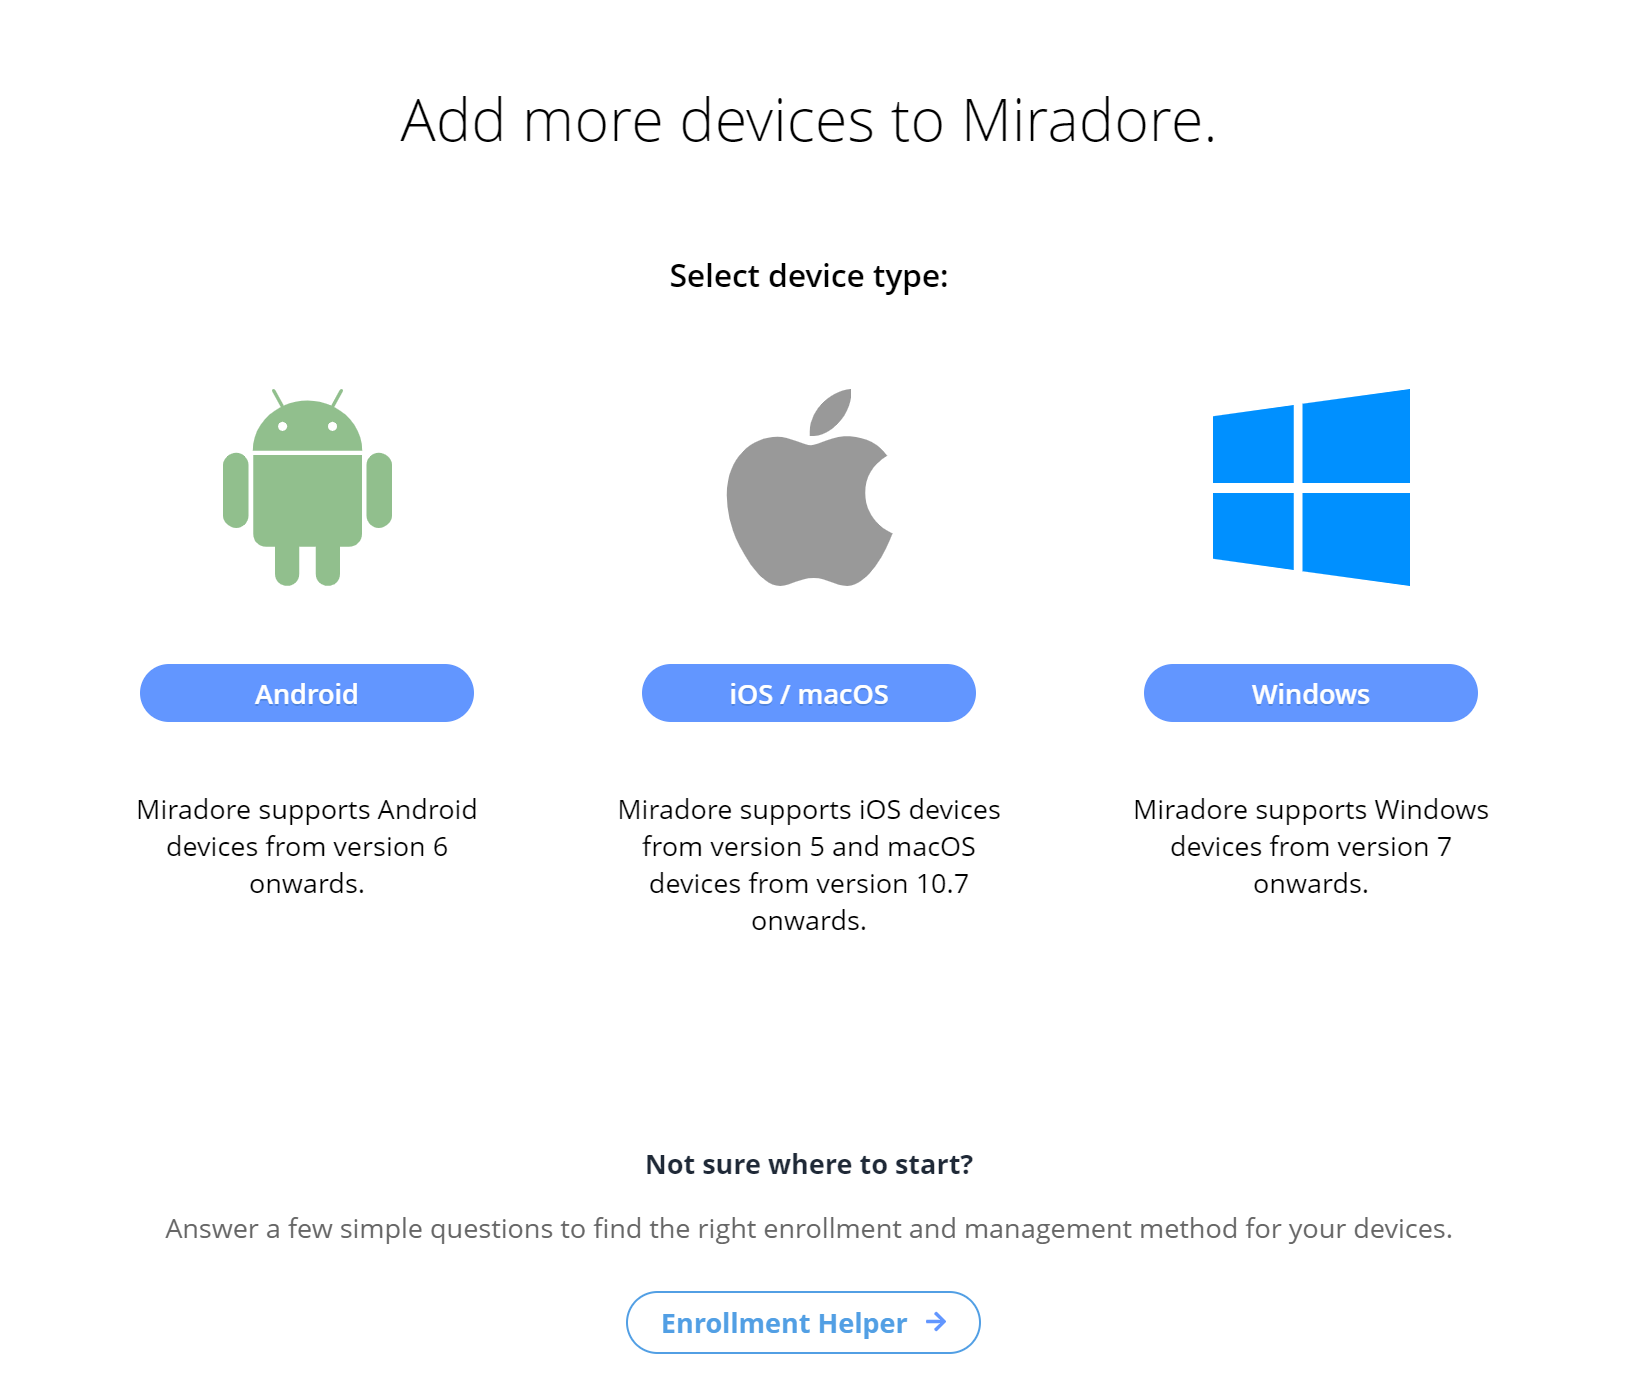
- Choose the device type by clicking the correct platform.
- Follow the instructions in the wizard in order to enroll the device to Miradore.
6. Next steps
After these five steps, you are ready to start managing devices with Miradore. You can do various things with your new Miradore site:
- Import new users and enroll more devices to the system.
- View the device inventory reports
- View and update your settings in Miradore.
- Upgrade your site subscription after the Premium plan trial.
- Utilize the different device management features that Miradore offers.
Additional information:
Have feedback on this article? Please share it with us!
Previous Article:
« Tutorial videos and webinars
Next Article:
Device management in Miradore »