Dashboards provide information about the Miradore environment in a form of clear and comprehendible visual graphs and charts. This article introduces Miradore dashboards and tells what possibilities there are to modify a dashboard according to your needs.
The general layout of a dashboard
You can access dashboards from Miradore navigation menu Home > Dashboard.
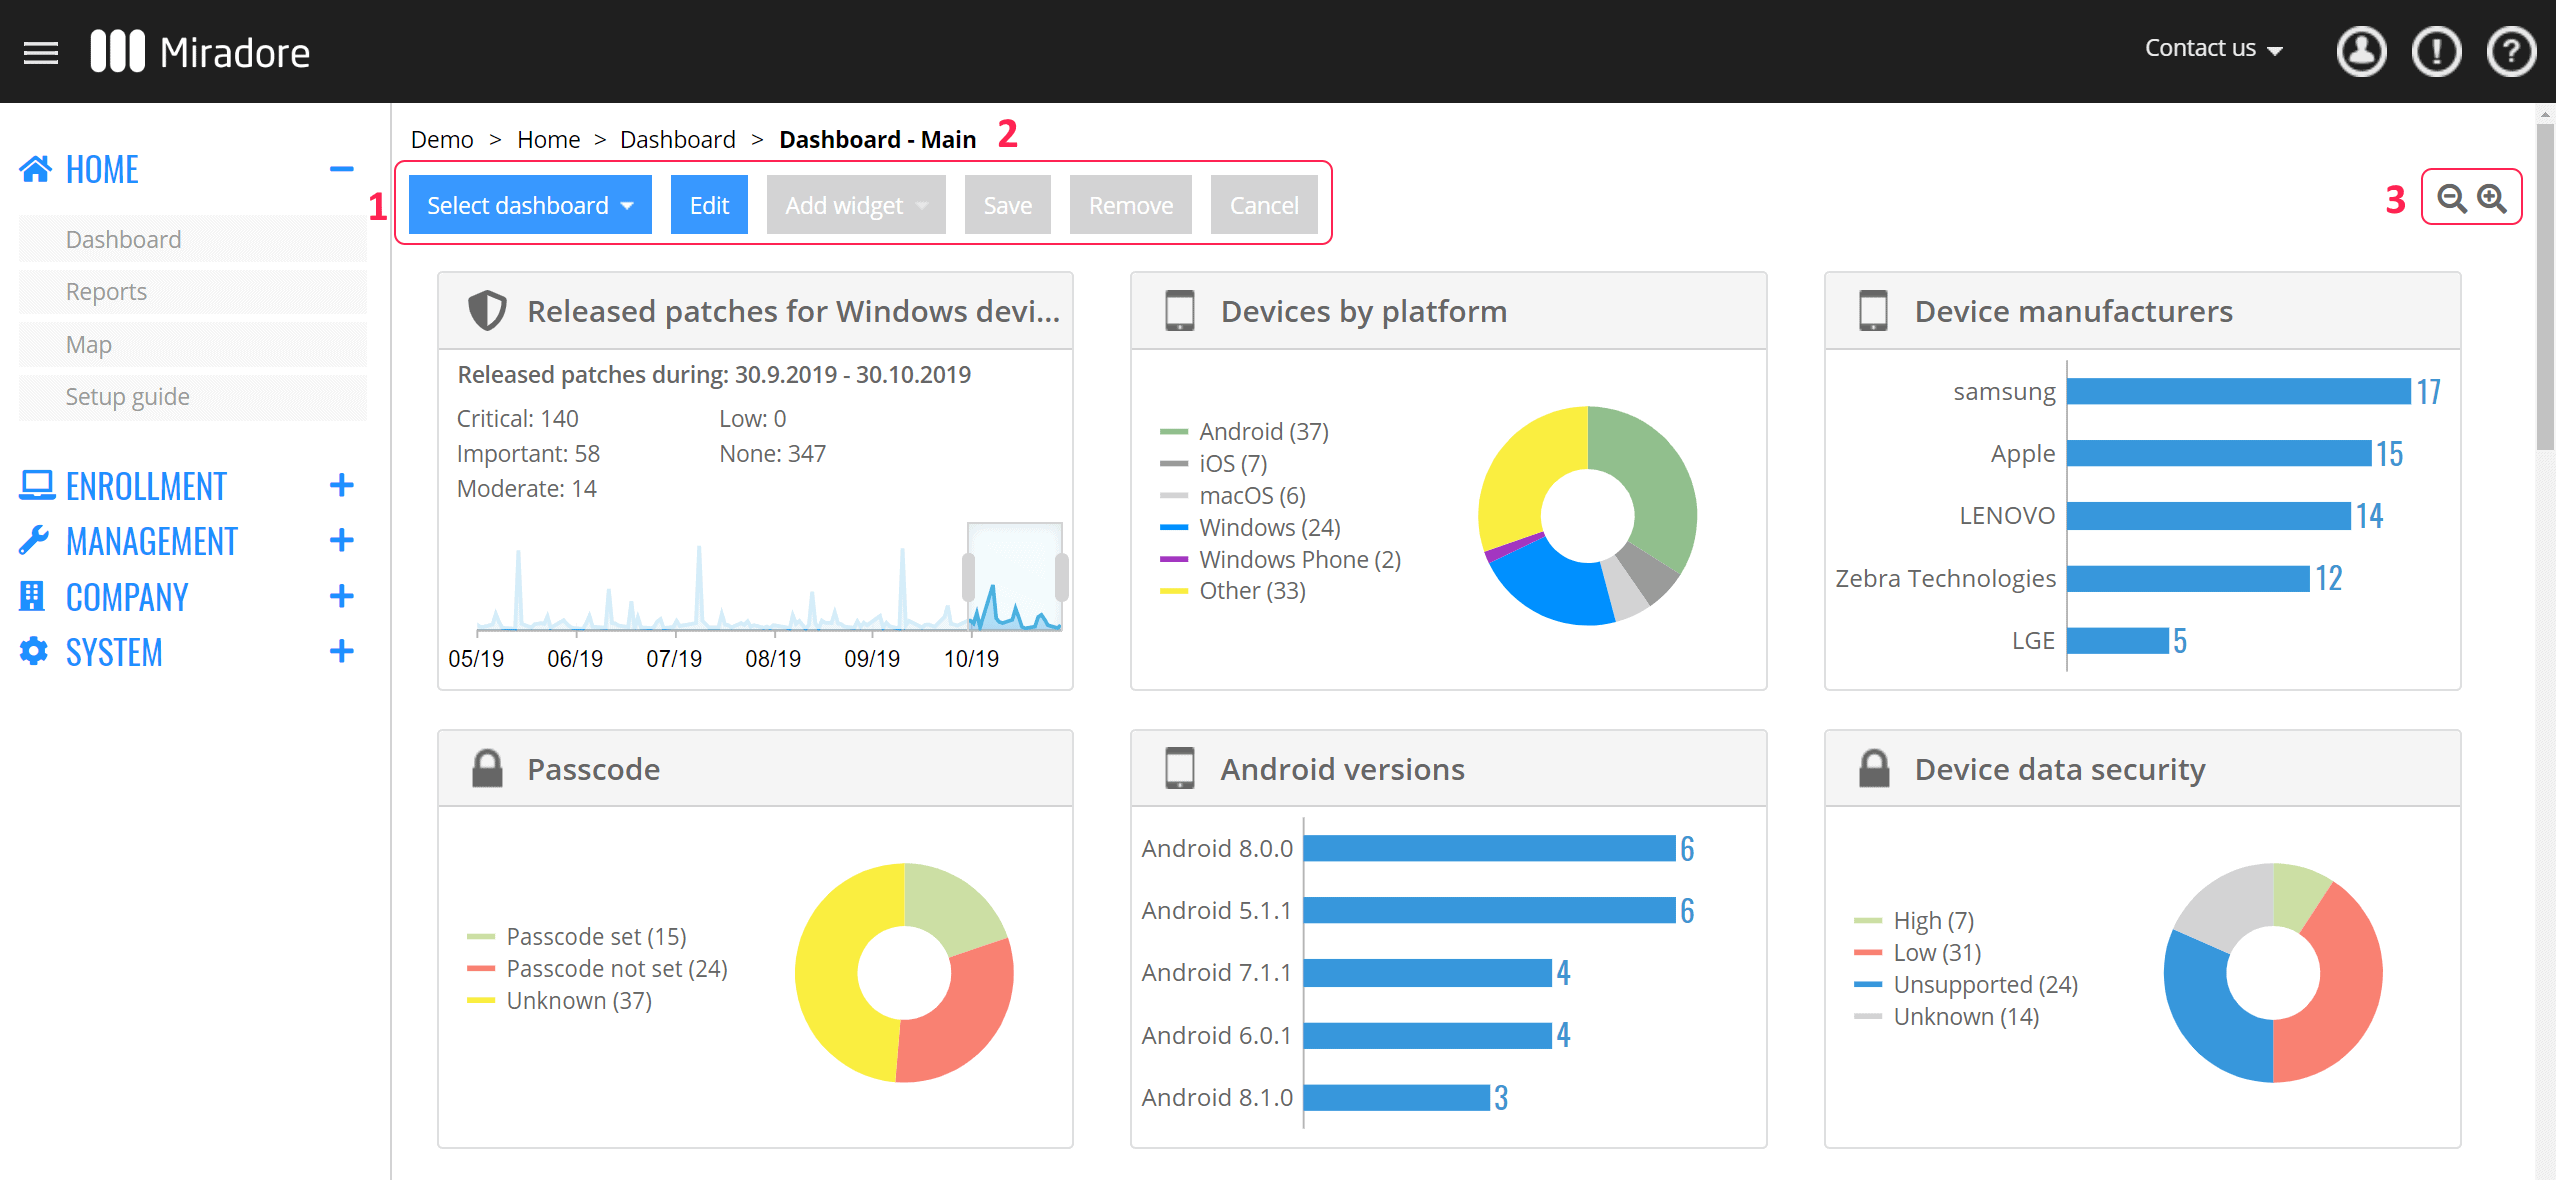
1. At the top of the screen, there are action buttons toolbar for viewing and modifying dashboards of your site.
2. From the breadcumb, you can see which dashboard is selected.
3. At the top right corner of the screen there are + and - icons, with which you can zoom in and out of the widget area and adjust the size of the widgets.
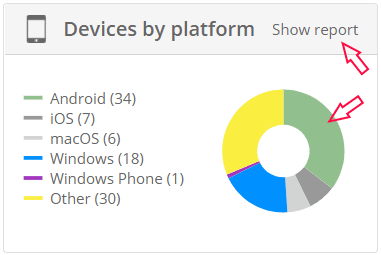
There is the possibility to see the data behind a widget by clicking on the widget's segments or the link "Show report" on the heading of the widget. Please note, that this drill-down feature is not available for all the widgets.
Modifying dashboards on your site
By default, there are four different dashboards to choose: Main, Android, iOS / macOS, and Windows. You can make the monitoring of your environment more efficient when you configure your dashboard view.
Create or remove dashboards for your site
To add a new dashboard, click "Add dashboard..." under the dropdown button Select dashboard, type the name of the new dashboard, and press enter.

To remove a dashboard, select the dashboard from the list under the dropdown button Select dashboard and click Edit to activate Remove button.
Add, remove and rearrange widgets
You can modify a dashboard according to your needs also by adding and removing widgets. Select the dashboard you want to edit and click Edit.
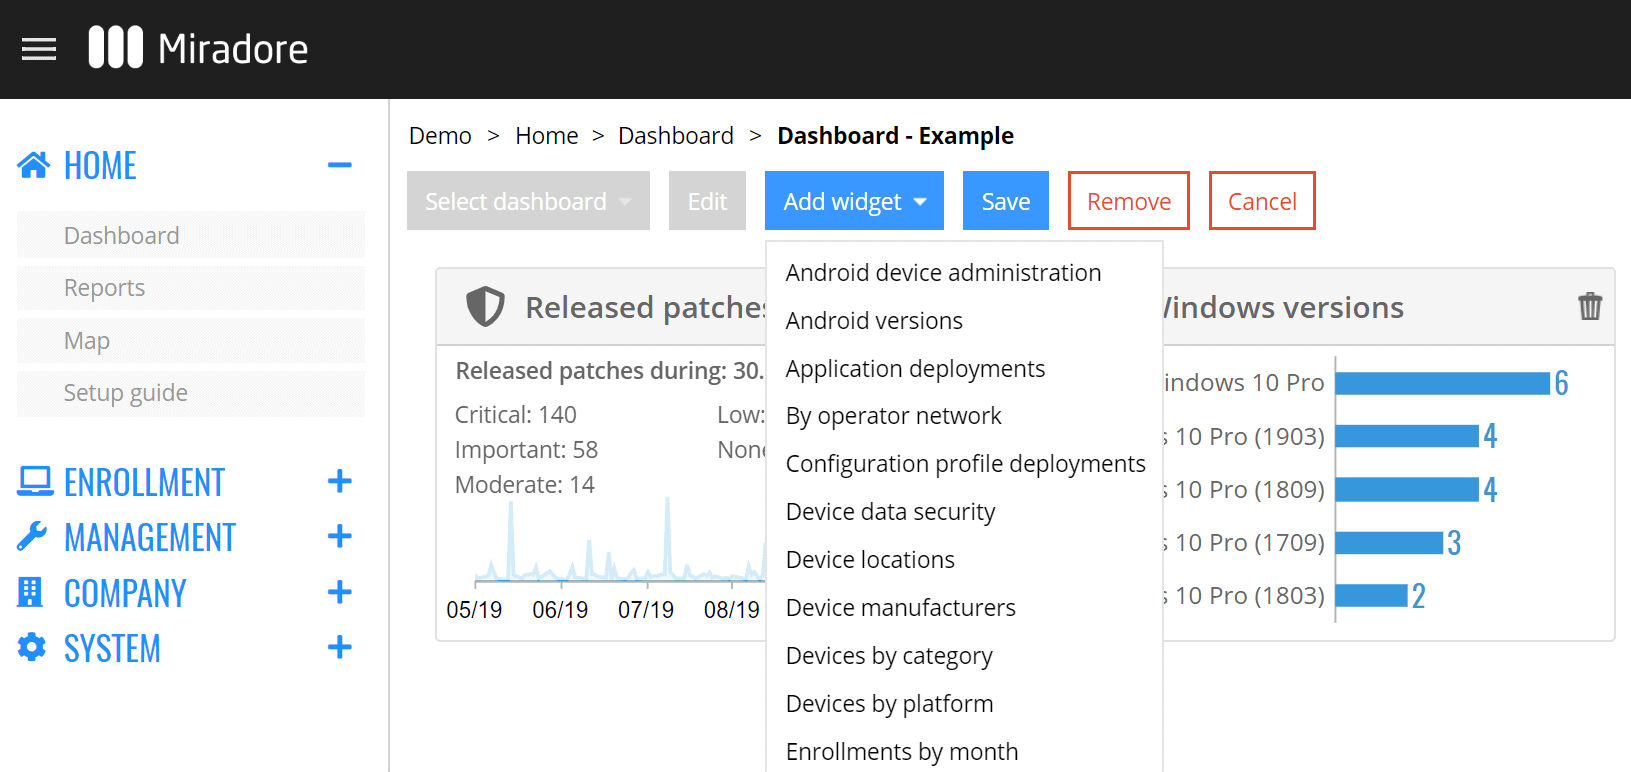
Add widgets to a dashboard from the list under the dropdown button Add widget and remove unwanted widgets by clicking the trashcan icon at the top right corner of the widget.
It is possible to rearrange widgets on a dashboard. You can organize the widgets by simply dragging and dropping them. When you are dragging the widget on the dashboard you can see the marks which will help you to place the widget.
Commit your changes by pressing Save.
Have feedback on this article? Please share it with us!
Previous Article:
« Managed device polling intervals and online statuses
Next Article:
Creating custom reports »