
Learn how web apps differ from native mobile apps and websites, and how to use Miradore to distribute shortcuts to web apps or regular websites on your managed Android devices.
About web applications
A web app is an application that runs on a web server instead of running locally on the device. It is basically a website that runs in a browser and is designed to be accessible on all devices.
About progressive web apps (PWAs)
A progressive web application is an advanced version of a regular web app. It feels like a native mobile app to the user and has access to the majority of the device features, unlike regular web apps.
The difference between PWAs and native mobile apps
PWAs are delivered on the device over the web. The PWAs are basically made of app-imitating web pages, and therefore, they require a lot less storage space on the devices than native mobile apps. Thanks to the browser-based nature of PWAs, they don't need to be updated by the user like native apps, but instead, it is enough to have a shortcut or link to a PWA from the device, and the vendor updates the app centrally.
PWA vs mobile website
What differentiates PWAs from mobile websites is their ability to keep functioning in offline mode and utilize the device functionalities, such as push notifications and the camera, like a native app. In contrast to mobile sites, PWAs also have an icon on the device's home screen which makes PWAs easily accessible and present to the device users.
Read more about web apps on Android devices in the Android Enterprise Help documentation.
Web apps in kiosk mode
Miradore's legacy Kiosk mode configuration profile does not support web applications as kiosk apps. To use web apps in kiosk mode, use the Home screen & kiosk mode configuration profile.
Create web apps for Android devices
Miradore enables administrators to deploy PWA or website shortcuts to any Android Enterprise-managed device through managed Google Play Store.
Requirements
To create shortcuts to websites or web apps on managed Android devices, the following requirements must be met:
- You must have a Miradore Premium or Premium+ subscription, or an active trial.
- You must have Administrator access on your Miradore site.
- Managed Google Play Enterprise must be configured.
- Devices must have the Google Chrome browser app installed and set as the default browser.
Create and add a web app to Miradore
- Navigate to Management > Applications and select Add > Android application.
- Select Managed Google Play store, then select Next.
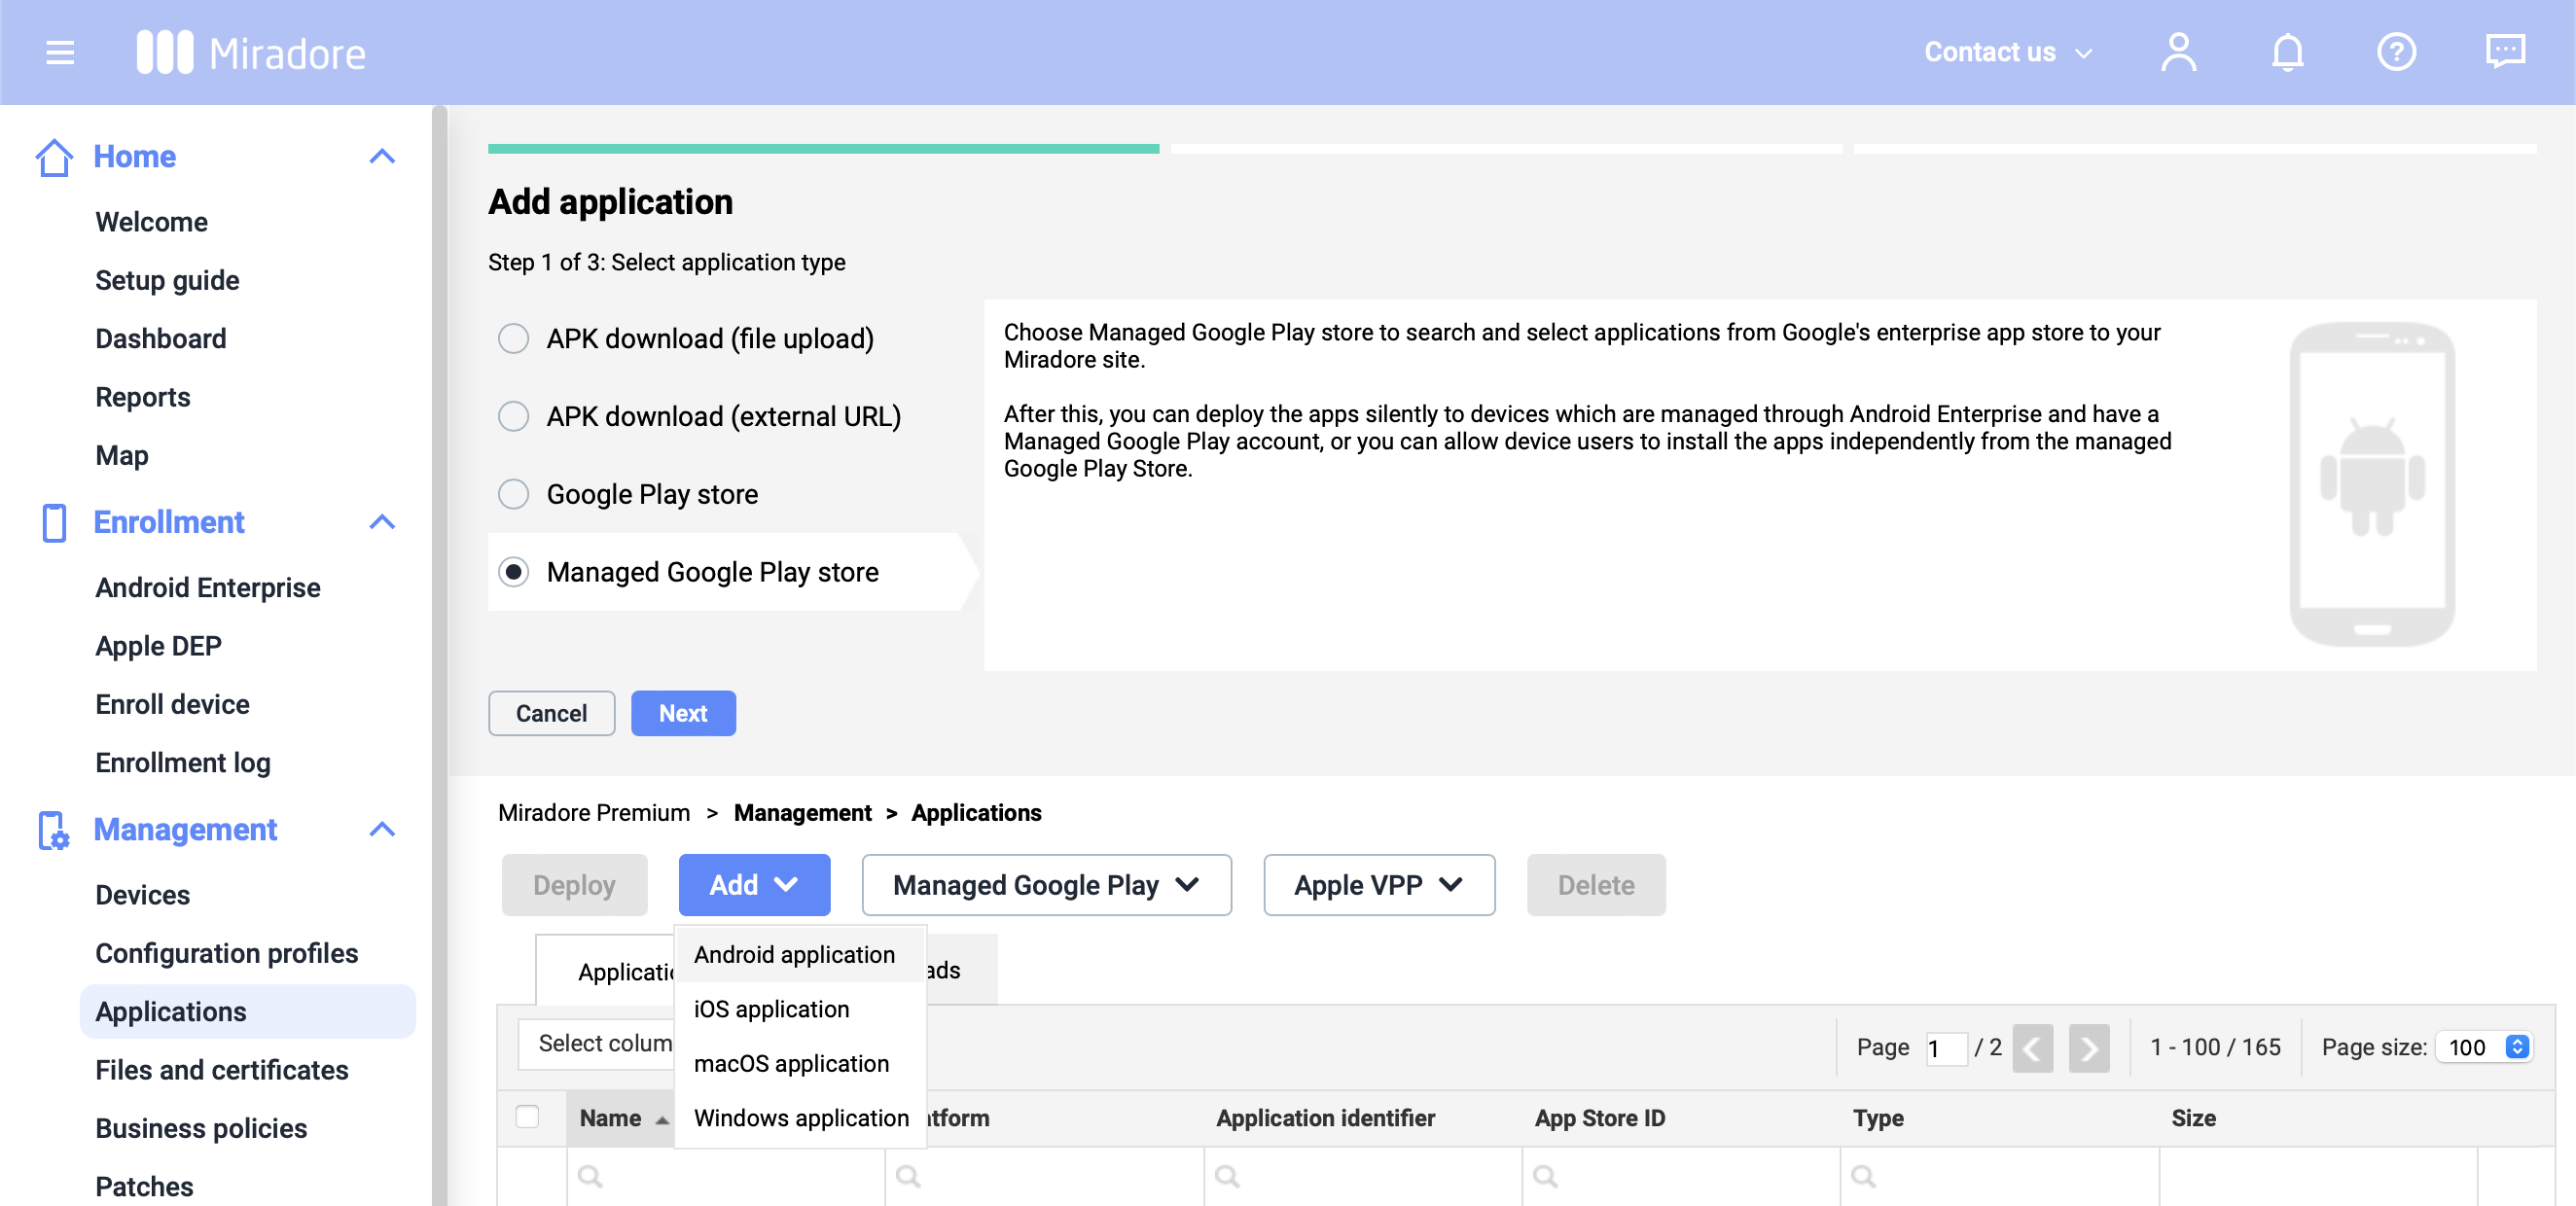
Result: The Google Play iFrame opens. - On the left sidebar, select Web apps.

- Select the + icon in the bottom-right corner to create a new web app.
- Configure the web app as follows:
- Title: Enter the name of the web application as it will appear on the device's home screen and in Miradore.
- URL: Enter the address of the progressive web app or website that launches when the device user taps on the icon.
- Display: Choose the display mode in which the browser will show the website's contents. See Google's documentation for details.
- Optional: Icon: Upload an image that will appear as the app's icon on the device. If no image is uploaded, a default icon will be used.
Note: Your web app must comply with Google Play Developer Program Policies. For example, if the title or icon you provide does not comply with the policies, your app may not be published.
- Select Create.
Note: It can take up to 10 minutes for the web applications to be published. If the app is being published or if the publishing fails, the web app page lists the app as not available.
Result: The Web apps menu opens and the newly added app appears in the list.
Note: The web app stays in Not available yet status until it is successfully added to the managed Google Play store. - Select the web app you want to deploy on your managed devices, then click Select app in the lower-right corner.
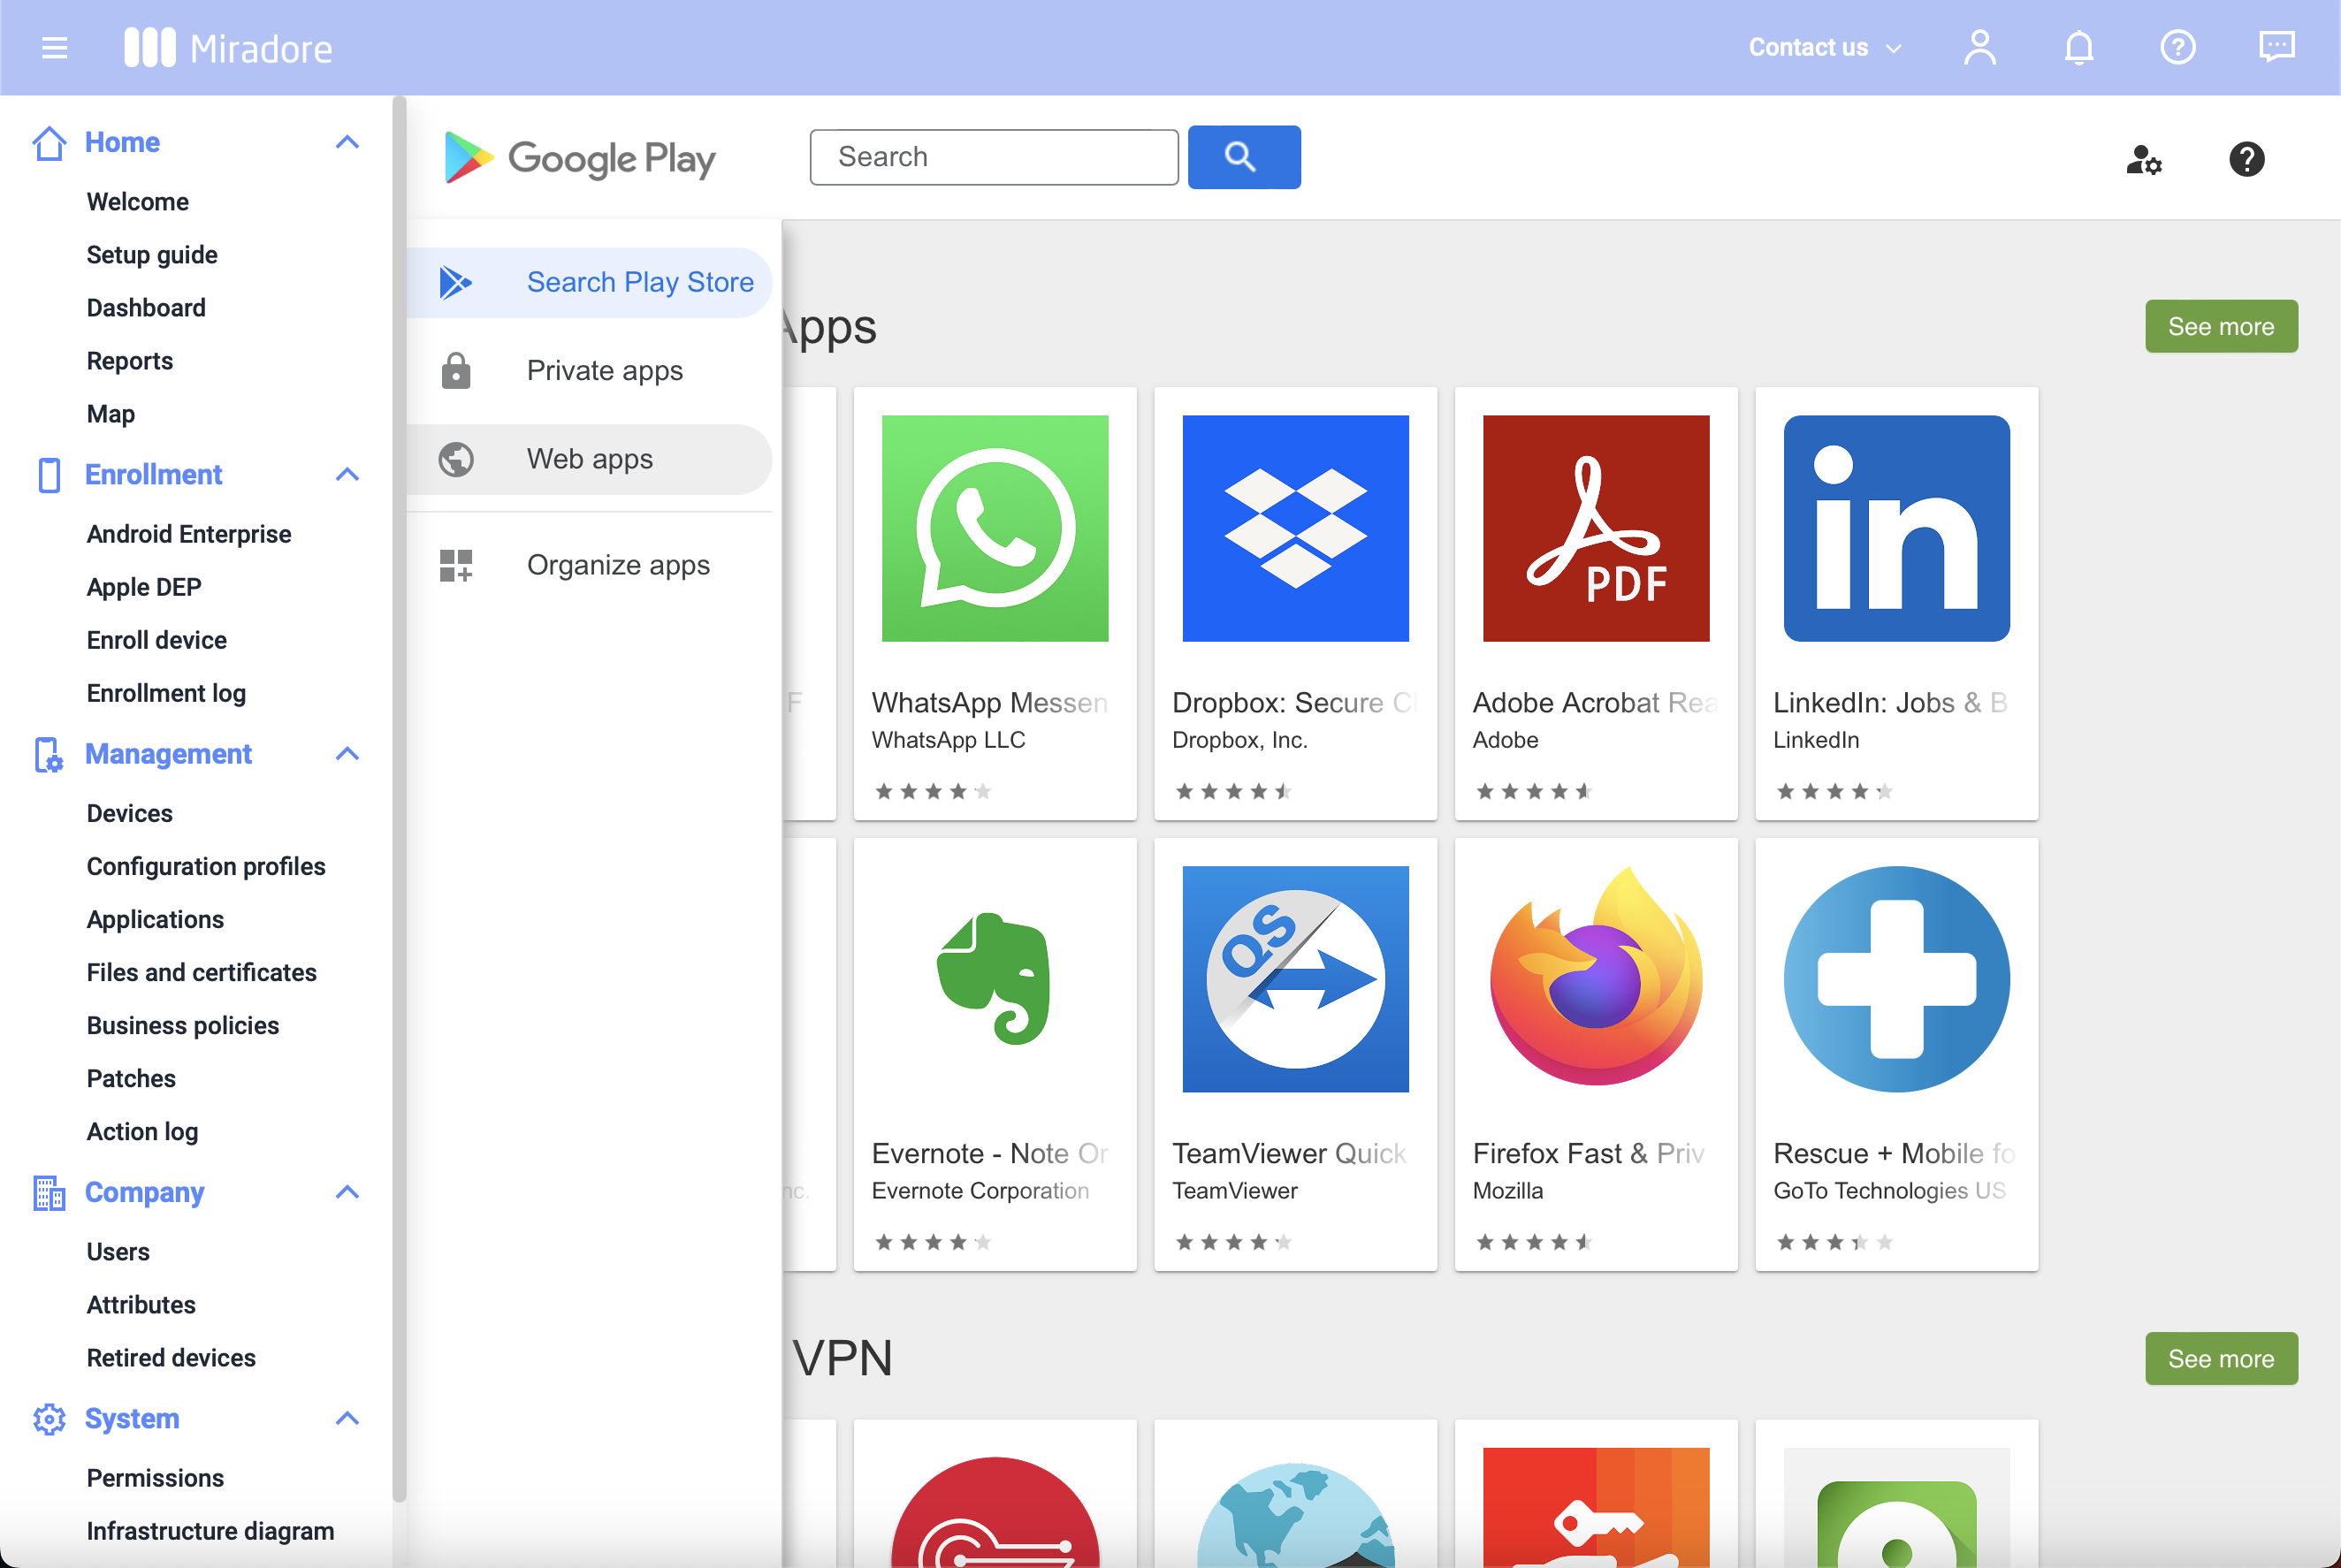
Results: The web app is added to the list of available applications in Management > Applications and is ready to be deployed.
Example: Add a location web app to the home screen
Easy access to a specific location on the map can be added to managed Android devices using an Android web application. When the web app is opened, the Google Chrome browser opens, which redirects to the navigation app, showing the specific location on the map.
- Deploy the Google Chrome browser and a navigation app to the managed device.
- Navigate to Management > Applications and select Add > Android application.
- Select Managed Google Play store, then select Next.
- On the left sidebar, select Web apps.
- Select the + icon in the bottom-right corner to create a new web app.
- Configure the web app as follows:
- Title: Enter the name of the web application as it will appear on the device's home screen and in Miradore.
- URL: Enter the location's URL in the navigation app. The URL structure differs between different navigation applications. As an example, the URL for GoTo's headquarters in Boston, Massachusetts is
https://www.google.com/maps/search/?api=1&query=GoTo%2C+Boston%2C+MAbased on the Google Maps URL structure. Check your navigation app's exact URL parameters in the developer's documentation. - Display: Choose the display mode in which the navigation application is displayed.
- Optional: Icon: Upload an image that will appear as the app's icon on the device. If no image is uploaded, a default icon will be used.
- Select Create.
Result: The Web apps menu opens and the newly added app appears in the list.
Note: The web app stays in Not available yet status until it is successfully added to the managed Google Play store. - Select the newly created web app, then click Select app in the lower-right corner.
- Deploy the web app to your managed devices.
Results: The web app is placed on the home screen. When opened, the web app opens Google Chrome and redirects to the navigation app, showing the configured location on the map.

Edit the details of a web app
- Navigate to Management > Applications and select Add > Android application.
- Select Managed Google Play store, then select Next.
Result: The Google Play iFrame opens. - On the left sidebar, select Web apps.
- Select the web app whose details you want to modify, then select Edit at the bottom.
- Implement your changes, then select Save in the lower-right corner.
Result: The application's details are updated and will be applied to the managed devices.
Note: Updates usually take effect in minutes, but they might take up to 24 hours to be reflected on your company's managed devices, depending on the app update settings. In some cases, device users may need to clear the cache of their device's launcher app before web app title updates are reflected in the launcher. - Re-deploy the app to your managed devices.
Update web app details
If web app details are updated in the managed Google Play store, you can update them in Miradore by doing the following:
- Navigate to Management > Applications and open the app's page.
- On the Main tab, select an application version.
- Select Actions > Update store versions.
- In the Update Managed Google Play store versions dialog, select Update, then select Close to exit the dialog.
- Deploy the updated web app version to your managed devices.
Remove a web app
Deleting a web app from the managed Google Play store does not remove the app from your managed devices, but removes it from Miradore. If the web app is removed from Miradore, it stays available in the managed Google Play store.
Remove a web app from the managed Google Play store
- Navigate to Management > Applications and select Add > Android application.
- Select Managed Google Play store, then select Next.
- On the left sidebar, select Web apps.
- Select the app you want to remove, then select Delete at the bottom of the Edit web app dialog.
- Confirm the removal by selecting DELETE.
Results: The web app is removed from the managed Google Play store but is still accessible to device users if it was installed on their devices. After deleting a web app from the managed Google Play store, it will eventually be removed from Miradore automatically.
Remove a web app from Miradore
- Navigate to Management > Applications and do one of the following:
- Select one or more applications by their checkboxes, then select Delete at the top of the page.
- Open an application's page and select Delete at the top of the page.
- Depending on where you initiated the deletion from, do one of the following:
- If you initiated deletion from the Management > Applications page, in the Delete wizard, select Delete, then Close.
- If you initiated deletion from the application's page, in the Delete application dialog, select Delete, then Close.
Results: The web app is deleted from Miradore, but still available in the managed Google Play store and on managed devices if it was deployed.
Remove a web app from a managed device
- Navigate to Management > Devices and open the page of the device from which you want to remove the web app by double-clicking it.
- Select the Deployments tab, then select the bin
 icon to the right of the web app.
- In the Remove application wizard, select Remove to confirm the removal.
- Select Close to exit the wizard.
 icon to the right of the web app.
Results: The web app is no longer available on the managed device.
Previous Article:
« Configure the OpenVPN app for Android
Next Article:
Application Block/Allowlisting for Android Samsung devices »