This article explains how you can enroll your Android device if it doesn't have a camera or support Google services. See general Enrollment instructions for Android users for devices supporting Google.
Google will no longer allow sign-in on Android devices that run Android 2.3.7 or lower starting September 27, 2021. Click here to read more from Google.
Alternative installation methods
Installing Miradore Client from APK article describing how to install Miradore using the Android Package with the file extension apk.
Enrolling non-Google Android to Miradore with ADB
Requirements:
- The android device being enrolled must be connected to a PC with a USB cable.
- Commands listed below can be scripted to automate and speed up the process.
- It may be possible to connect multiple devices to one PC with a USB hub. In this case, a script is needed to target the commands to each of the connected devices.
- Devices running AOSP (Android Open Source Project) (or similar non-Google Android) are not registering to Google Firebase Messaging, which is used to deliver push notifications to devices. This means an action executed in the Miradore console will not be delivered to the device immediately, the device will receive it when the Miradore client polls for the next time. By default, the Miradore client polls the server every 3 hours, but this interval can be modified. The minimum setting is 15 minutes.
Preparations:
-
- Download ADB (Android Debug Bridge)
- Media: https://developer.android.com/studio/releases/platform-tools.html (decompress to some folder on your PC)
- Instructions: https://developer.android.com/studio/command-line/adb
2. Download the Miradore client installer (also known as APK) and configuration file from your Miradore site’s ”System > Infrastructure diagram” -view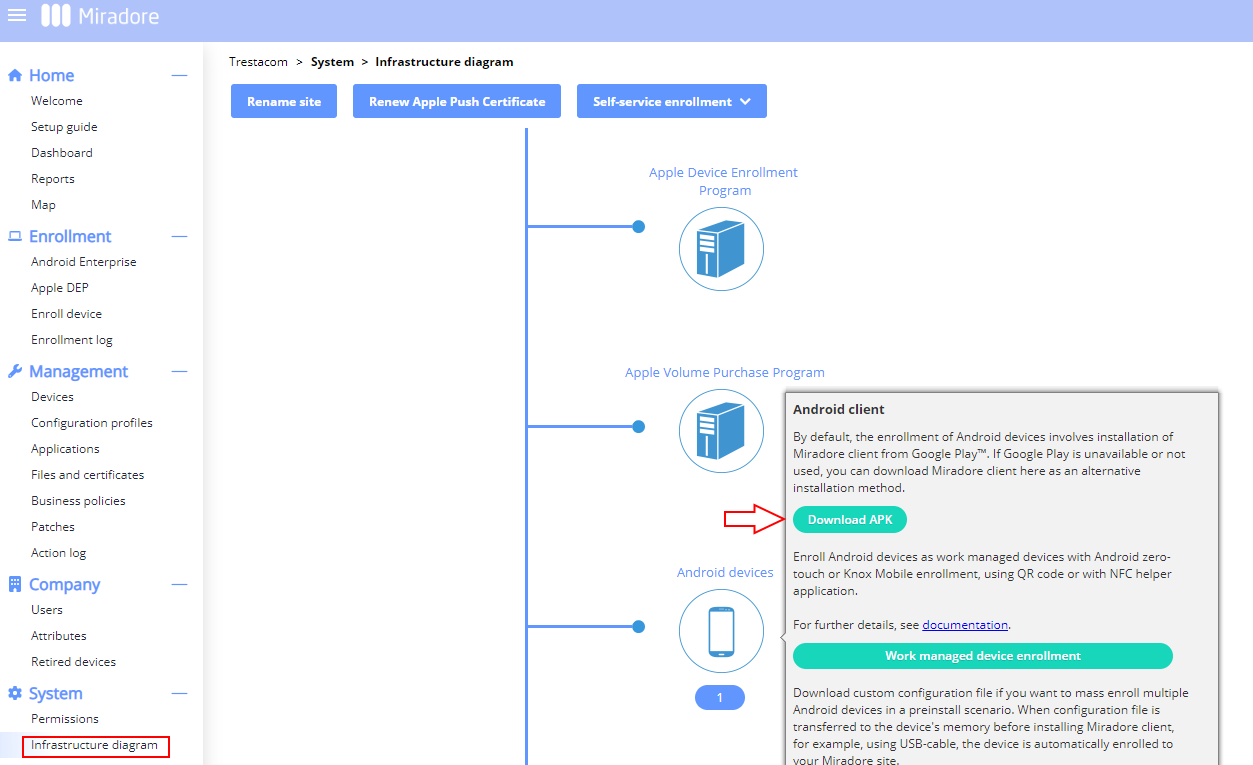
- Search “Android devices” from the infrastructure diagram and hold your mouse on top of the icon to open the tooltip shown below:
3. Click ”Download APK” to get the client media (file: mdonline_b360.apk, number follows the client version)
4. Click ”Download custom configuration file” to download the configuration file appsettings.mdcfg
5. Copy these files to your PC’s disk for later use
Enrolling the device to Miradore:
On the device end:
- Start the device
- Reset the device if needed
- Connect the device to the WiFi
Settings > Wi-Fi
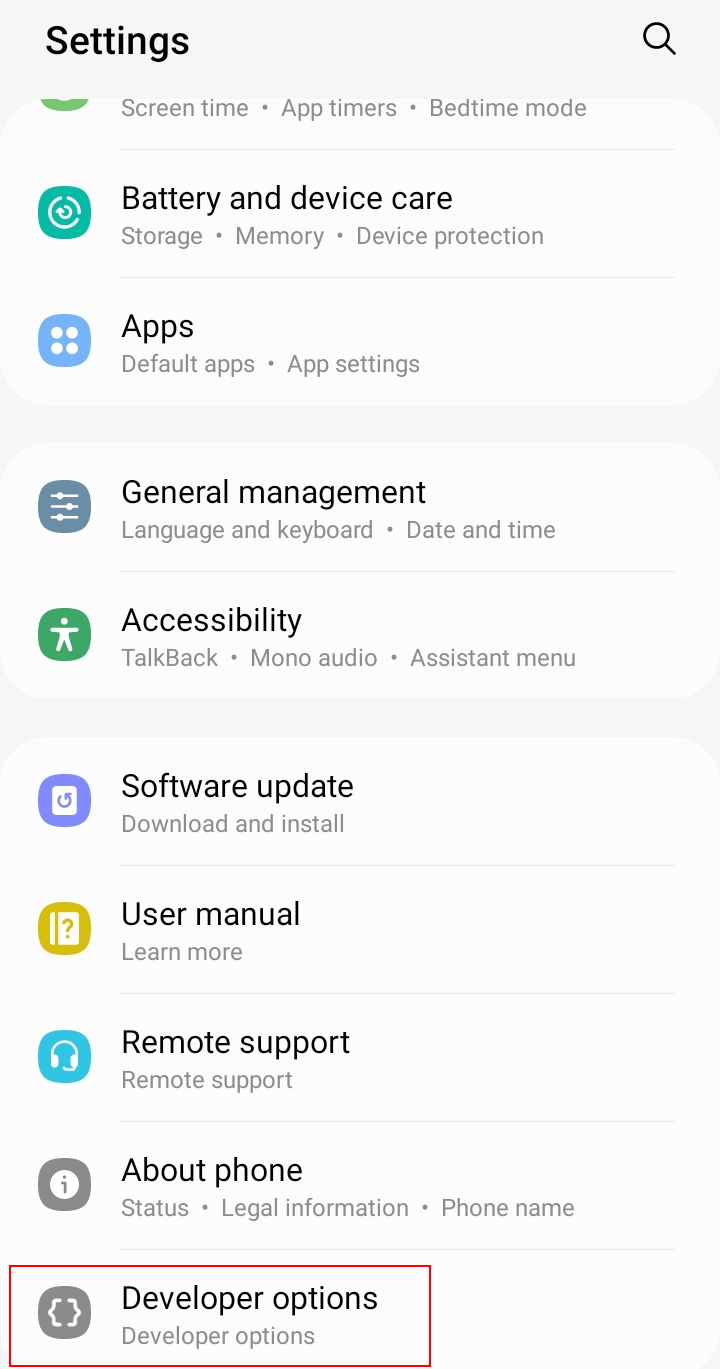
- Activate “Developer options” from “Settings > About phone > Software information” by tapping “Build number” for many times until a notification appears on the screen saying that developer mode is being turned on. This would also make Developer options to appear under Settings as seen below.

- Connect the device to your PC with a USB cable. Worth noting that the cable should be connected directly to the computer and not via a hub for example for it to function properly.
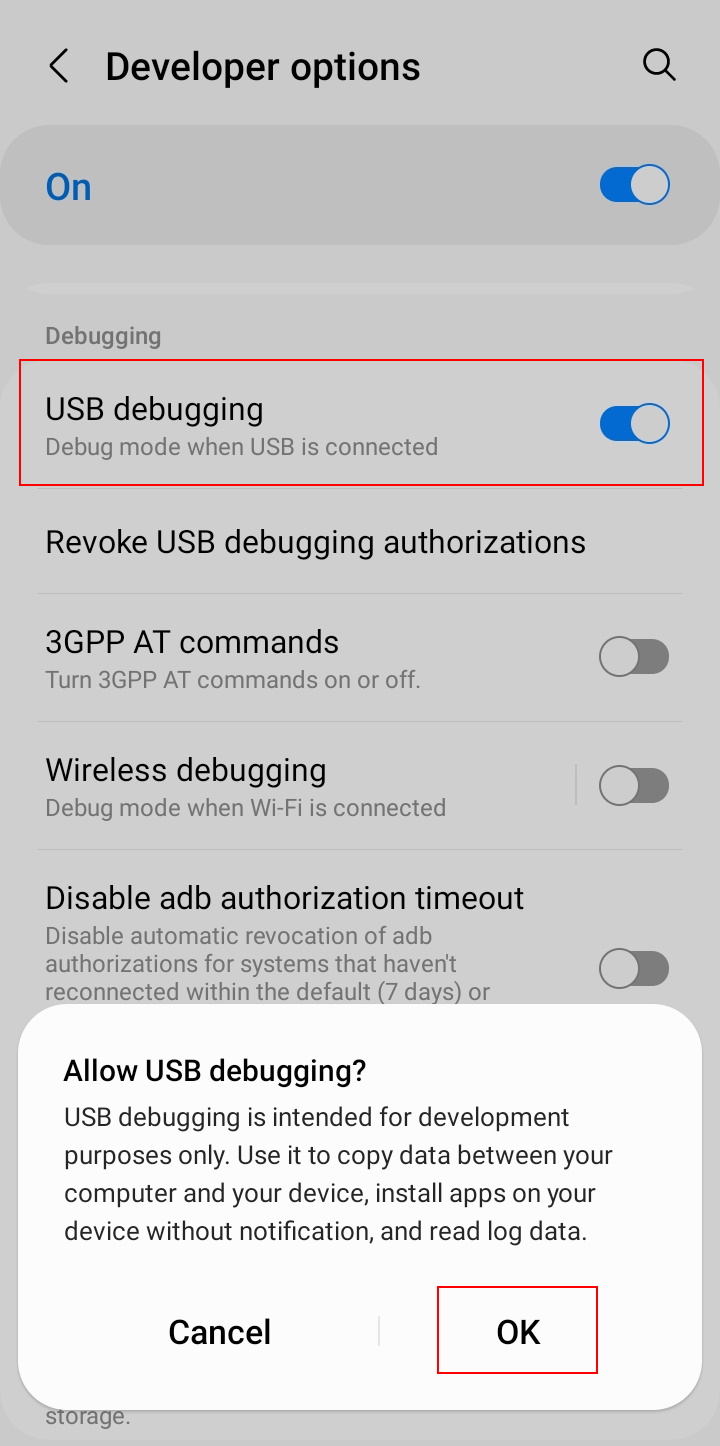
- Enable ”USB debugging” from the device “Settings > Developer options > USB debugging” and allow the action as seen below.

On your PC:
- Open command prompt (Run > cmd)
- Navigate to the folder where ADB was uncompressed in step 1.a. (there should be a file called adb.exe)
- Run the following command
ADB devices
The command prompt should print something similar to the following:
List of devices attached
* daemon not running; starting now at tcp:5037
* daemon started successfully
<serial number> unauthorized
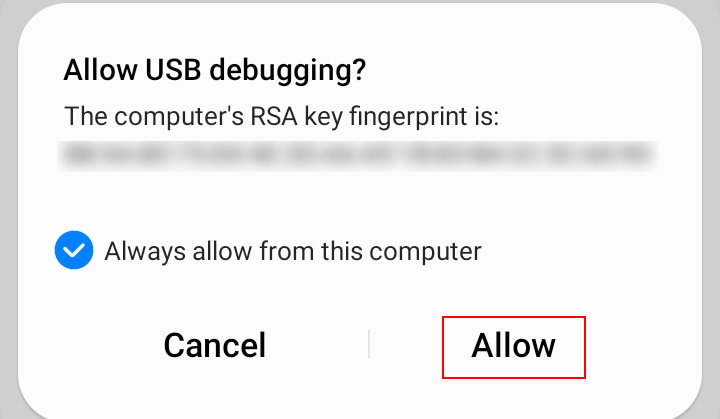
- The device will now ask for permissions for connection ”Allow USB debugging?”
- Select ”Always allow from this computer” and respond ”OK” as seen below

- Run again following command:
ADB devices
The command prompt should print something similar to the following:
List of devices attached
<serial number> device
The device is now connected to your PC.
- Copy the Miradore client’s configuration file to the device with the following command:adb push "<path to file>\appsettings.mdcfg" /sdcard/appsettings.mdcfg where <path to file> points to the folder where you copied the file in step 2.b. This could be for example the default Download folder found under the user-specific files. As a confirmation, you should see 1 pushed, and 0 skipped.
- Install the Miradore client by running the following command:adb install "<path to file>\mdonline_b360.apk" where <path to file> points to the folder where you copied the file in step 2.b. Make sure that the file name corresponds to the one you downloaded. Please note that mdonline_b360.apk is referring to the most recent version of the file and the filename might be different when you're installing the client and the command should be amended accordingly.
You should now see the following text:
Performing Streamed Install
Success - Elevate the Miradore client as device owner by running the following command:
adb shell dpm set-device-owner com.miradore.client.v2/com.miradore.client.admin.AdminReceiver
You should see the following text:
Success: Device owner set to package com.miradore.client.v2/com.miradore.client.admin.AdminReceiver
Active admin set to component com.miradore.client.v2/com.miradore.client.admin.AdminReceiver
- Check the client status by running the following command:adb shell dumpsys device_policy
- Start the Miradore client application which should make a connection to Miradore. If needed click ”SYNC NOW” from the client application. The target is that the name of your site is visible on the client application and that the ”Last connection” states successfully.
On the Miradore site:
Open view ”Mobile management > Enrollment log” and you should see the device at the top of the list
- Open the device by double-clicking and setting the end user information under the “Settings” tab. You can set also other configurations like tags and warranty information.
Specific manufacturers
Huawei
On May 16, 2019, the US government placed Huawei on its Entity List. This government action prohibits all US companies, including Google, from collaborating with Huawei. (click here to read more information from a Google employee). The latest flagship to still include Google services was Huawei P30 Pro. Devices released after that are most likely no longer supporting Google.
For further Huawei-related questions not relating to Miradore please contact Huawei support directly.
Samsung
For Samsung devices, you can use Samsung Knox Mobile Enrollment.
For further Samsung-related questions not relating to Miradore please contact Samsung support (for example US / Finland).
Device compatibility
To find out if your device is compatible with Google Play check out the Google Play supported devices help page or the list of supported Android devices directly.
Troubleshooting
USB cable
When connecting the device to your PC with a USB cable make sure that the cable is connected directly to the computer and not via a hub for example for it to function properly.
Have feedback on this article? Please share it with us!
Previous Article:
« Enrolling company-owned devices (COPE) as Fully managed with work profile
Next Article:
Samsung Knox Mobile Enrollment »