In this article, we explain how you can remotely configure Google Chrome for Android devices using managed app configurations.
The instructions cover the deployment of the app, configuration of the browser home page, bookmarks, and also how to allow or block access to certain websites.
At the end of the article, we demonstrate how you run the Chrome browser in kiosk mode which prevents users' access to the rest of the device.
Requirements
- Miradore Premium Plan or active trial.
- You will need to have Administrator or Editor rights on the Miradore site.
- Managed Google Play Enterprise must be enabled and configured on the Miradore site.
- The app configs are applicable to Fully Managed Android Enterprise devices and Android devices with a Work Profile.
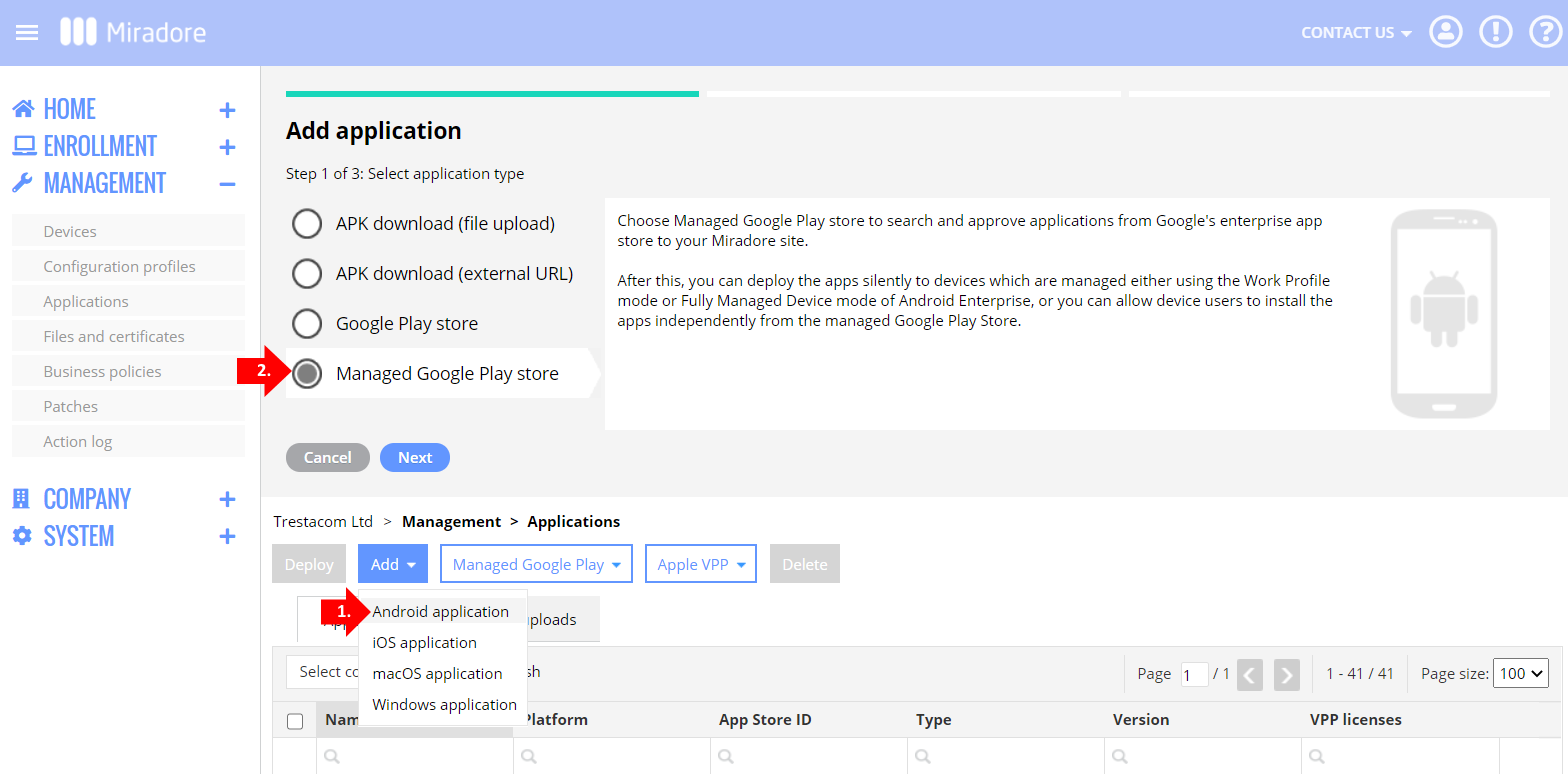
Add Chrome to Miradore as a managed app
On the Applications page, click Add > Android application > Managed Google Play store.
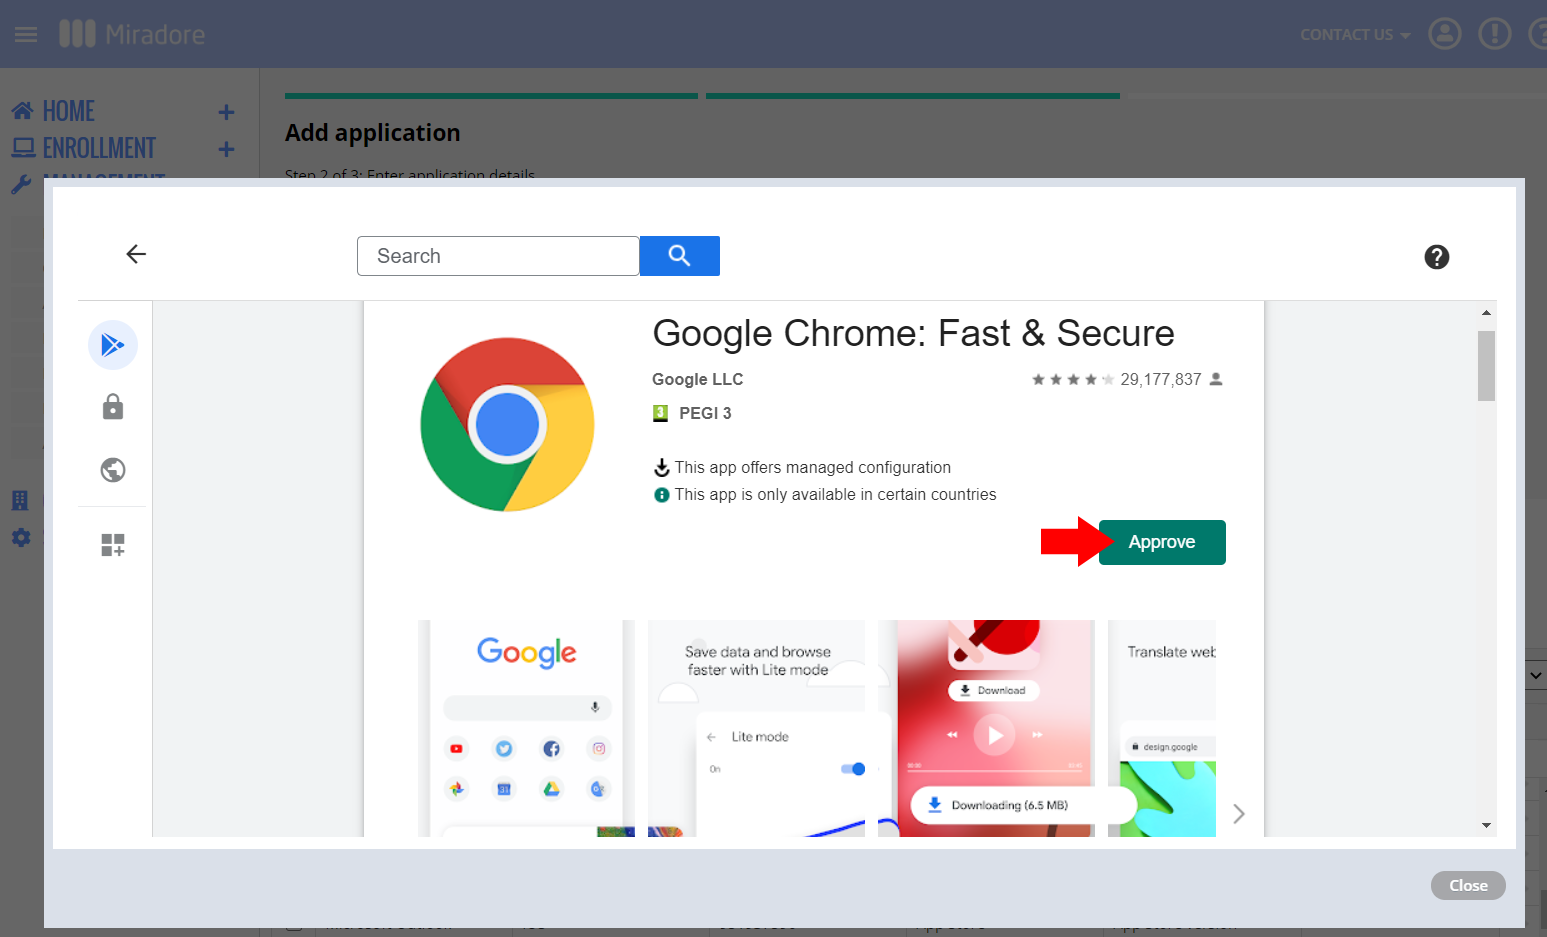
Search for Google Chrome and approve it for your organization. After approving the app, you can configure and deploy it using Miradore.
Define managed configurations for the Chrome app
You can specify the managed app configs for Chrome on the Configurations tab of the application page.
Click Add configuration and enter a name for the managed app configuration.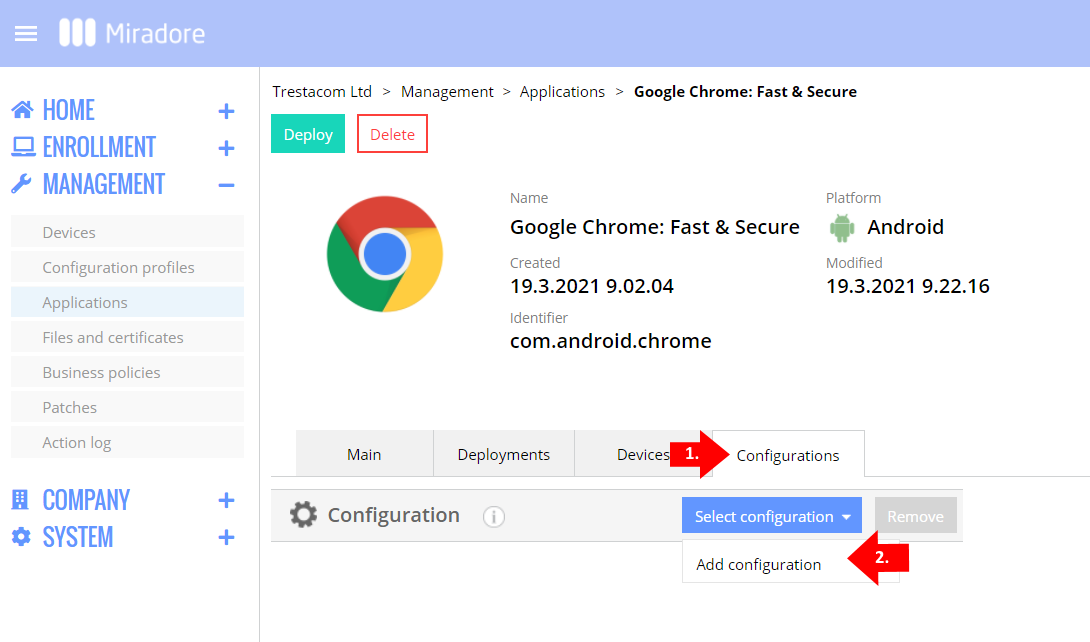
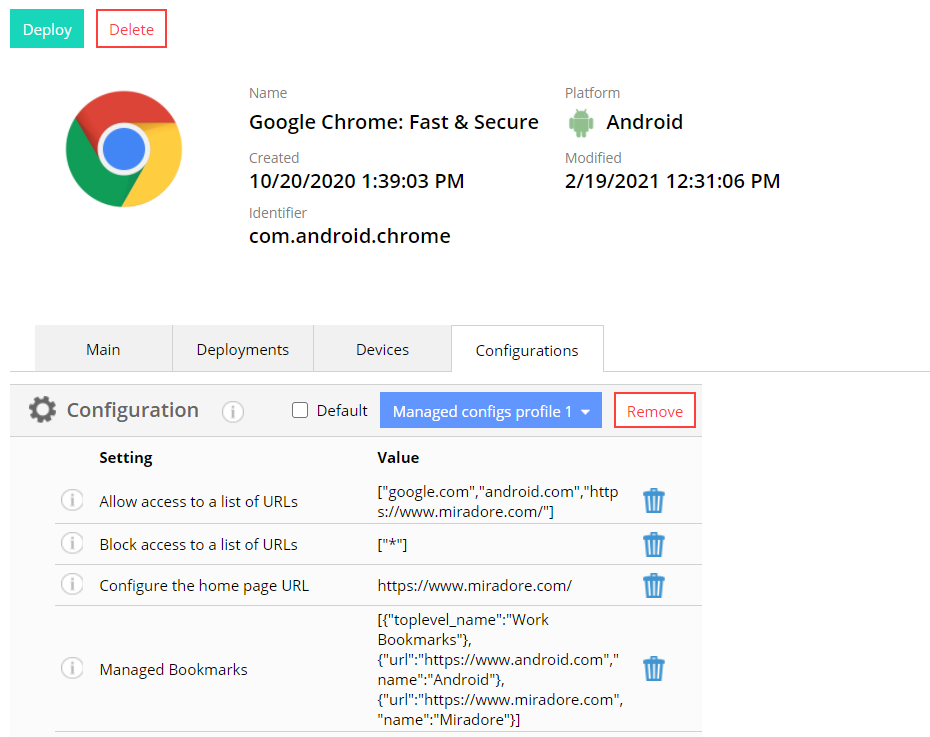
All supported app configuration keys are listed on the configuration page. Use the blue + button to add the needed configuration keys and specify their values according to the Chrome Enterprise policy list. You can also check field tooltips for help.
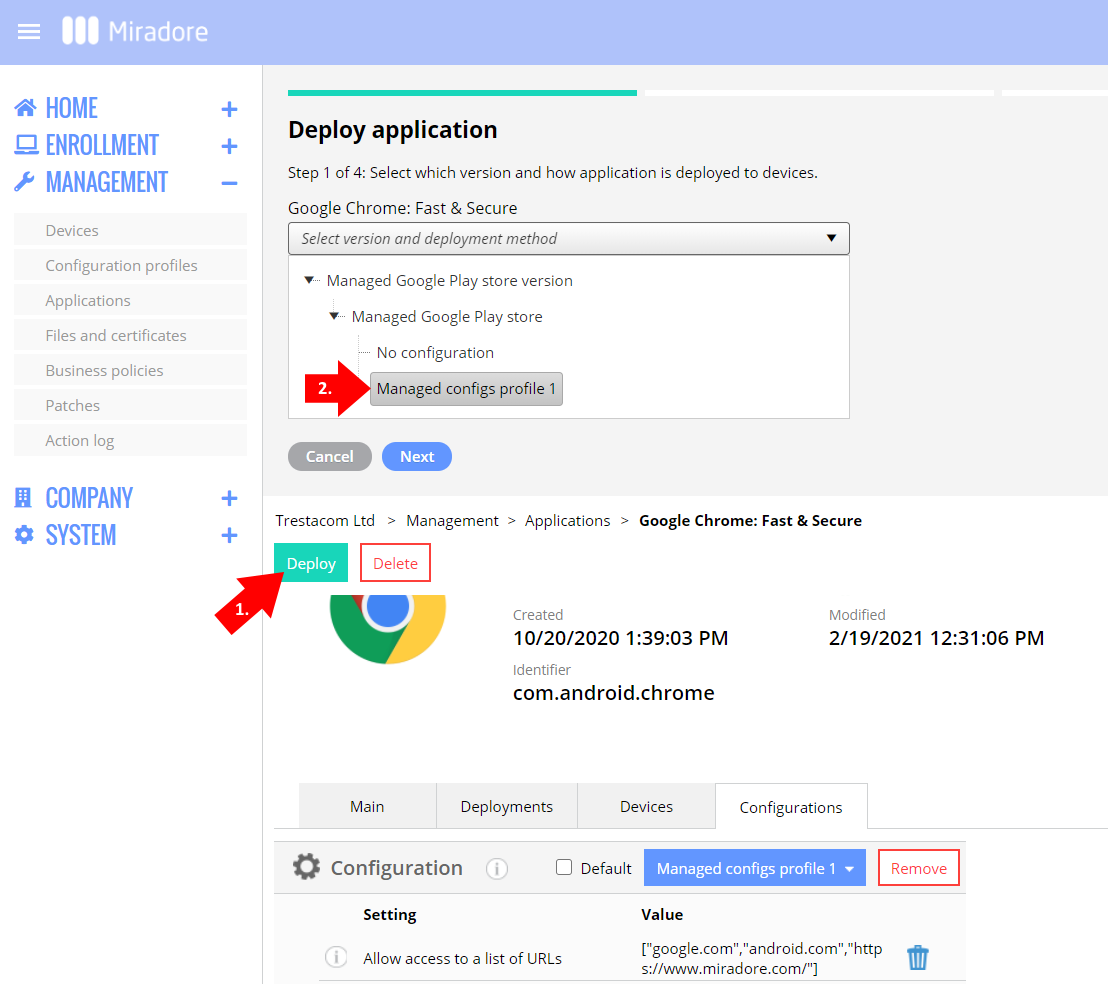
In the below picture, you can see an example of configuring some of the most common settings for Google Chrome.
As you can see, the example configuration blocks access to all websites except "google.com", "android.com" and "https://www.miradore.com". Then, Configure the home page URL ets the Miradore website as the home page for the browser. And lastly, Managed Bookmarks setting creates a bookmark folder that contains bookmarked links to Android's and Miradore's websites.
Please note that you can add multiple managed configurations if you want to distribute different browser settings for different users.
Deploy Chrome with the managed configurations
After you have defined the managed app configs, you can deploy the app either manually or automatically.
The easiest way to install Chrome with managed app configs is to use the Deploy wizard on the application page. In the deployment wizard, you can choose the devices where the application will be installed and which managed configuration will be used to configure the Chrome browser.
If you want to automate the deployment of the managed Chrome, you can attach the application with the managed app configuration to a business policy. The business policy will then deploy Chrome with the selected configuration to all devices that are within the scope of the business policy.
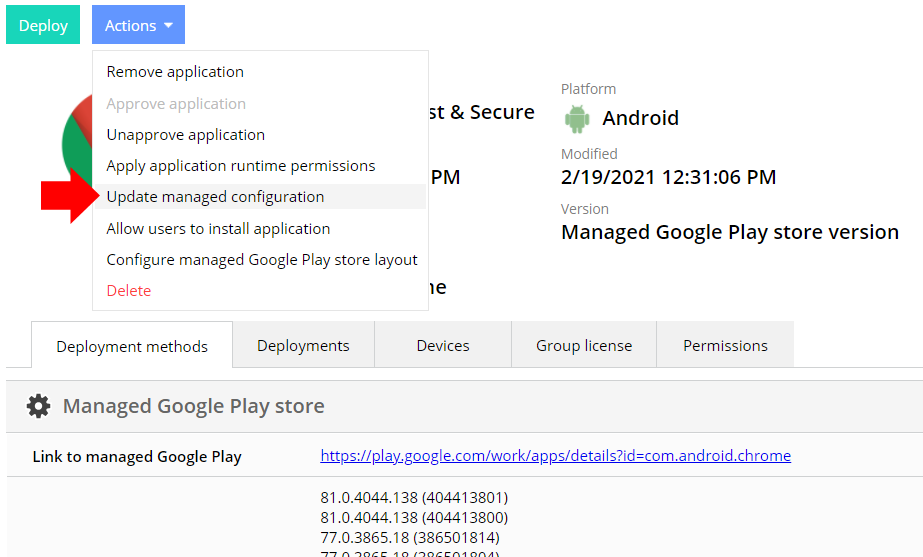
What if I want to modify or change the deployed app configuration?
You can use the Actions > Update managed configuration button to deploy another (or modified) app configuration to devices. This action is very useful especially when testing the managed app configuration. You can find this task from the managed Google Play store version page of the application.
How to set up the Chrome browser in kiosk mode on Android?
Fully Managed Android 9.0 and newer devices can be locked down into a single-app kiosk mode with Miradore.
Before enabling the kiosk mode, make sure that you have deployed Chrome with the correct configurations to the device as explained above.
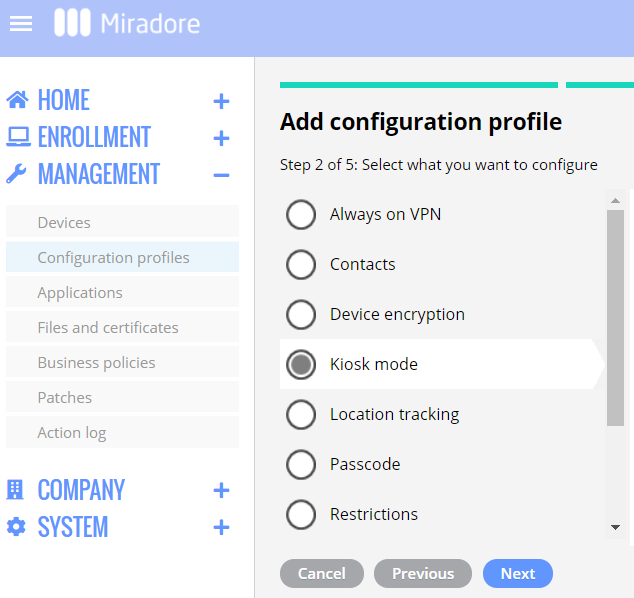
You can lock down an Android device into a kiosk mode by creating a Kiosk mode configuration profile (see the picture below).
When asked for a kiosk mode application, enter Chrome's package name com.android.chrome.
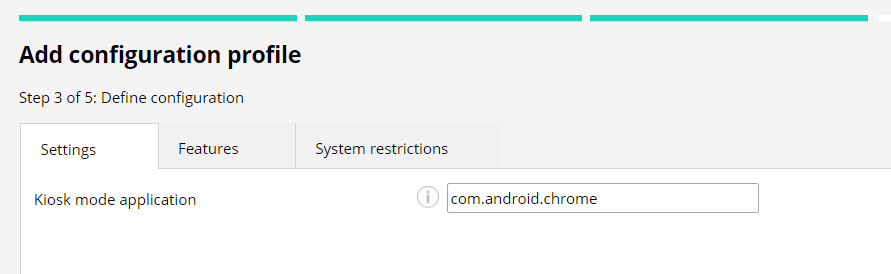
On the Features and System restrictions tabs, you can define which device features the users can access.
After you've created the profile, you can put devices in kiosk mode simply by distributing the configuration profile.
Troubleshooting
Known issues and possible solutions.
I cannot see the Chrome app on my device
Chrome is one of the Android system apps. Sometimes Chrome does not show up on your device, because your device has been enrolled in Miradore without the system apps. It is also possible that your administrator has blocked the use of Chrome on your device with a configuration profile. In either case, the Miradore site administrator can create a configuration profile to allow the use of Chrome on the device. See Managing Android system applications with black and whitelists.
I can't clear deployed configurations from the device
Sometimes the re-deployment of Chrome using the "no configuration" option can get stuck "in progress". Therefore, it can be difficult to clear the previously deployed configurations from the devices. In a scenario like this, you can consider uninstalling Chrome with Miradore's Remove application option. After that, you can reinstall Chrome without configurations.
App deployment stuck "in progress"
- Application deployment may sometimes get stuck if the application is already installed on the device. Many Android devices have the Chrome app preinstalled by default if you do not disable system apps during the device enrollment. In situations like this, the application deployment is not always able to convert the existing application into a managed application. You can try to re-enroll the device without the system apps or consider blacklisting Chrome and using another browser app. There is also a beta version of Chrome in the managed Google Play store, which too can be installed and configured remotely using Miradore.
- If you have the device at hand, you can also try to update the Play store app and install the possibly missing Android System webview updates.
- If the device was enrolled in Miradore using the QR code mass enrollment, ensure that a user has been assigned for the device.
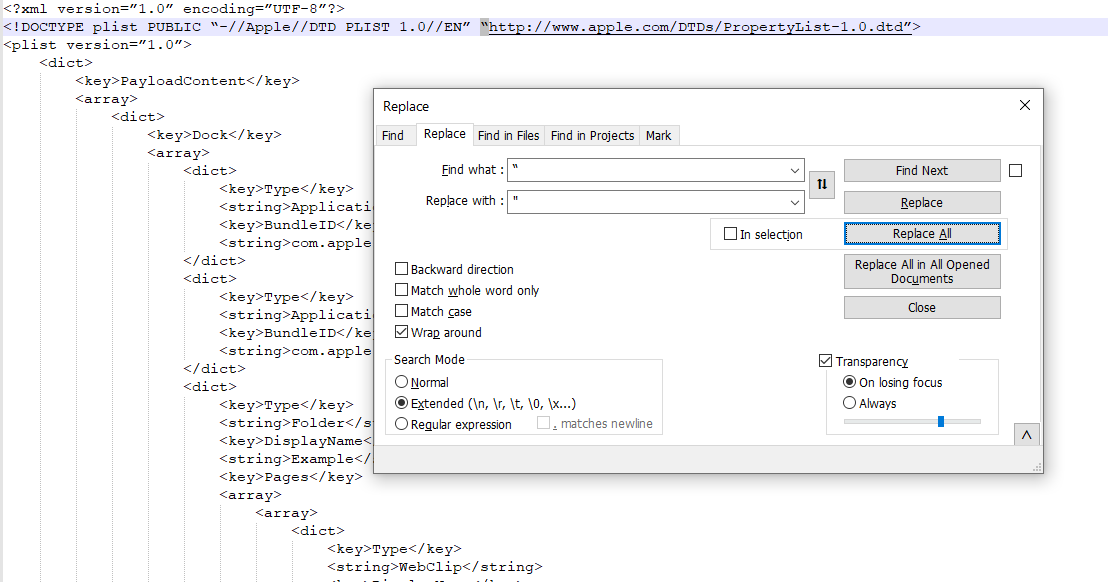
- If the syntax doesn't work please double-check that the quotation marks are of the correct type. If required you can find and replace them using Notepad. See the example below.
Have feedback on this article? Please share it with us!
Previous Article:
« Managed configurations for Android apps
Next Article:
Configuring Exchange for Outlook on Android »