This article will guide you on how to install Miradore Client from Android APK. It is suggested for you install Miradore only through the APK file when necessary otherwise please see Android device management for other installation options.
When to install Miradore Client from APK?
Installing from APK becomes necessary when a device does not have a Google Play store or credentials to access the store.
Installing the application
If you wish to install Miradore Client from Android APK you can do so by downloading the file using the following link:
https://online.miradore.com/mdonline.apk
When installing using the APK file Unknown Sources must be enabled, the client needs to be installed manually after download and credentials need to be re-entered to the client after installation (they are already validated once in a browser before the download link is shown on the enrollment page). Please note that installing apps from unknown sources may put your phone and data and risk and should only be allowed when required and you trust the source.
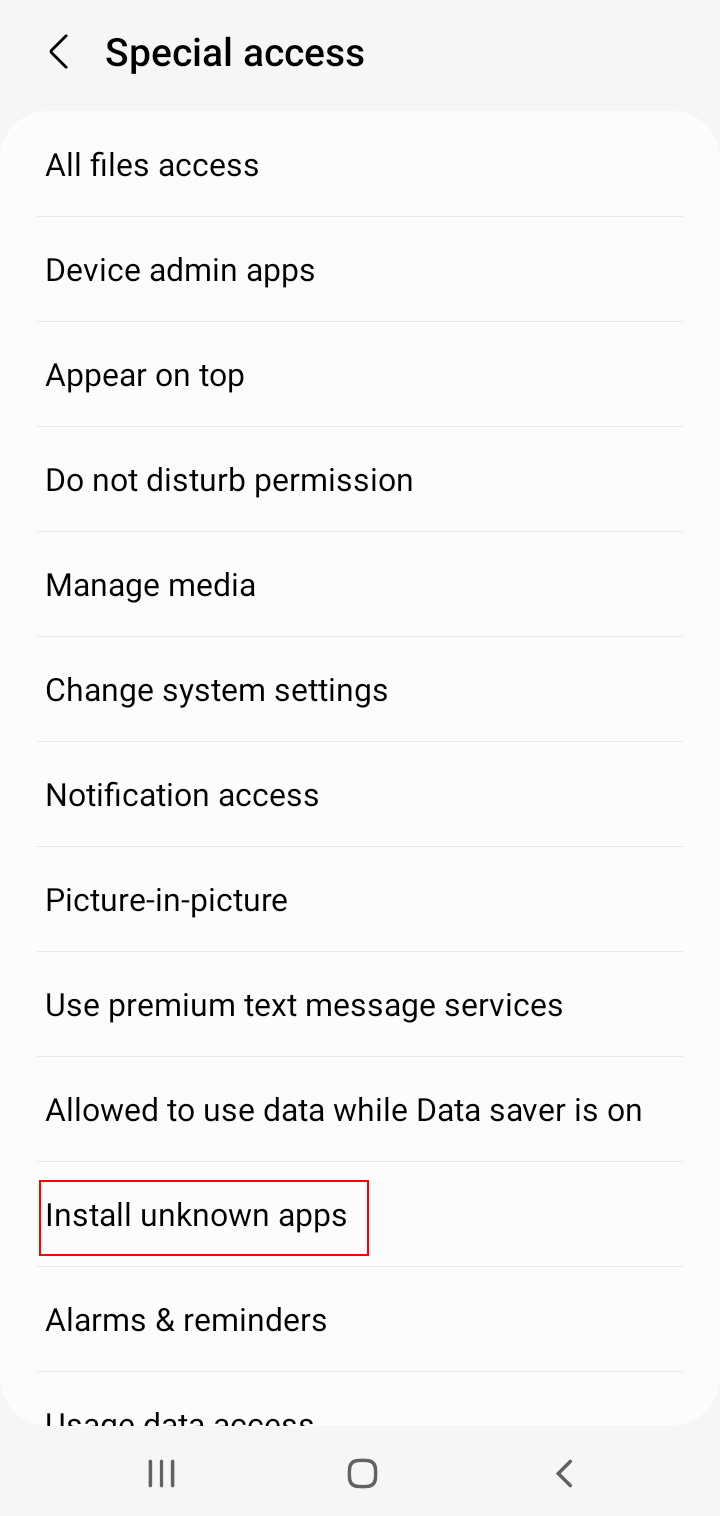
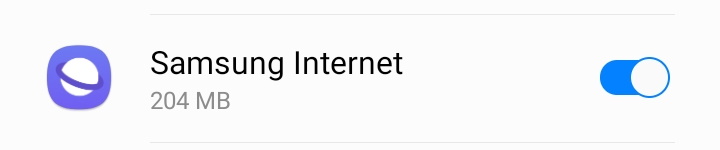
For example on Samsung devices, you can access the required settings by going to Settings > Apps > Special access (found from the right corner underneath the menu icon) > Install unknown apps and switch the Samsung Internet on (to the right) as seen below.
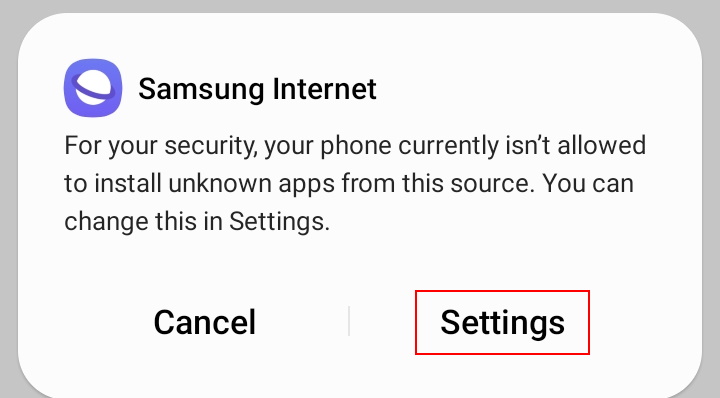
If you haven't done so you will be prompted to do so by turning it on by selecting Settings as seen in the following pop-up.
Make sure you are not using the Play Store how to keep the client up-to-date.
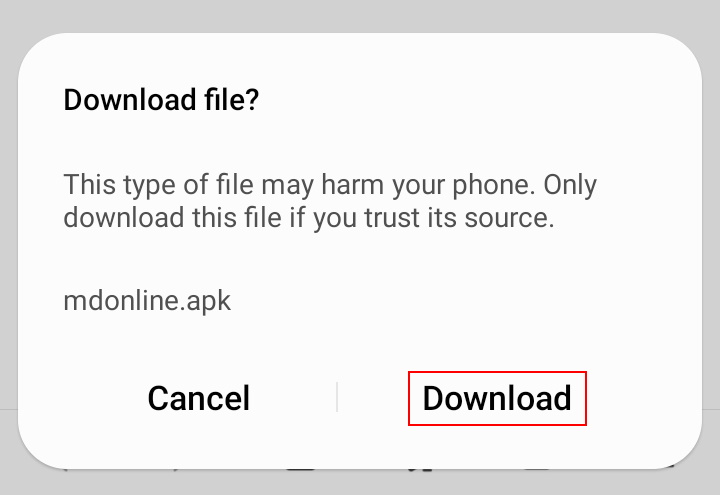
A box will appear on the bottom of the screen where your permission to download a file is being asked. Select Download to download Miradore client.
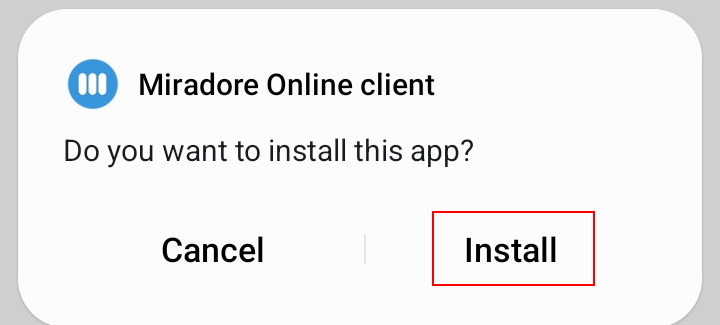
Once you have completed the download and run the file a pop-up will appear asking you if you wish to install the app. Choose Install as seen in the screen capture below.
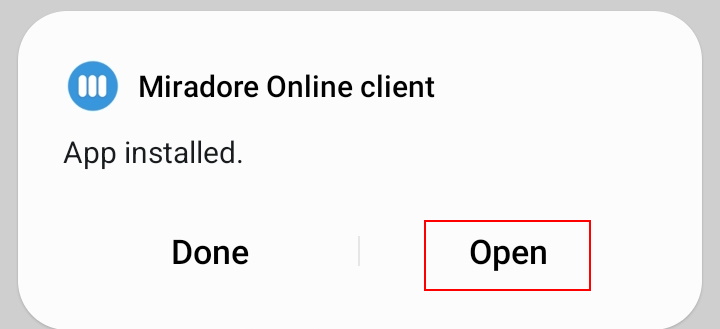
Once Miradore has been installed select Open.
You will then see the privacy policy and data collection regarding Miradore once you've read them tick the checkbox I agree to Miradore privacy policy and data collection at the bottom and you will then be able to press continue.
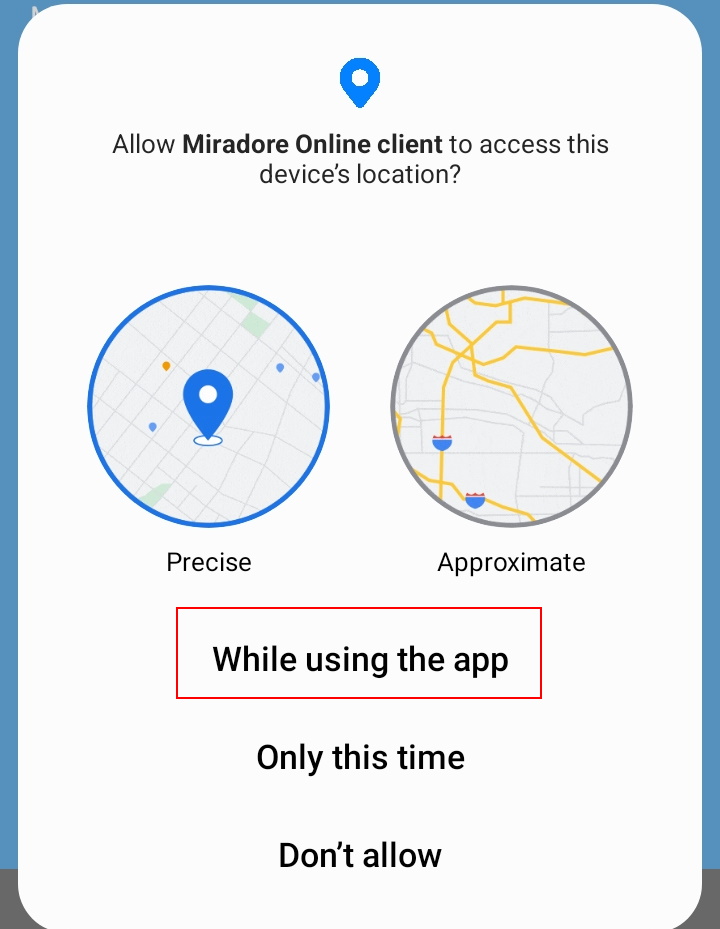
Miradore collects location data to enable to be able to track the location of your device. This will be explained in detail and once you've agreed with the content press continue. You will then be asked to give the client access to the device's location. You can choose between either precise or approximate. Precise being the default open. Once you've made the selection select While using the app from the options below.
Another similar view will then appear with further options: Allow all the time, Allow only while using the app, Ask every time and Don't allow. The most convenient way would be to select the first option. Also, there is a switch where you can determine whether to give the client Use precise location. If you turn this off the app can access only your approximate location. In case you wish for more information you can press the blue See all Miradore Online client permissions text.
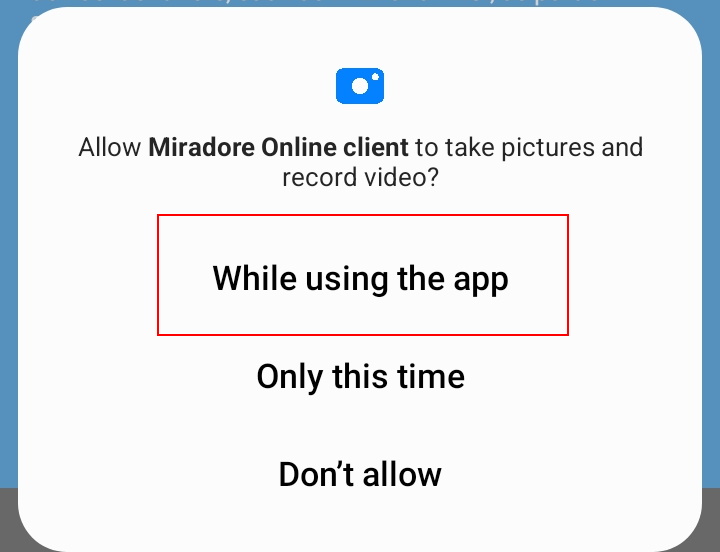
The next step is to allow Miradore to take pictures and record videos. Select While using the app from the options.
You will then be asked for access to your contacts. Select Allow.
The second permission is to allow Miradore to make and manage phone calls. Select Allow.
The third and final step here is a request to access photos and media on your device. Select Allow.
Enrolling the device
The next step is enrolling the device and if you have not already done so you can see it can be done through the Company > Users page by using the action Enrollment > Create enrollment credentials as seen in the screen capture below.
For the step-by-step guide please see the Creating enrollment credentials for the user article.

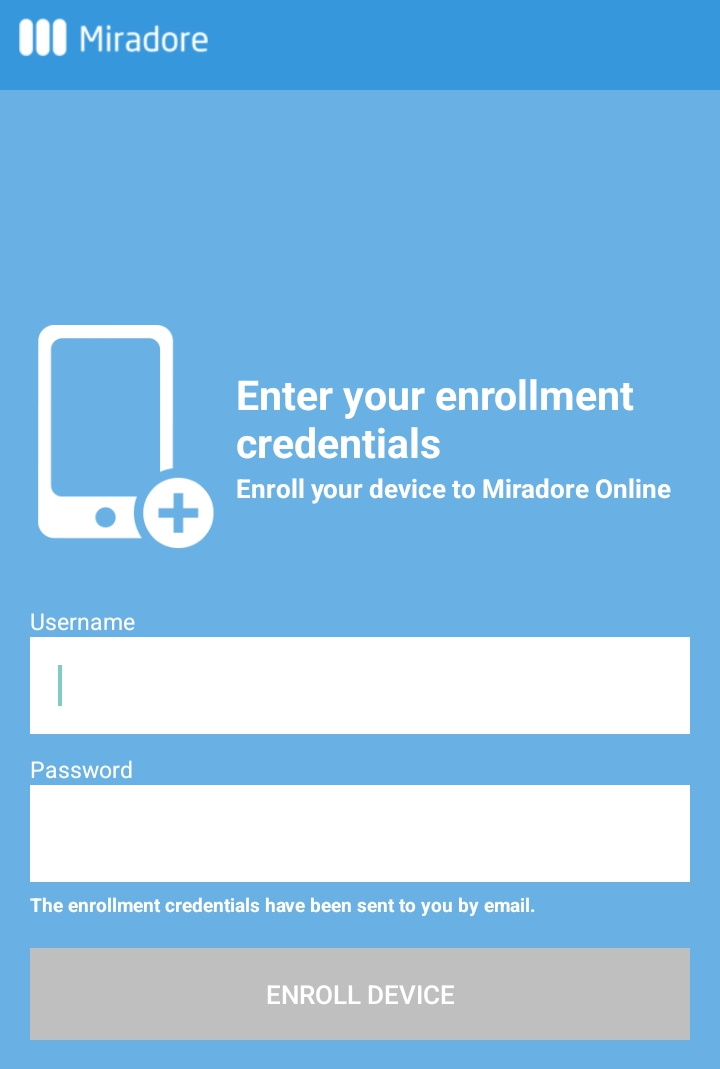
You are then asked to enter your enrollment credentials to Miradore as seen below. Enter your details and then you can proceed by pressing enroll device.
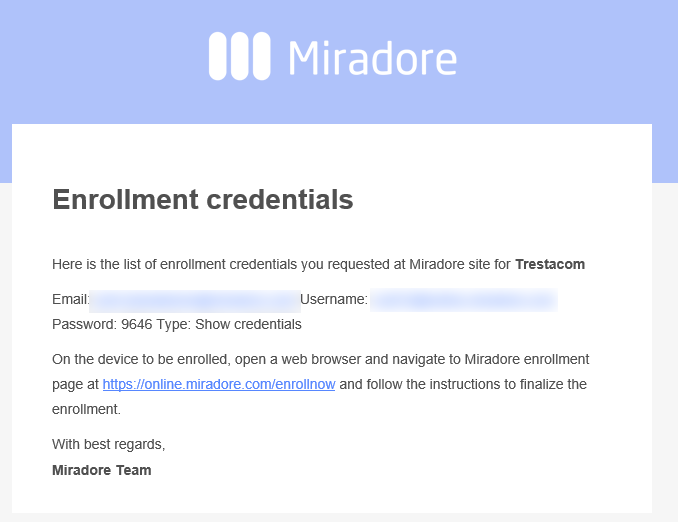
Below you can see what the e-mail looks like regarding your enrollment credentials. In this example, Trestacom is the name of the company. The email and username are blurred and the four-digit password (example 9646) is shown underneath these details.
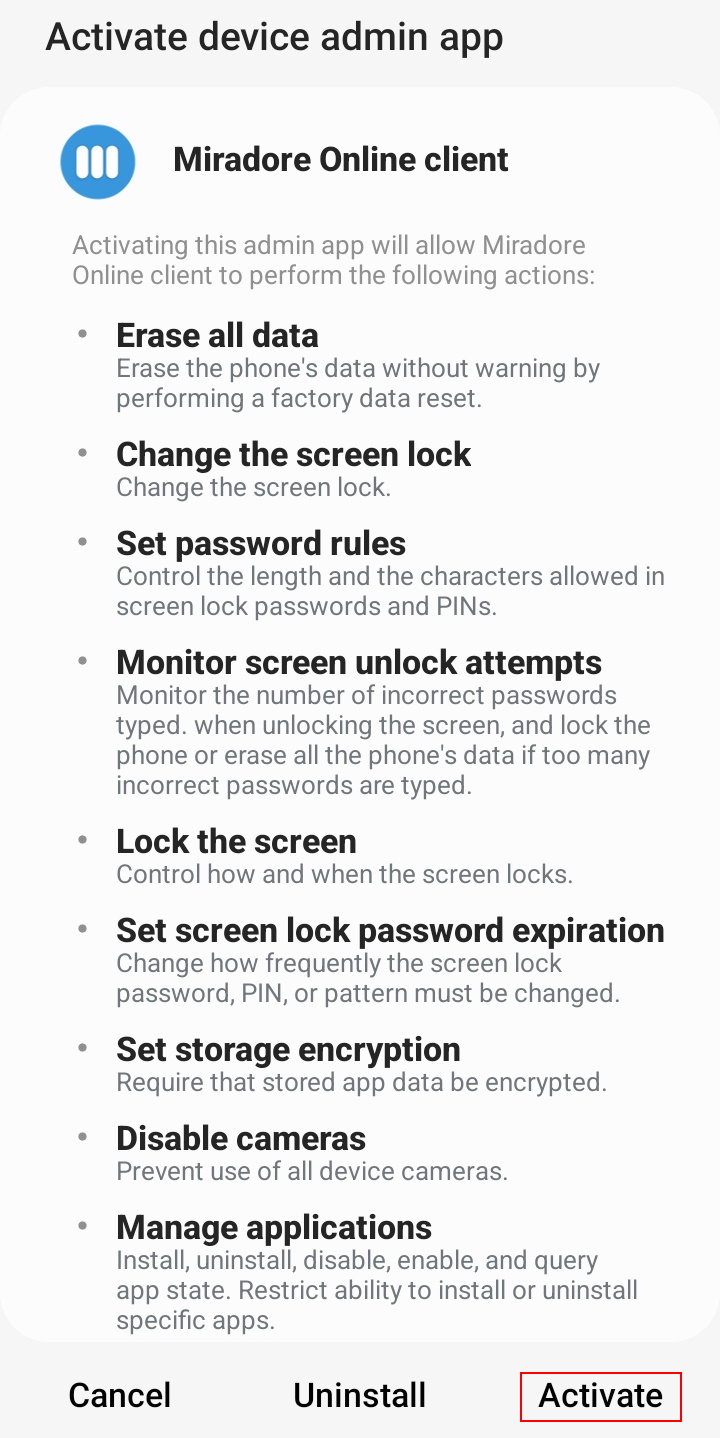
You will then be asked to active the device admin app. Please select Activate.
If you are a Samsung user you are then after asked to activate Knox license and you can do so by simply selecting Continue. In case you wish to check the Samsung Knox Privacy Policy you can do so by clicking the blue text.
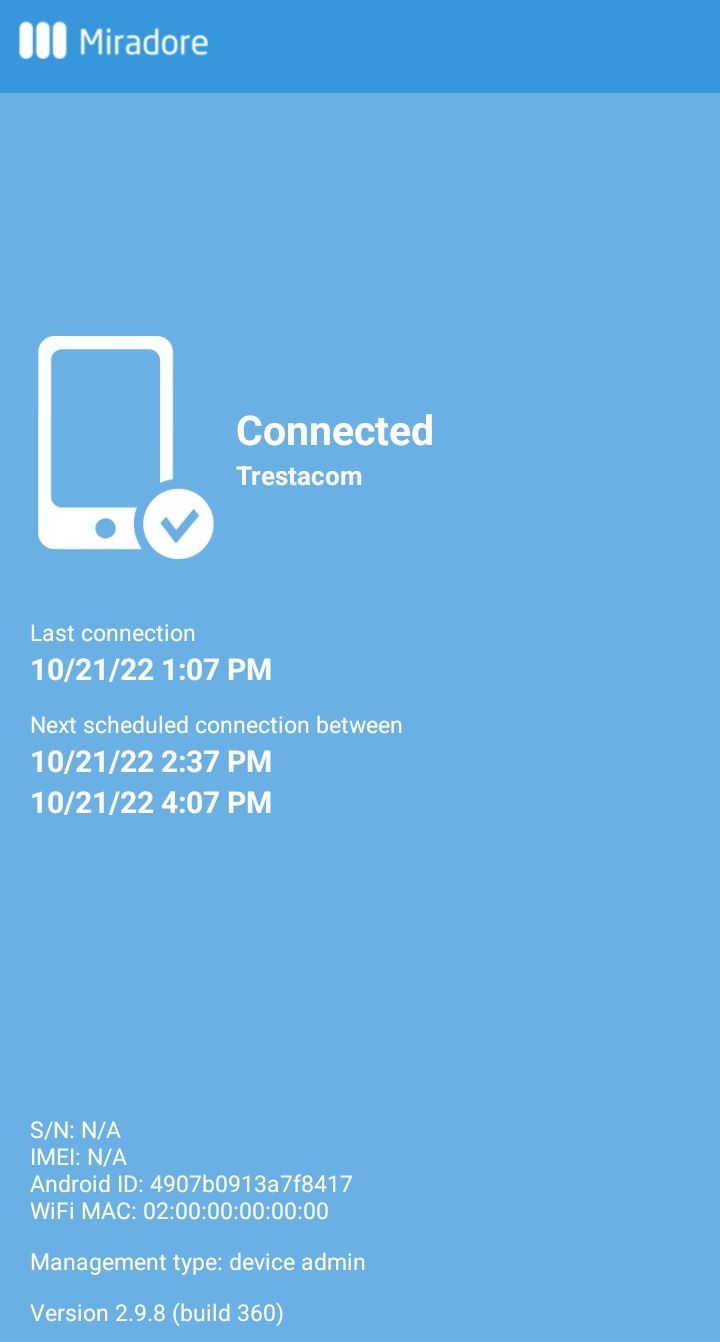
Congratulations you should now be successfully connected to Miradore as seen below.
Have feedback on this article? Please share it with us!
Previous Article:
« Self-service enrollment